• Portfolio
  • The Ritual // BuJo
  • Workshops
  • ITP Blog
  • Idea Compost
  • Resume
  • Bio/Contact

J. August Luhrs

  • Portfolio
  • The Ritual // BuJo
  • Workshops
  • ITP Blog
  • Idea Compost
  • Resume
  • Bio/Contact

Intro to Fab: "Male Gaze (2018)" -- Motor Mounting

Alas, the time has come for the final fabrication assignment, one that beautifully encapsulated my experience making stuff for this class — agonizing over ideas, sourcing of janky materials, pivoting mid-way through, and both finishing and not finishing. It’s been a blast.

For this week’s assignment, to mount a motor onto something and to mount something onto that motor, I was conflicted on what to do. It’s finals, I don’t have a lot of time, I can’t order a ton of stuff with all the holiday madness — should I aim low to ensure completion, or should I take a risk and (probably) not finish… I was debating between two ideas.

I LOVED the inspiration link to Zimoun, an artist I had never heard of but now count among my favorites. Immediately after last class I watched this video and felt the ripple of influence across my life in 4 dimensions:

I’m a huge fan of art that takes a really simple, small component and uses 1,000 of them to do something really interesting. I can definitely see myself doing something similar in the future — mass quantity and huge footprints are attributes I appreciate in installations. But alas, I only had 4 motors in my kit, and even with a cheap DC Motor kit on amazon (20 for 12 bucks??? wow!), what would I do and how would I have the time to make 100 of something? Yeah, yeah, I could go smaller, but having 4 of something, or even 10 of something, just doesn’t compare to 1000 of something. You think 20 or 100 is a lot, and then you step back and realize volume SUCKS and your massive project is barely anything. I’m not bitter.

So plan B: what did I have on hand that could make for a good motor companion? Well I have over 150 transparent dildos because of this project, so I figured that was a good as reason as any to try and do something motorized with them. So I thought, dildos on DC motors? DCildos? That seems simple enough. But upon a perfunctory test, I realized it would be a lot of hassle (and some purchased shaft couplers) just to get the shaft to couple (eyyy) and that still wouldn’t be very interesting. Four dildos spinning in place? *Yawn*

I’ve been kicking around a concept for over a year that I call “Male Gaze” which would be a room full of dildos on mini bleacher stands, all hooked up to motors that adjust their position based on motion tracking software detecting people in the room. There are possible other variations, some messier than others, but that’s the core concept.

For anyone reading this unfamiliar with the term “male gaze”, I was advised that you might appreciate a definition:


”In feminist theory, the male gaze is the act of depicting women and the world, in the visual arts and literature, from a masculine, heterosexual perspective that presents and represents women as sexual objects for the pleasure of the male viewer.” — The All-Knowing Wikipedia

So anyway, I thought, hmm, maybe one dildo is enough in this case, perhaps even better than four; I’ll get one of those pan/tilt servo things we saw in class, strap the dong on that bad boy, and use some sort of face tracker web cam thing to have the dildo always point to the person’s face (and I’ll even throw a googly eye on there). It would be a prototype of the bigger room, but still a complete entity in its own right. Now we’re cooking with gas. But wait, I have to order a pan/tilt servo thing…

Hence the dilemma:
Do I try and rush ship a PTST (Pan/Tilt Servo Thing) and only have a couple days to try out a brand new type of interaction with tech that I’ve never used before? Or do I just put the dicks on the DC motors and call it a day? Well I told myself to play it safe and not do the PTST & face tracking combo, and I had myself believing that for a whole half day! Pshh, like I would just put dildos on DC motors like some amateur. Unfortunately that half day was just long enough to push my shipping date back to Sunday, and then because of life, that got delayed until monday night. So I didn’t have the PTST in hand until Monday at like 8pm, but nevertheless, with the help of some caffeine, I hunkered down and began to make some magic:

THE PLAN:

Use a dildo attached to a Pan/Tilt Servo Motor to follow a user’s face based on face tracking software coming in through the camera on a raspberry pi.

View fullsize 1211180021.jpg

At first when planning the design, I planned on doing two dildos each with one eye. I was really intrigued by the example passed around class of the ping pong ball eyes controlled by one lever in the back — it would be great to do something like that since the eye movement was so realistic. But I was a bit hazy on how the motor would fit in with that, and the thought of adhering the dildos to a round surface with all the weight jutting out like that… no. So then I thought, well I could get two PTSTs and then they could each just get the same signal, but then imagining that movement led me to believe it wouldn’t be realistic eye movement. Which was good because I could only get one PTST shipped quick enough. I considered doing two dildos on one, but I was worried about weight and once I saw how insanely tiny the PTST was, I knew I had to stick with one. But I think it worked out for the best.

So upon some quick google searches, it seemed like the best plan of action would be to use OpenCV with Python on the Pi and control the servos with a prepackaged script from Pimoroni or some servoblaster library. There were a lot of PTST face tracker apps already out there, so I figured it would be a piece of cake to just drag and drop the files into my project. Hoo Boy… It’s never that easy. To go over all the issues I had between 8pm and midnight would take a whole other blog post, but they include me being a Linux N00b, the articles I was copying were Six Years OLD, and one of my servos being broken out of the box (I think). Suffice to say, I had a moment of reckoning at midnight where it felt like I had made negative progress, and I knew I wouldn’t have time the next day to figure anything out, I had to have this thing working by the time I went to bed or abandon all hope. So with one last ditch effort, I took a sharp detour, went back to the shameful safety of Windows, and found redemption:


PLAN B:

Use a dildo attached to a Pan/Tilt Servo Motor running off an arduino to follow a user’s face based on a p5 sketch running PoseNet coming in through the a webcam on my laptop.

I don’t know why I don’t just start with Tom Igoe’s code everytime I do a project. It’s sure as hell where I always end up. After finding the gold mine that is (surprise surprise) the ITP PComp online tutorials, I knew I could get something to work. The above video was my final test at 430am.

I had to change a lot of my intended designs with this shift, and because the top servo was giving me hell, I limited the motion to one axis (horizontal). I was a bit nervous using poseNet for the first time, but after messing around with the default example, knew it would be super easy to implement if I just ignored everything but the nose object, and used that to dictate where the servo should point. The biggest hassle was figuring out how to get the right info sent from p5 to the arduino over serial. I’ve done a few projects with serial but I feel like every time I do, I have to completely relearn the core concepts of binary and ASCII text and all that fun jazz. Luckily I found a forum post that helped me get the arduino to filter the incoming string messages and only send them to the appropriate servo (since I was sending X data to the bottom servo and Y data to the top servo, or so I hoped). Then it was just tweaking the mapped values and having to reset the serial server over and over. But it did the thing! And it was good.

Then I had to go back to the drawing board for what the actual mounting would be. I had first envisioned a box with the PTST mounted on top, the pi camera peeking out of a secret hole in the front, and a neck tie draped over the front for fun effect. The box would feature totally self-contained tech/hardware, with just a power cable coming out, but now that the laptop was here to stay I had to figure out what to do. I also figured I might need to go get more screws because the PTST obviously didn’t come with any, and I only had two SUPER TINY screws. When I got up in the morning — EXHAUSTED — to go find a box at the container store (no more shoe boxes for this boy!), I threw the necktie onto my desk and realized… Hey, I don’t need a box. I’ll just mount the PTST directly to the triangle knot of the tie, and ditch the box since I don’t have a whole lot of hardware I can fit in there anyway. Plus, I can sew the motor onto the tie through the screw holes, and not have to go buy screws or a box! Hooray! As the Dan Shiffman of Painting would say, “a happy accident”.

View fullsize 1211181224a.jpg

Working on the floor was a lot of fun. I generally don’t do a lot of my microcontroller based work there just because I keep all my hardware stuff at home (I can’t fit it in my locker/toolbox/shopbin…). But circumstances necessitated it, and I was happy to place my dildo center stage in the lounge. Got a lot of fun looks and conversations out of it, including a visit from the man behind my curtain himself, Dan Oved! It was an honor to have him see my application of poseNet. When I got to sewing, my friend Idit showed up like the fairy godmother of fashion design and textiles and offered some sage wisdom (and helped thread my needle once).

I grabbed some scrap wood from my bin because I knew the tie wouldn’t be able to hold up the rotating servo on its own, so I made a little base by stapling the tie down to the wood. For mounting the dildo to the PTST, I considered adhesives, tape, cock ring around the plate, etc., but at the end of the day, I decided a clear zip tie threaded through the plate would be the simplest and most effective solution. To get the googly eye to stick to the silicone, what else to use but my trusty Goop?


SO FOR MY FINAL FABRICATION ASSIGNMENT, I USED:

THREAD, STAPLES, A ZIP TIE, and GOOP

I’ve really come a long way, haven’t I?

View fullsize 1211181442.jpg
View fullsize 1211181457.jpg

For the final touches, I got a wig I had in my locker and tried to spice things up with it. I figured it could work as an enclosure of sorts for the arduino, to reduce the amount of exposed wires since I had so many that were unavoidable.

All that was left after that was to sit back and watch the horrorshow unfold.

At the end of it all, it definitely feels (and looks) rushed, but I’m happy that I took the risk and made something that works. My take on this piece, and pretty much every fab assignment, and pretty much any project I’ve ever done is:

You can always make a good idea look better later, but a shit idea will always be shit, no matter how much you try and spray paint it gold.

Next steps would be to make it work more reliably (with two axis servos and a better reset for the sketch), and to really focus on the appearance. I think my end goal for this iteration of Male Gaze would to have a tiny subway seat that the tie was draped over, with the servo secretly mounted to the heavy plastic, and a tinier wig floating above the moving dildo. Maybe for the spring show ;)

Fun ideas after feedback from class:

  • would be great to have the servos hidden

  • could incorporate an eye into the actual dildo itself, or even have an eye that could blink with a motorized lid

  • wear the tie in a conversation and have the interruption be the point

    • could even lose the dildo and have the tie itself erect (similar mechanism to Peiqi’s penis wall)

  • Should collab with Andri on sex-ed stuff

View fullsize 1211181503.jpg
View fullsize 1211181526.jpg

LINK TO GITHUB w/ ALL THE FILES

categories: Intro to Fab
Tuesday 12.11.18
Posted by August Luhrs
 

Intro to Fab Week 12: Materials and Adhesives

For this week’s assignment, I wanted to keep it easy, breezy, beautiful. Faced with the seemingly infinite possibilities of creating a piece where two different materials were joined together, I decided to start with what I had on hand and just go from there. So i went to my handy dandy tool bag and dug out all the adhesives that had made the travelling team from Los Angeles, along with my sad bag of zip ties.

View fullsize 1203181242a.jpg
View fullsize 1203181246.jpg

Then, wanting to stick with the “free” motif, I made a jaunty trek over to the shop to peruse the treasure trove that is the free-shelf/dumpster. In all of 34 seconds, I picked up three different materials, and by Jove, the muses granted me a lighting bolt of inspiration. I held Art in my hands:

View fullsize 1203181243a.jpg

Only two questions remained: What true form lay beneath these humble materials and how would I encourage them to cooperate and unlock their hidden beauty?

For the latter, I made a pilgrimage and consulted the all-knowing oracle, This to That, and lo and behold, I had known the answer within me all along. The answer is always Goop.
So I had a plan for the acrylic and plywood, but what of the ficklest member of this divine trio, the cardboard? What part would they play in this ménage à trois? I had considered laser cutting the acrylic to create slots or holes the cardboard could interact with, but a voice in my head warned me to not use mystery plastic in the laser cutter, and I obliged. Wanting to explore the cardboard’s natural features, I ran my fingers along their many-orificed edges and found myself thinking back to the zip ties. I would use the zip ties as a bolt and the cardboard as a giant sliding nut! I drilled the holes in the ply wood and delighted.

View fullsize 1203181250.jpg
View fullsize 1203181302.jpg

Then for the tricky task of joining the acrylic to the plywood with the Goop, I knew clamps would not help me, and I didn’t want to waste time on a jig or some other devilish device of stabilization. Once again drawing on my innate resources, I turned to my hurricane tape and decided to use it as an Olympic athlete might use joint tape. Why hurricane tape over any other tape, you ask? I was really digging using the stuff I had brought with me from L.A., and it ultimately was a perfect amount of support without sticking too much or leaving any residue. So using a natural brush (a flake of plywood veneer that had fallen off), I set to work on bringing together a more perfect union:

View fullsize 1203181330.jpg
View fullsize 1203181334.jpg

Then, channeling my inner mother-hen, I sat and waited for my creation to emerge triumphantly into existence… I went to Moma with my partner and found out that Duchamp had clearly used my idea as inspiration for one of his pieces. It was okay, but I think the arbiters of art history will smile kindlier on the better of the two (mine).

1203181539a.jpg

The next day, I excitedly returned and finished assembling my fabulous Frankenstein. I tried different orientations, eventually eschewing my initial brutish, vulgar design (cardboard in front, zip ties protruding) for a more coy, more exploratory approach (cardboard behind, zip tie “bolt-heads” in front). I also knew the correct orientation was to have the cardboard’s naturally exposed ridges grazing the back of the acrylic, symbolizing the teeth of God nibbling upon the human condition. This allowed the plywood to really shine, as I wanted to highlight the brave choice of the plywood to molt its veneer, emerging cicada-like into its new life as art masterpiece:

1204181102.jpg
View fullsize 1204181100.jpg
View fullsize 1204181103a.jpg
categories: Intro to Fab
Tuesday 12.04.18
Posted by August Luhrs
 

Intro to Fab Week 11: Death Box Quiz Thing

20181127_184825.gif

I was originally thinking about doing one of two things for this week’s assignment:

1) a control board game where I would have a panel full of various buttons, knobs, displays, and the like and create a group puzzle game where a group is trying to find the winning combination of settings to complete the puzzle, but one person at a time. One player enters the room with the board and takes one action (flips a switch, presses a button, etc.), then the board gives some sort of feedback to let the player know if they were going in the right direction with their action. Then that player would switch places with the next player in the group, and as they pass each other, the first player can say one simple sentence to the second, to hopefully give them an idea of what to do next to get the box towards the win state. Thought it would be a fun social experiment / team building exercise while also tapping into everyone’s natural inclination towards flipping switches and pressing fun buttons.

2) Another idea was an enclosure for a different project of mine that’s been sitting on the shelf, the Deathwatch. I’ve been wanting to redesign it for a while, to make it waterproof with a clear enclosure that would still show off the cyberpunk guts. Then I realized I didn’t have enough time and rather than continue the trend of half-finishing my assignments, I should double up with another class assignment.

So it was great that this week I had to make a memorial for Designing for Discomfort. Since the prompt for that was to make a memorial that would exist in a physical location and bring attention to an important topic you feel goes under-noticed in society, I knew I wanted to make it about mortality and impermanence. I figured I could do a spin off the Deathwatch and make it a physical installation as opposed to a wearable, but still inspired by the same quote from G.I. Gurdjieff:

"The sole means now for the saving of the beings of the planet Earth would be to implant again into their presences a new organ … of such properties that every one of these unfortunates during the process of existence should constantly sense and be cognizant of the inevitability of his own death as well as the death of everyone upon whom his eyes or attention rests. Only such a sensation and such a cognizance can now destroy the egoism completely crystallized in them..."

So I decided to stick with the idea of giving an expiration date to the user, hopefully setting them up to think about what it would really feel like if that was the true day of their death. I wanted to sort of trick people into getting that message by having them blindly interact with a seemingly fun game only to have that twist at the end. I also thought it would be better to make something interactive and light as opposed to a memorial that was very heavy and uninviting. So the box experience was:

  1. Users see the box, buttons and display lit up, with a message “Press One”. The colors of the message (“Press” in white and “one” in green) correspond to the colors of the giant arcade buttons to the top and bottom respectively. Hopefully that’s enough leading to get them to choose and press a button.

  2. Then a random assortment of binary “this or that” questions are presented in the same color structure. There are twenty different pairs that could be displayed (“teeth/toes”, “daddy/zaddy”, “PB&J/pizza”, “3 kid/3 $$$”, etc.) and after they make 6 choices, the display reads “look below”.

  3. The display and a noise leads them to look on the front of the box, where a small receipt is being printed. Once it’s done, they rip off the paper and receive their message, which reads “Congratulations! You have: X years, Y months, and Z days left to live. What will you choose next?”

The choices are totally arbitrary, the arduino doesn’t even record which button was pushed, it only increments a countdown until they’ve made 6 choices. I wanted to get across a funny, absurd flavor for what living is like, you make all these stupid choices, and then it doesn’t really matter either way, because you’re going to die no matter what. The death-date prediction was based off the Deathwatch statistical sketch, but I adjusted the probabilities to make it skew toward sooner deaths. It’s not as interesting when 90% of the people live until they’re 81; I wanted people to really have to think, “What if this is right and I only have 9 more years left to live? What then?” Which I hope is guided by the last message of “What will you choose next?” — I usually don’t like being so overtly self-help, but I felt like the receipt was disconnected from the buttons without that last part. I was excited to be able to use a mini printer for the first time, and hopefully they can keep their forecast like a fortune cookie.

The build went nice though, it was my first time doing stuff with arduino since coming to NYC since I waived PComp, and I was worried I would be rusty. But I got it all done in one day, learning two new libraries (for the RGB matrix and the mini printer) and remembering how much i hate debouncing buttons in the process. For the enclosure I was originally going to go to the container store and do that thing we saw in class where you can laser cut the top and just slide it into a premade box, but because of the snow last week, I had just bought my first pair of waterproof boots and realized the shoebox was perfect. I love using cardboard, so I was really stoked that I could re-purpose the box instead of just trashing it and buying a different one. I thought about laser cutting it, but figured that was way over-engineering it since I’ve gotten plenty far with just an X-Acto knife in the past. That turned out to be perfect, and I cut the button holes so precisely that I could actually screw in the buttons to the cardboard. That got me a little hot and bothered. The wire-hell inside has yet to be addressed, but that’s only because I worked entirely from home and all my jumper wires and stuff like that are at school, so I’ll hopefully be able to clean it up before class tomorrow.

Overall, really happy with how it turned out, and excited to leave it up tomorrow during the day and see what people think of it (and their inevitable demise).

View fullsize 1126181311.jpg
View fullsize 1126181310.jpg
View fullsize 1126181311a.jpg
View fullsize 1126182046.jpg
View fullsize 1126182211_HDR.jpg
View fullsize 1127180155.jpg
View fullsize 1127181442.jpg
View fullsize 1127181442a.jpg
View fullsize 1127181452.jpg
View fullsize 1127181502.jpg
View fullsize 1127181515.jpg
View fullsize 1127181536.jpg
View fullsize 1127181518.jpg
View fullsize 1127181542_HDR.jpg
View fullsize 1127180203.jpg
categories: Intro to Fab
Tuesday 11.27.18
Posted by August Luhrs
 

Intro to Fab Week 10: Laser-Cut Dome Prototype

On this week of “August Bites Off More Than He Can Chew”:

I’m applying for a Burning Man Honorarium grant soon, for an installation I’ve been working on all year, Corpus Phallosum. I have some 3D model renders for the proposal, but the actual designs of the model aren’t transferable to a physical blueprint, the struts are all random lengths:

FrontDome.png

Is it a brain? Is it a butt? Nobody knows.

I don’t know enough about CAD or other engineering software to know how to design this same structure, but only use 3-5 different strut lengths. So I figured the best way to do that would be to try and play around with something physically until I came up with a new design.

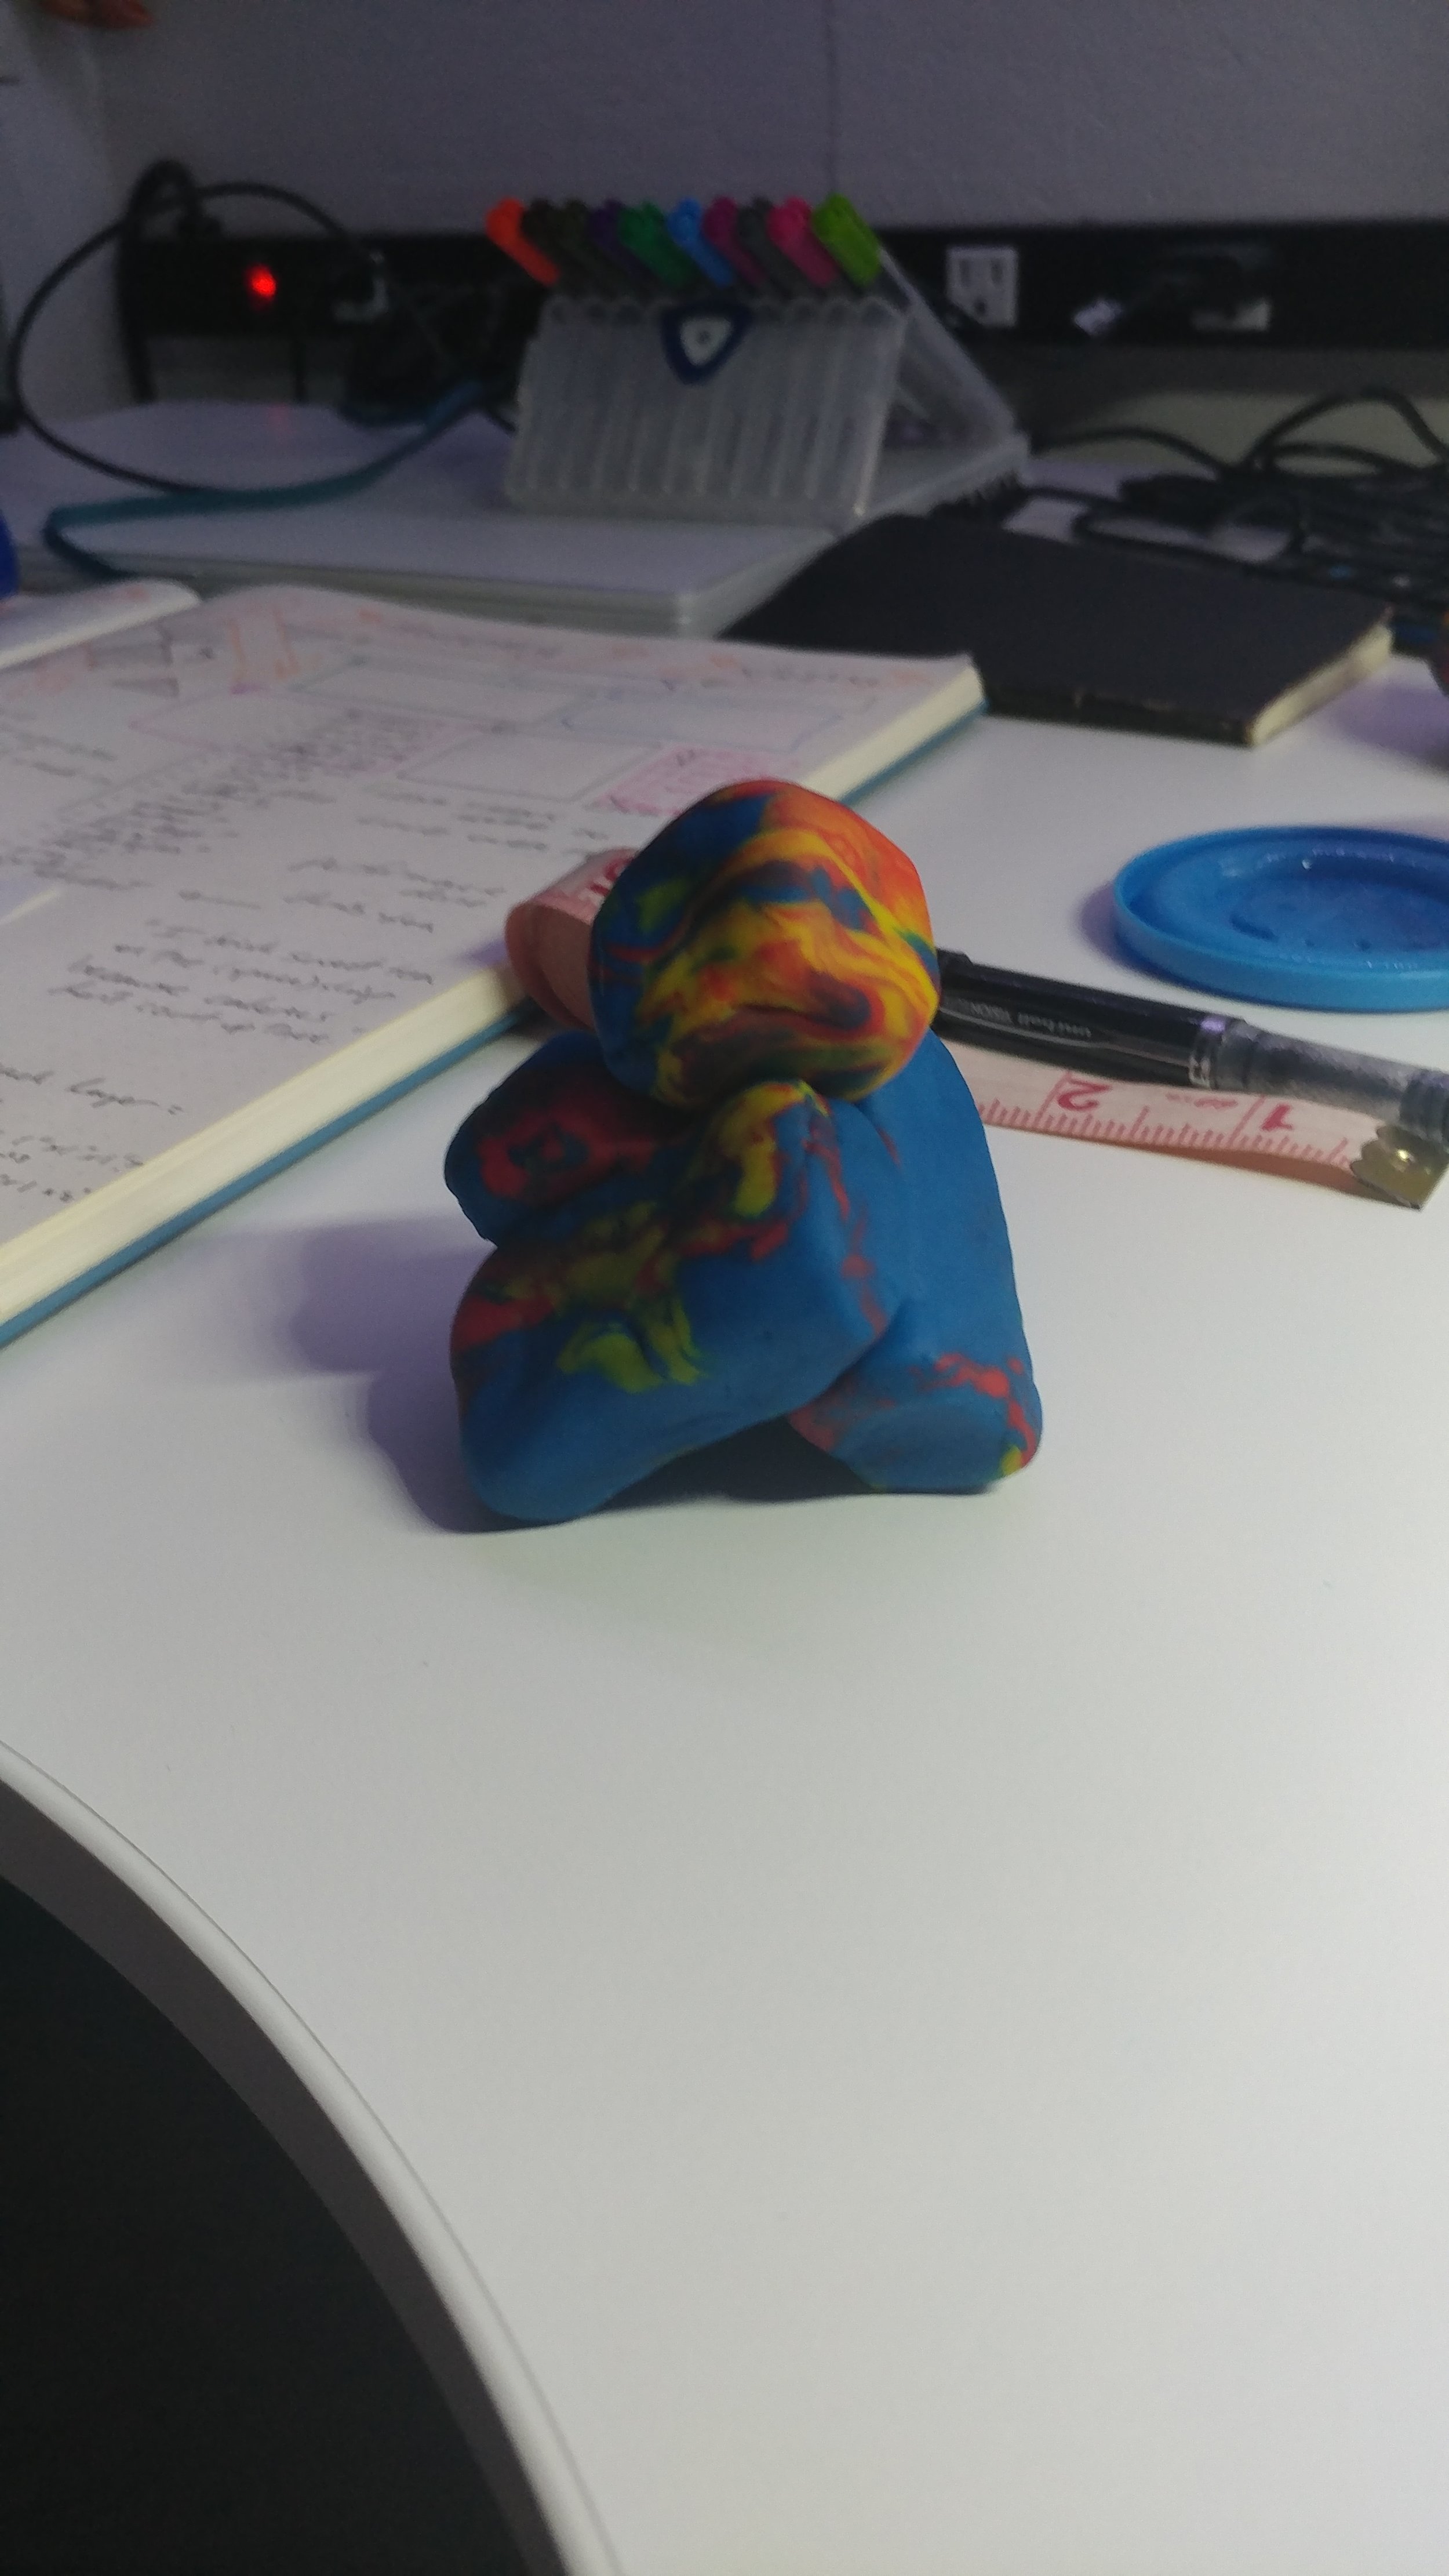
I decided on arbitrary lengths (4”, 3.5”, 2.5”) since those ratios are similar to the ratios of the strut lengths of the first dome I made, and started by using popsicle sticks and play dough to see if my idea would even work theoretically:

1102182007.jpg

Then I decided to try and cut some struts out of the free cardboard in the shop. Figured 1/4” wide was enough, but didn’t take into consideration how the corrugated filling would affect the sturdiness of the material. The first test proved that I would have to find another material, but I was able to demonstrate the core concept:

1109181813.jpg

So I asked Ben for advice on what kind of material would be cheap, relatively load-bearing, and still flexible enough to allow for bending at the vertices. He suggested mat board or thin cardboard (like what post office boxes are made from). I went for the free option, and found a place across the street from my apartment that was happy to give me some free USPS boxes!

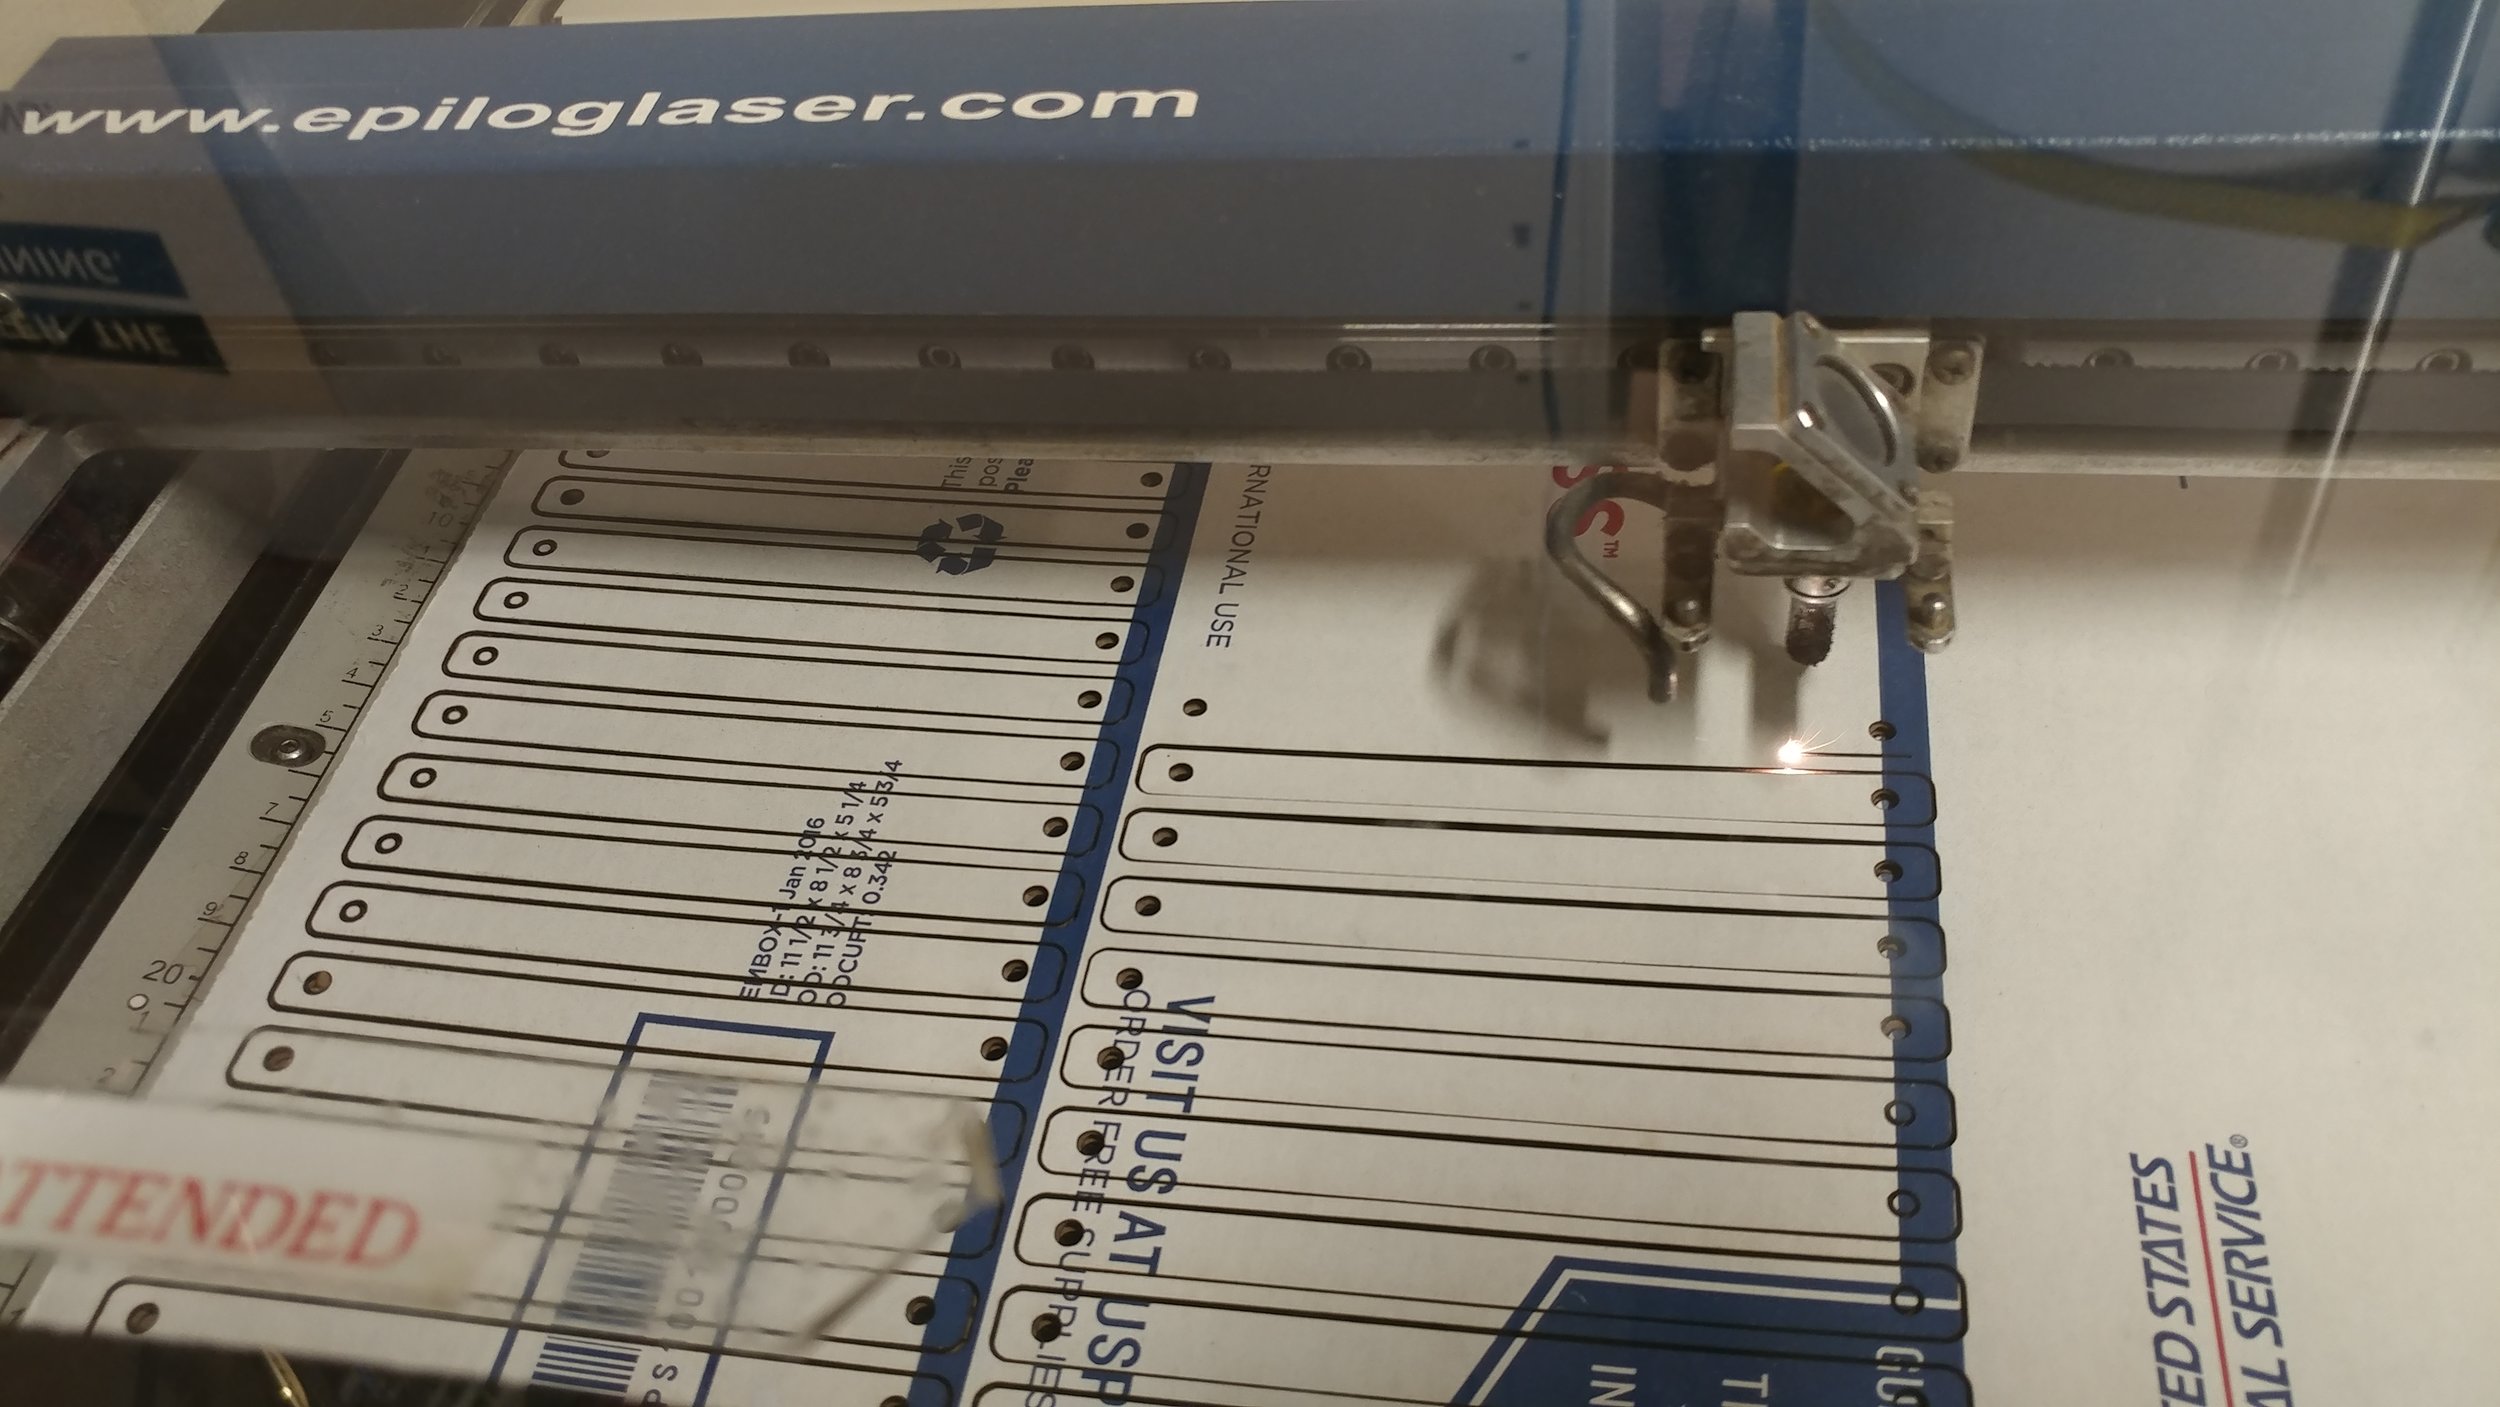
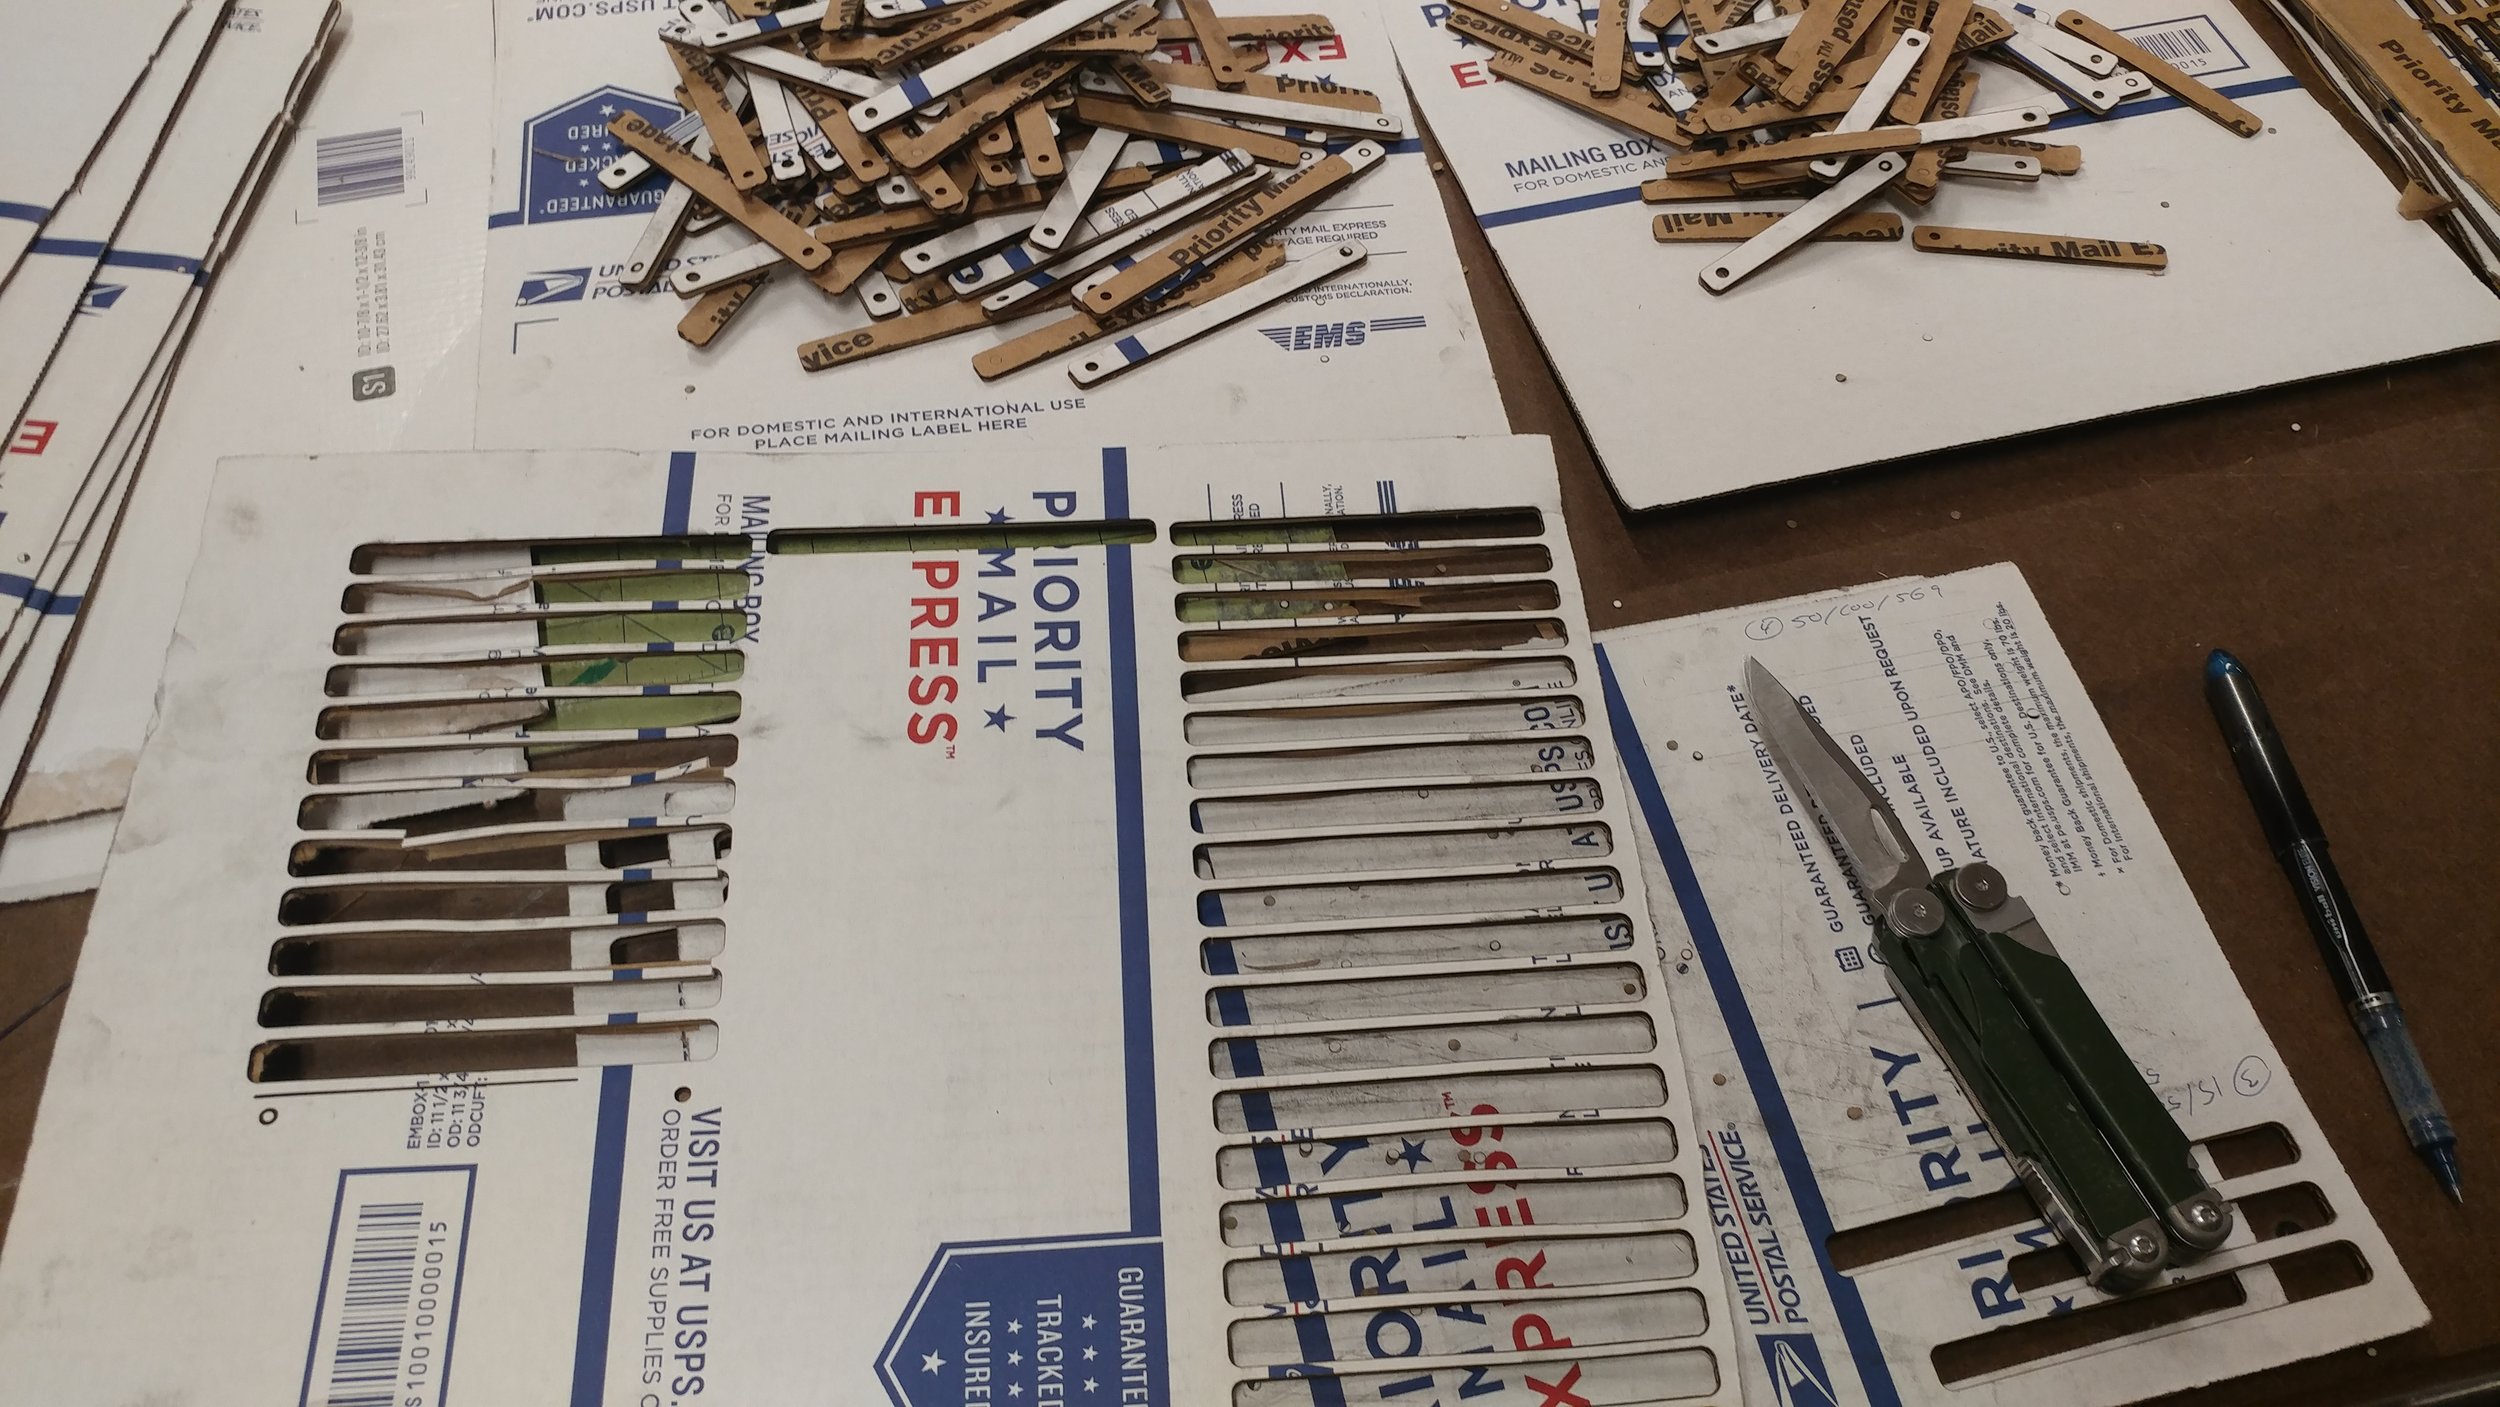
These proved to be exactly what I needed. After cutting them to size, I did some tests with the laser, adjusting the settings to what the manual suggested for mat board (50, 50, 500). That wasn’t quite enough, and I ended up with (15, 50, 569). That just took forever though, so I decided to test (40, 100, 569), and after some trial and error, ended up at (30, 100, 569) which was quick enough to get all the struts cut, but I still had to use my pocket knife to cut some pieces out. If I had unlimited time I would’ve just ran it slower, but I had an hour reserved on the 50W, and luckily no one came after that and I was able to use it another 30 mins. I couldn’t afford to spend longer than that there though. The machine also randomly stopped part way though, and the whole shop staff was stumped at why it wasn’t working. After a few resets, we fiddled with the contacts on the lid and that seemed to do the trick.

1112181458.jpg
1112181603.jpg

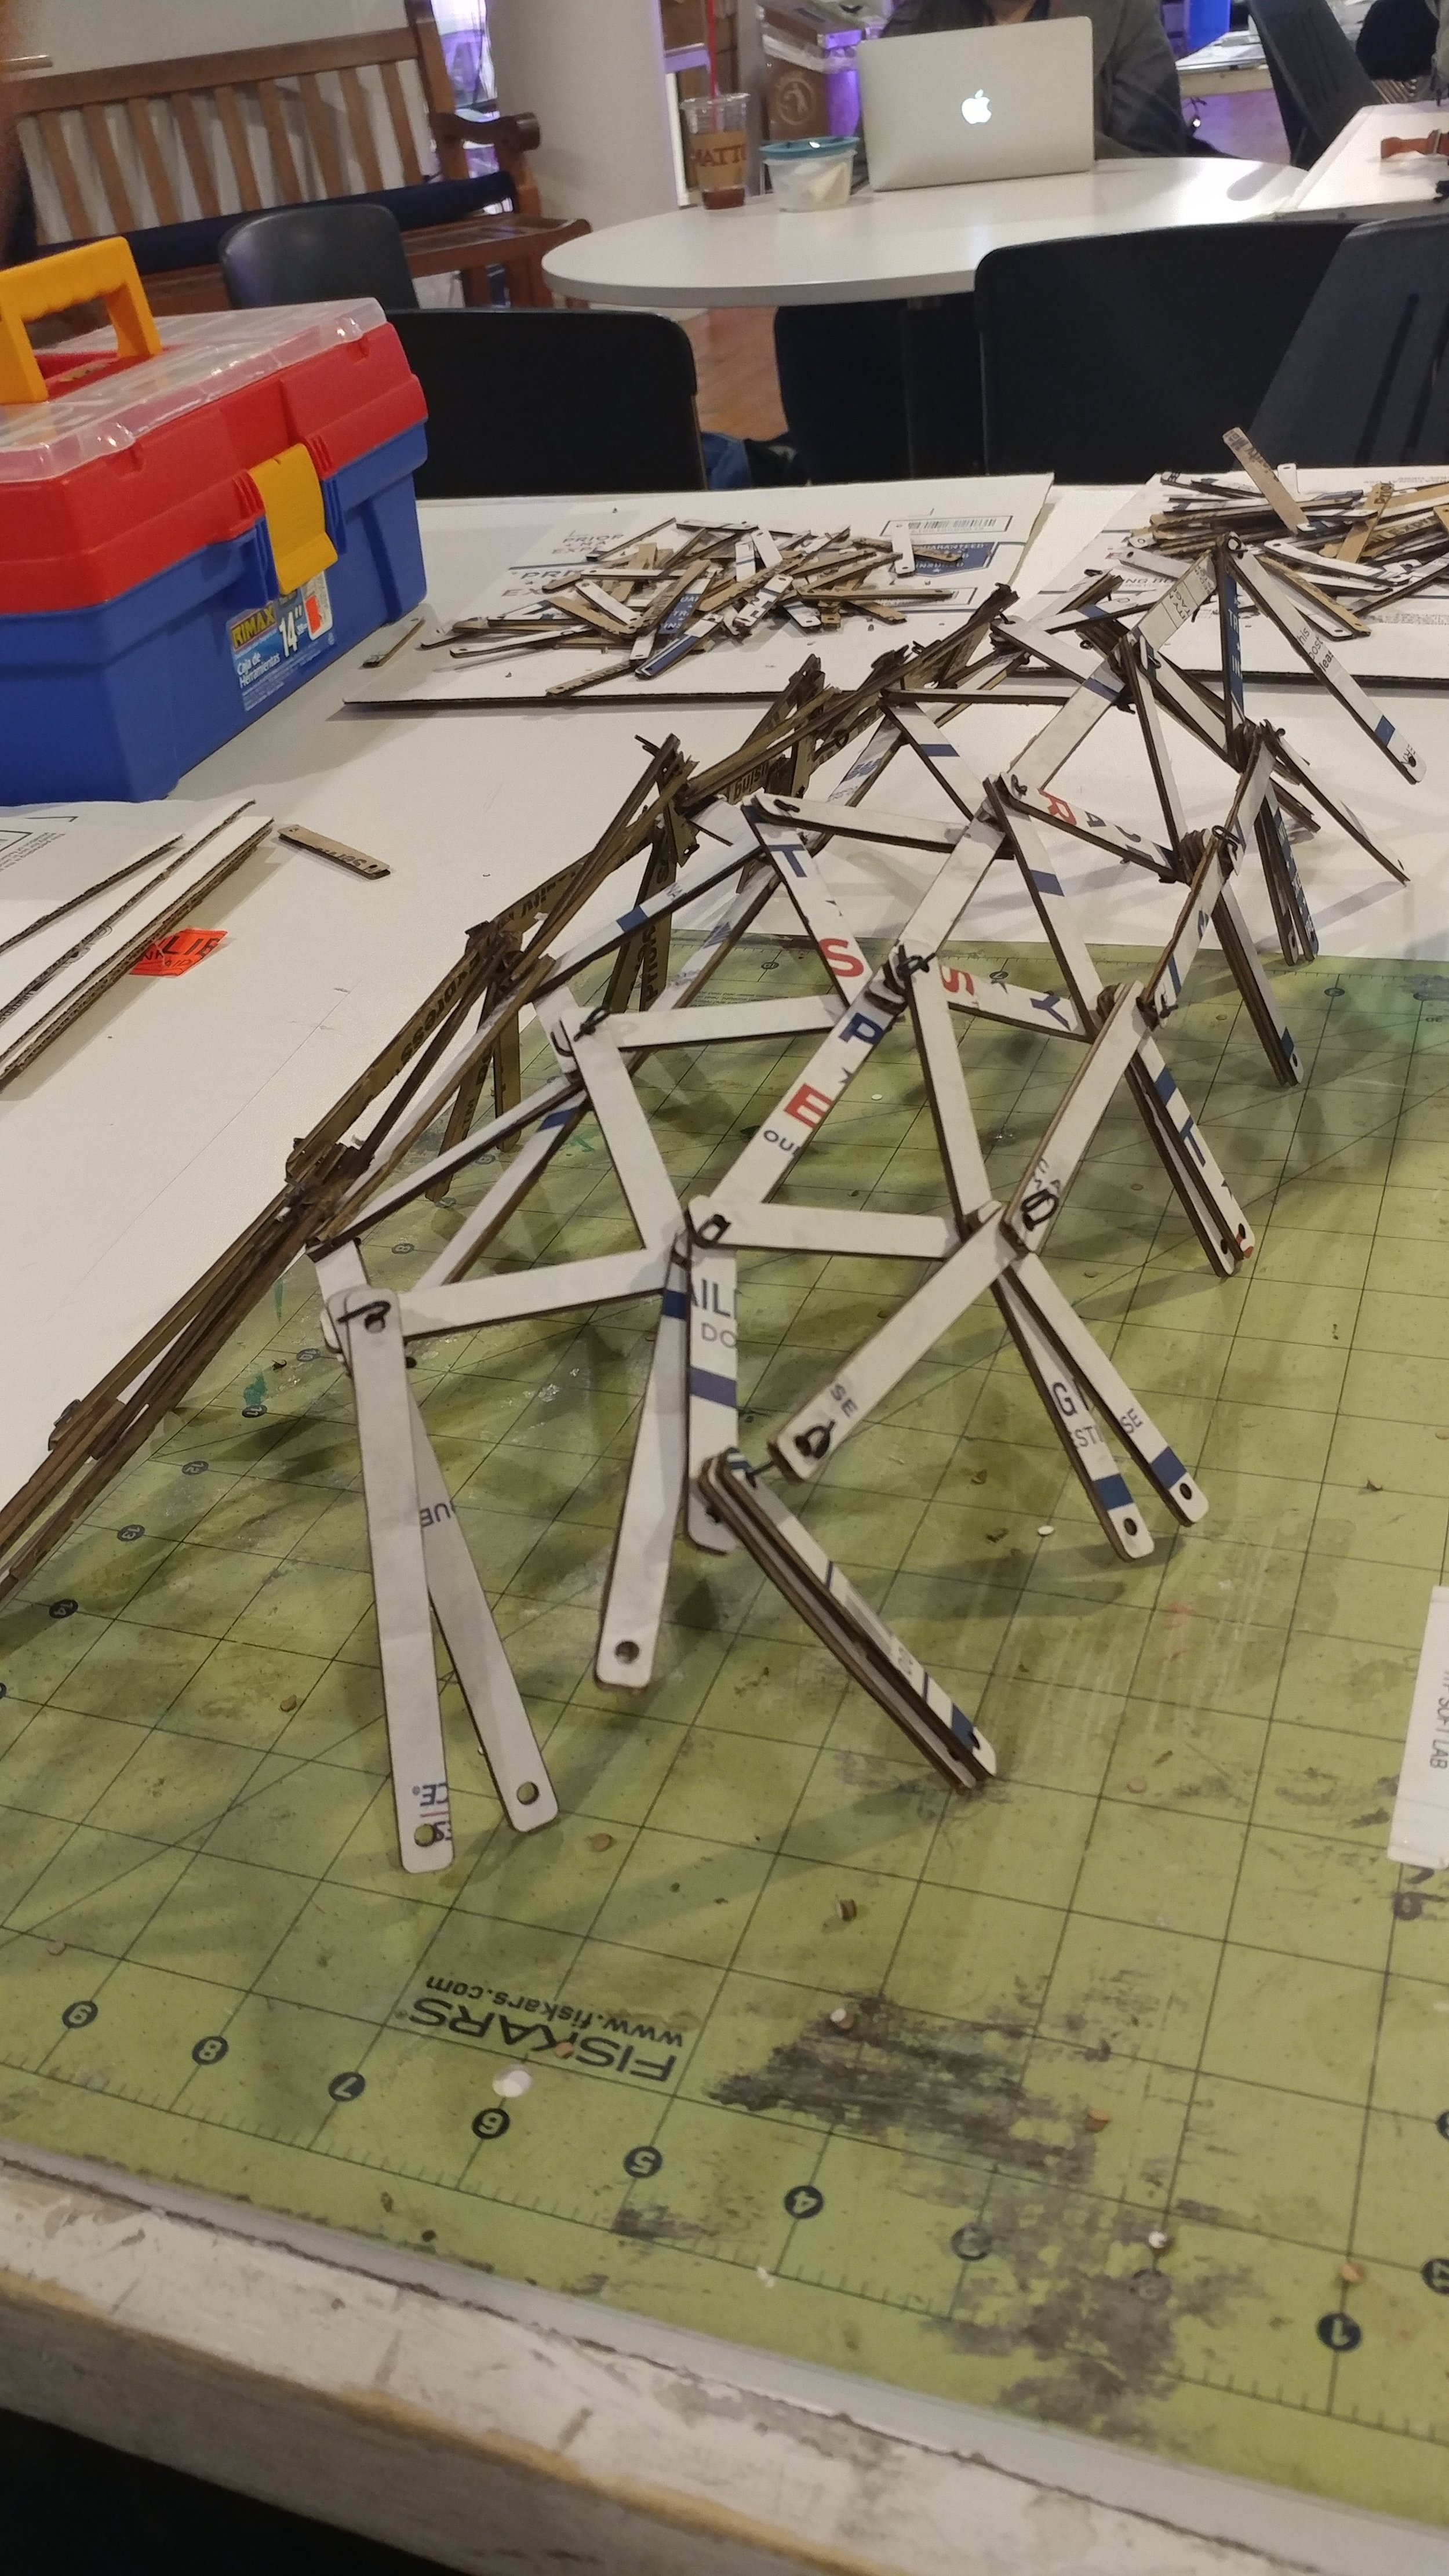
Then came the fun part. I had no idea how to start other than using the same guidelines from my other dome build: start from the top, and lay out the struts in groups based on the vertices, then bolt each layer together as you move down the dome. The only tricky thing was the brain wasn’t a sphere that I could start at the apex with, I either had to start with the two highest ridges, or start with the corpus callosum and build up and out. I opted for the corpus callosum, since I figured starting with the middle would be better. I had an intuition of how the triangles should be arranged based on my previous 3D model, but I was pretty much flying blind and just sort of guessing as I went. I figure that since I have different sizes, I’ll be able to make the shape somehow… It may not be the most geometrically astute design, but I just need it to work. I also realized my idea for basic bolts (wire wrapped around the vertices) wouldn’t work as initially intended, and I had to basically try and turn wire into a nut/bolt combo — a single axis that wouldn’t allow either end to escape.

View fullsize 1112181627.jpg
View fullsize 1112181639.jpg
View fullsize 1112181640.jpg
View fullsize 1112181647.jpg
View fullsize 1112181735.jpg
View fullsize 1112181751.jpg

Once I had built out from the corpus callosum enough to feel like I was at the top of the two ridges and ready to start building down, I figured I could do what I do with my metal dome, and just prop up the bottom layer of struts to start the next layer. However, this is not burning man, and whereas metal pipes with sharp ends will dig into the desert floor very nicely, smooth cardboard does not have the same relationship with a cutting mat or desk top. So the propping up plan wouldn’t work as intended, and I didn’t think going through the trouble of making a little perimeter for the ends to butt up against would be worth the time. I figured I might be able to just continue building out on the 2D plane and then shape it later, but I really felt like I needed the visual feedback to know where to continue shaping the triangles. So I ended up stopping early, not really sure where to go from here. I’m not sure whether it would be a better use of time to continue with this physical process, or just try and find a way to play around with the same concept digitally. I had an idea for a p5.js 3D sketch with struts you could move around and stick together, but after running through the design in my head, I realized I was trying to make CAD software from scratch… so scratch that.

View fullsize 1112181759.jpg
View fullsize 1112181809.jpg
View fullsize 1112181813.jpg
View fullsize 1112181814a.jpg
View fullsize 1112181813c.jpg
View fullsize 1112181817.jpg

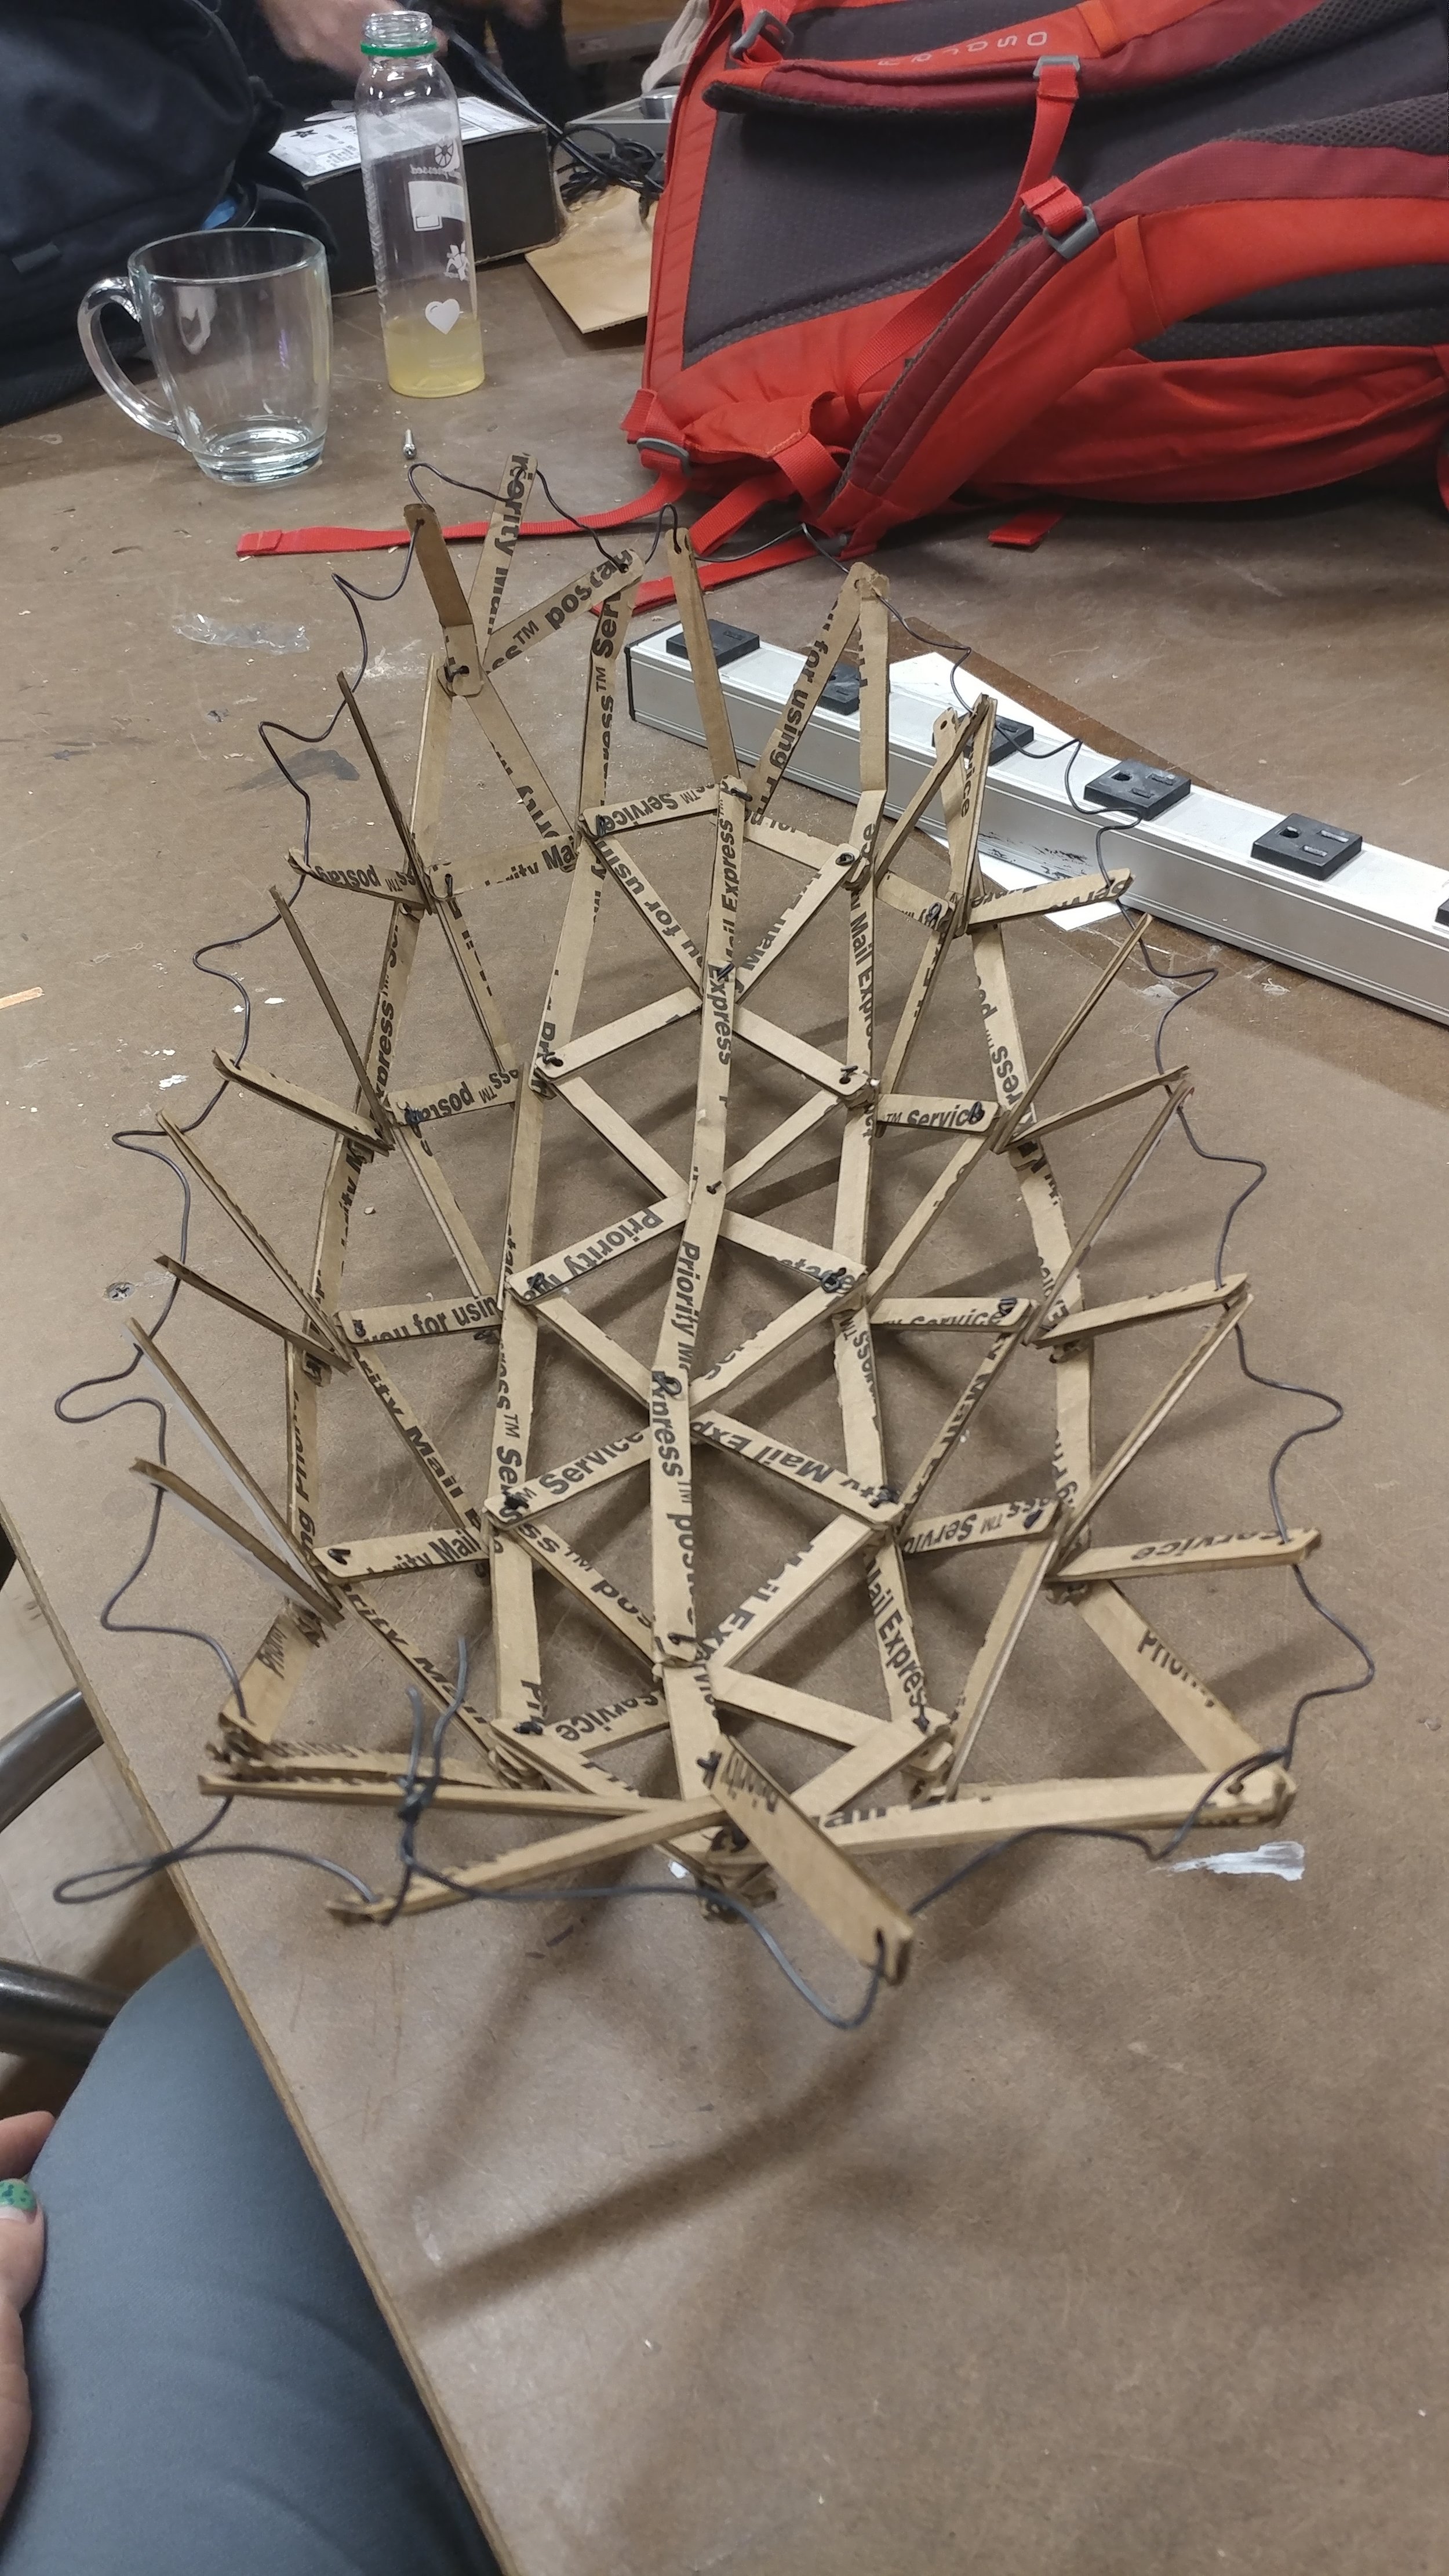
So the final iteration of this project was just to try and make a bottom layer that would hold a shape in place. It’s not very brain like, but it’s a cool cocoon. Cornucopia? Corpus Cardboardsum?

View fullsize 1113181507.jpg
View fullsize 1113181508.jpg
View fullsize 1113181508a.jpg
categories: Intro to Fab
Tuesday 11.13.18
Posted by August Luhrs
 

Intro to Fab. Week 9: Cella Cube of Dooooom

Since I had so much work for other classes this week, my main focus when brainstorming what to make five of was “keep it simple, quick, and easy.”

I actually believed I would do that… for about 3 minutes.

Fuck Pintrest.

cellla.jpg
naef spread.jpg

Now, I know what you’re thinking: “You made five of those?!”

No, I’m not stupid. I made three.

Well, started to make three… Since I couldn’t get started until the day before class, I didn’t have time to deal with the inevitable breakdown of my plans. So the joining, evening out, painting, and lacquering will have to come later. But here’s as far as I got, which was honestly farther than I expected with four hours:

  1. The first thing I did when I saw the pintrest pics was to try and wrap my head around how the hell I could reproduce it. I looked at the images and try to deduce the ratios the layers were based off of and saw that the width of each layer was half the width of the center cube, and the center cube was 2/3 the length of the 2nd layer. From that I got the equation L = W + H, which was confirmed when I did my first prototype with index cards — since the cards were so thin the sides ended up being squares.

  2. Then with Play Dough, I did another prototype, and it got me really excited about the project: If just one cube and one layer was so fun, how much better would three cubes and 27 layers be ?!

  3. I wrote down my estimated measurements for each layer and then tried to map out how much wood I would need to buy by drawing out each board and taking a cookie cutter to them. I gave myself at least a 1/2” between blocks since I couldn’t remember how wide the saws in the shop were, and then figured I’d get an extra board to be safe. Proud to say my estimates were almost exactly on, and I didn’t need either extra board. Also planned out each stage of the build to save time the next day, but figured I’d need to adjust a little on the fly too.

  4. In the morning, went out to buy the wood and had looked up and planned to use poplar boards, but upon feeling the poplar, was a little nervous that the material wasn’t that great. So I ended up getting oak boards instead, but damn, they were pricey. Coming back from Home Depot in the pouring rain, the wood got wet and I was stressed that I had just ruined an expensive set of wood. But it turned out to be fine, just smelled weird.

  5. I took the lengths to the panel saw first, and cut some thin slices off using clamps. Forgot I meant to use a stop block since a lot of the measurements were the same, but remembered to by the time I got to the miter, so that was good.

  6. The miter saw was where I spent most of the time, and I wrote the lengths I had to cut on my arm so I wouldn’t have to double check my notes. I’m really excited about the stop block system, because I’m used to pre-measuring and marking all my cuts before hand (trying to estimate the amount of loss from the cut never works though). So I felt really great about how close all the cuts ended up being to each other. Had some scary moments with pieces flying off the saw though, so definitely a learning experience about how to use that machine safely.

  7. Once the rectangles and center cubes were cut, I clamped each layer down and took them to the belt sander to even them out a bit. I had planned to even out the whole cube as a unit once assembled, so this was mainly just to get major imperfections out and get all the pokey bits off. Only had one layer get away from me and one corner got a little too worn down, but nothing too bad.

  8. Then I did a test assemble to make sure the concept had succeeded, and it had! Already looked really cool, was excited to get it smooth and painted.

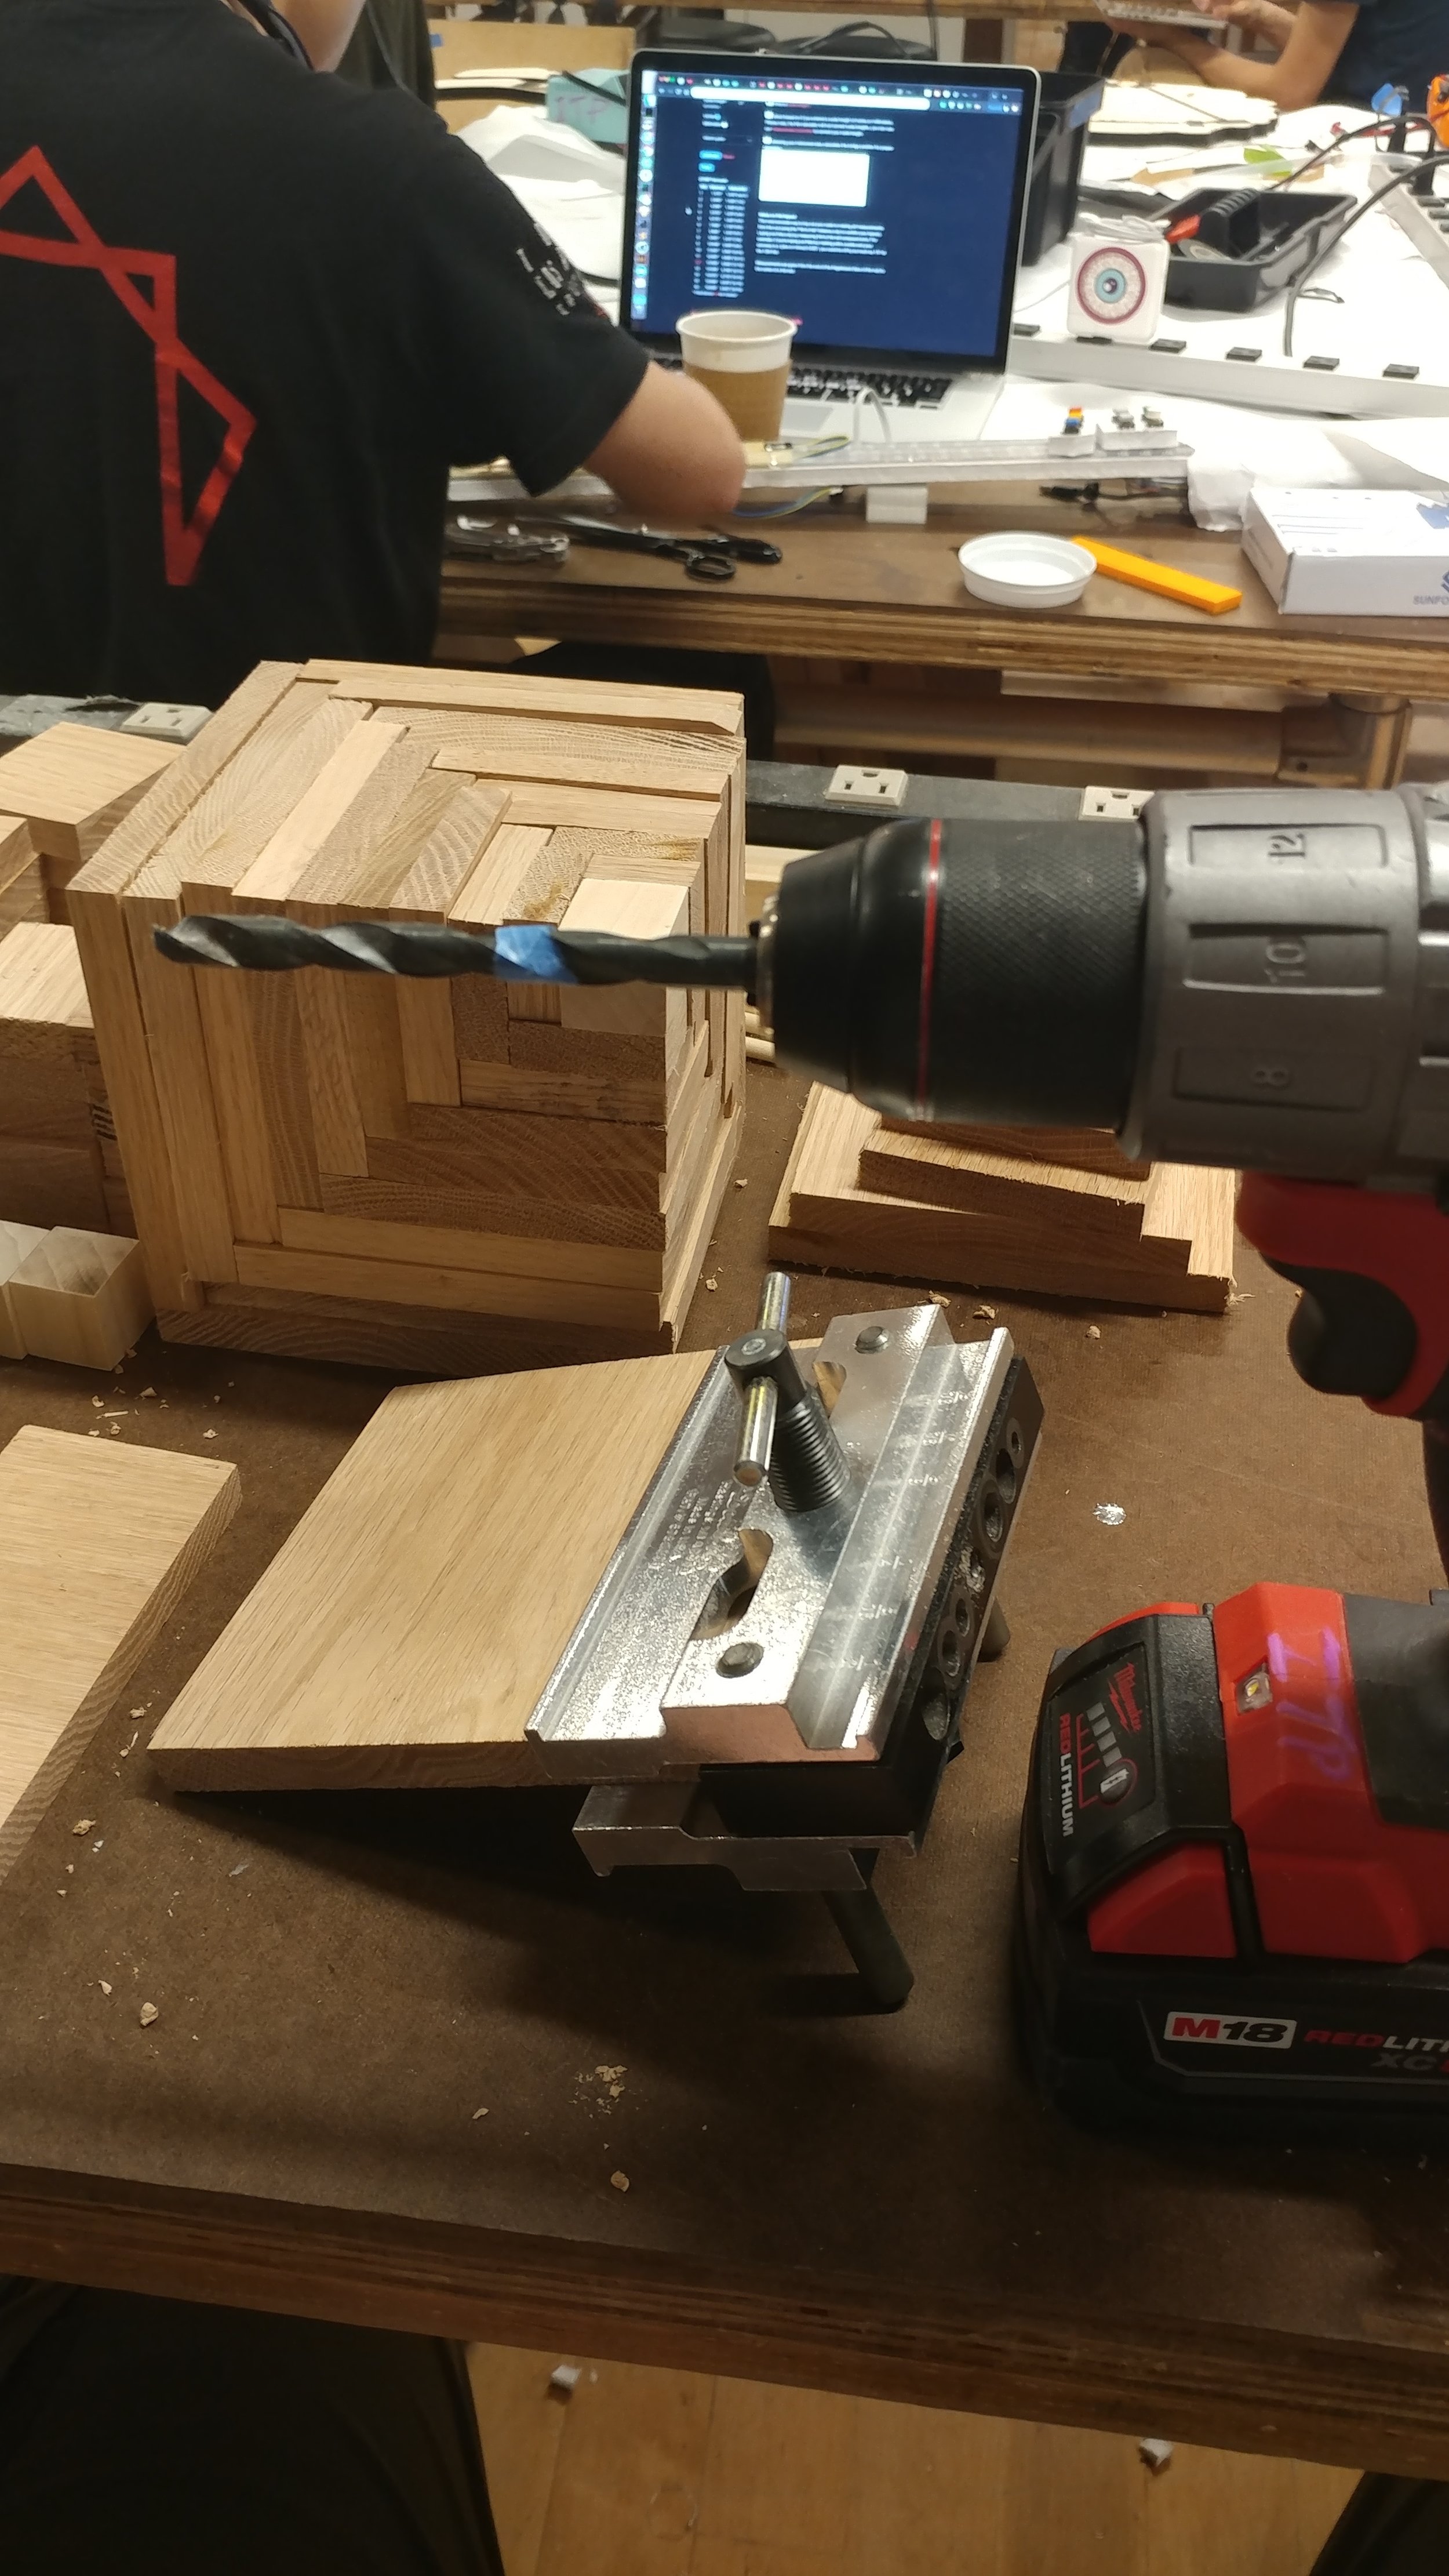
  9. Then I began the long anticipated journey of drilling holes into each panel, so that I could put dowel pins in the bottom and side of each rectangle. Home Depot didn’t have a bulk bag of dowel pins, so I thought I could just get some 1/4” dowels and cut them to size. I used the bandsaw to cut a bunch of them at once, and I ended up cutting exactly 100 pins (I get really excited when estimations are correct…). Then I went and got the doweling jig and put the holes at 1” and 3” out from the side to account for the edge that needed to sit up against the other rectangle. I put them on the wrong side at first, so that was annoying, but I was using a scrap block as a measuring jig (is that a thing?) so it was super quick and painless to redo. Then I did a test of the drill press; I planned on using a jig to drill all the left holes at once and then move the jig to do all the right holes, but for this one I just made some measurements and did it by sight. Then, using the pins I had cut, I tried assembling a test layer. Since I got 1/4” dowels, I figured I could squeeze them into a 1/4” drilled hole, but that was wrong. So I had to move up to a 5/16” bit, but then the pins were way too small and they were practically useless. That’s when everything fell apart (literally). I realized I either needed to find some dowel pins online that could work (1/4” by 3/4” ideally, but I couldn’t find any of those on amazon…), or figure out another sturdy way of joining these layers… Either way, I wouldn’t have time to get the pins and have everything dried by the time of class tomorrow morning, so I resigned to give up and try again next week.

  10. Frustrating, but still really excited about these cubes. Now just wondering if I could have done all this on the laser cutter….

View fullsize 1105181752.jpg
View fullsize 1105181805.jpg
View fullsize 1105181805a.jpg
View fullsize 1105181805b.jpg
View fullsize 1105181958.jpg
View fullsize 1105181958a.jpg
View fullsize 1106181047.jpg
View fullsize 1106181132.jpg
View fullsize 1106181137.jpg
View fullsize 1106181332_HDR.jpg
View fullsize 1106181502.jpg
View fullsize 1106181350.jpg
View fullsize 1106181453.jpg
View fullsize 1106181453a.jpg
View fullsize 1106181643.jpg
View fullsize 1106181704.jpg
categories: Intro to Fab
Wednesday 11.07.18
Posted by August Luhrs
 

Intro to Fab. Week 8: SMASHLIGHT

I always say I want open ended prompts until one lands in my lap…. “Make a flashlight”…. damnit.

Here was my brainstorm:

  • FIRE

  • puzzle box that turns on light on correct solve

  • glow stick torture device (rack?)

  • giant block with one tiny tiny LED

  • EXPLOSION

  • glow in the dark fish trebuchet

  • GIANT HAMMER — bashlight!

One of these won out, mainly due to two factors: 1) I didn’t have time to make a puzzle box or safe explosive and 2) it made me laugh every time I thought about it. PRESENTING (with a name change thanks to Lydia Jessup)….

THE SMASH LIGHT!!!!

So here’s how it all went down.

  1. Went on a lovely dig through the shop scrap, and found a treasure trove of wood! Figured I could just make the handle out of the longest piece I could find, and make a box for the mallet head. The light part wasn’t as important, I left thinking about that until the end :P I was actually considering not having the hammer emit light at all, but rather bring a demo “light bulb” that I could smash dramatically in class.

  2. I finally got to haul my tools from home to the shop; I was really excited to use my bestest friend tool, my impact driver. I was hoping to use it exclusively (besides any cuts) and just quickly smash some screws in (again, didn’t have much time). Unfortunately, I couldn’t drive anything with it without the screws getting bent to shit, either because of the thickness of the wood or the quality of the shop screws, but it’s a problem I don’t think I’ve had with my trusty impact driver, so I was sad.

  3. Resorted to normal drill/driver combo, clamps, and my chalk line tool for quick guidelines.

  4. So I actually had a big moment at the beginning of this project where I spent a whole precious 45 minutes trying to figure out how I was going to make the initial cuts to the wood. Back in L.A., in my backyard shop, this would’ve been no problem, I would’ve taken out my circular saw and bam, done. But I left it behind in California. Though one of the things that excited me the most about coming to ITP was access to the shop machines, I found myself paralyzed before them. If only I had my comfortable hand saws, I wouldn’t have to go use the scary big saws (that I’ve used before, mind you!). It was a big moment, and I’m happy to say I sucked it up and got some help using the three saw machines in the back. Definitely have a while to go before I get good with them though.

  5. Had a lot of trouble getting a straight cut on the band saw (?), but I think it was because the top-stop guard (?) thing wasn’t close enough. Only the last cut I made on that machine turned out perfect. Oh well, I never really aim for pretty projects anyway.

  6. Once the cuts were made, everything else was super quick. Just clamp and drive.

  7. Didn’t measure the box so that everything would be flush — again, wasn’t really focused on pretty, just wanted to sprint to the finish line so I could actually bring a completed project to class.

  8. The light I found was just the biggest light I could find in my component box — luckily I happened to have a 12V portable battery pack that I could tape on. I thought about hiding all the wires, but I kind of liked the exposed look. I also considered putting some sort of screen over the hole (which I didn’t make, I just found that piece in the scrap and decided it was a perfect opening) to project an image or something, but didn’t have time.

  9. Super jazzed about how it turned out — I love big stupid stuff. Glad I could keep accessibility and portability as priorities, I think it’s the perfect tool for a grandma.

View fullsize 1029181529.jpg
View fullsize 1029181529a.jpg
View fullsize 1029181726.jpg
View fullsize 1029181733.jpg
View fullsize 1029181640.jpg
View fullsize 1029181700.jpg
View fullsize 1029181604.jpg
View fullsize 1029181610.jpg
View fullsize 1029181611.jpg
View fullsize 1029181617.jpg
View fullsize 1029181620.jpg
View fullsize 1029181714.jpg
View fullsize 1029181724.jpg
View fullsize 1030180941.jpg
View fullsize 1030180949.jpg
View fullsize 1030180916.jpg

Can I be DIY/Queer Thor?

1030181003.jpg
categories: Intro to Fab
Tuesday 10.30.18
Posted by August Luhrs
 

Powered by Squarespace.