• Portfolio
  • The Ritual // BuJo
  • Workshops
  • ITP Blog
  • Idea Compost
  • Resume
  • Bio/Contact

J. August Luhrs

  • Portfolio
  • The Ritual // BuJo
  • Workshops
  • ITP Blog
  • Idea Compost
  • Resume
  • Bio/Contact

ICM Final: Tradetatos

After starting with the goal of just having some sort of shared network interaction between players on different devices, I took the ideas garnered from our in-class playtesting and decided to branch off from the original game concept and make a new game.

Tradetatos is a mobile game for 2-20 players, where the objective is to collect the most valuable fud possible by scavenging the map and sending negatively-valued fud to your opponents. Each player has their own screen on their device, but a shared screen tells players the overall map layout, how much time is left, and what fud is valuable or not. Players have two minutes to collect as much fud as possible as morks, tatos, and upples randomly spawn across the map, but they have to keep an eye on the economy indicators to let them know which of the three are super valuable, and which are actually negatively valued and will spoil your whole haul. Whoever has the most fud points at the end of the game wins.

I used these super helpful videos from Dan Shiffman as a starting point!

  1. Coding Train 12.1: Introduction to Node

  2. Coding Challenge 32.2: Agar.io

To play, follow these steps:

  1. On a shared screen that all players can easily see, open this page.

  2. Have each player open up this screen on a personal device such as phone or laptop.

  3. When all players have chosen a color and name and have pressed start to join the map, press the start button on the shared screen page.

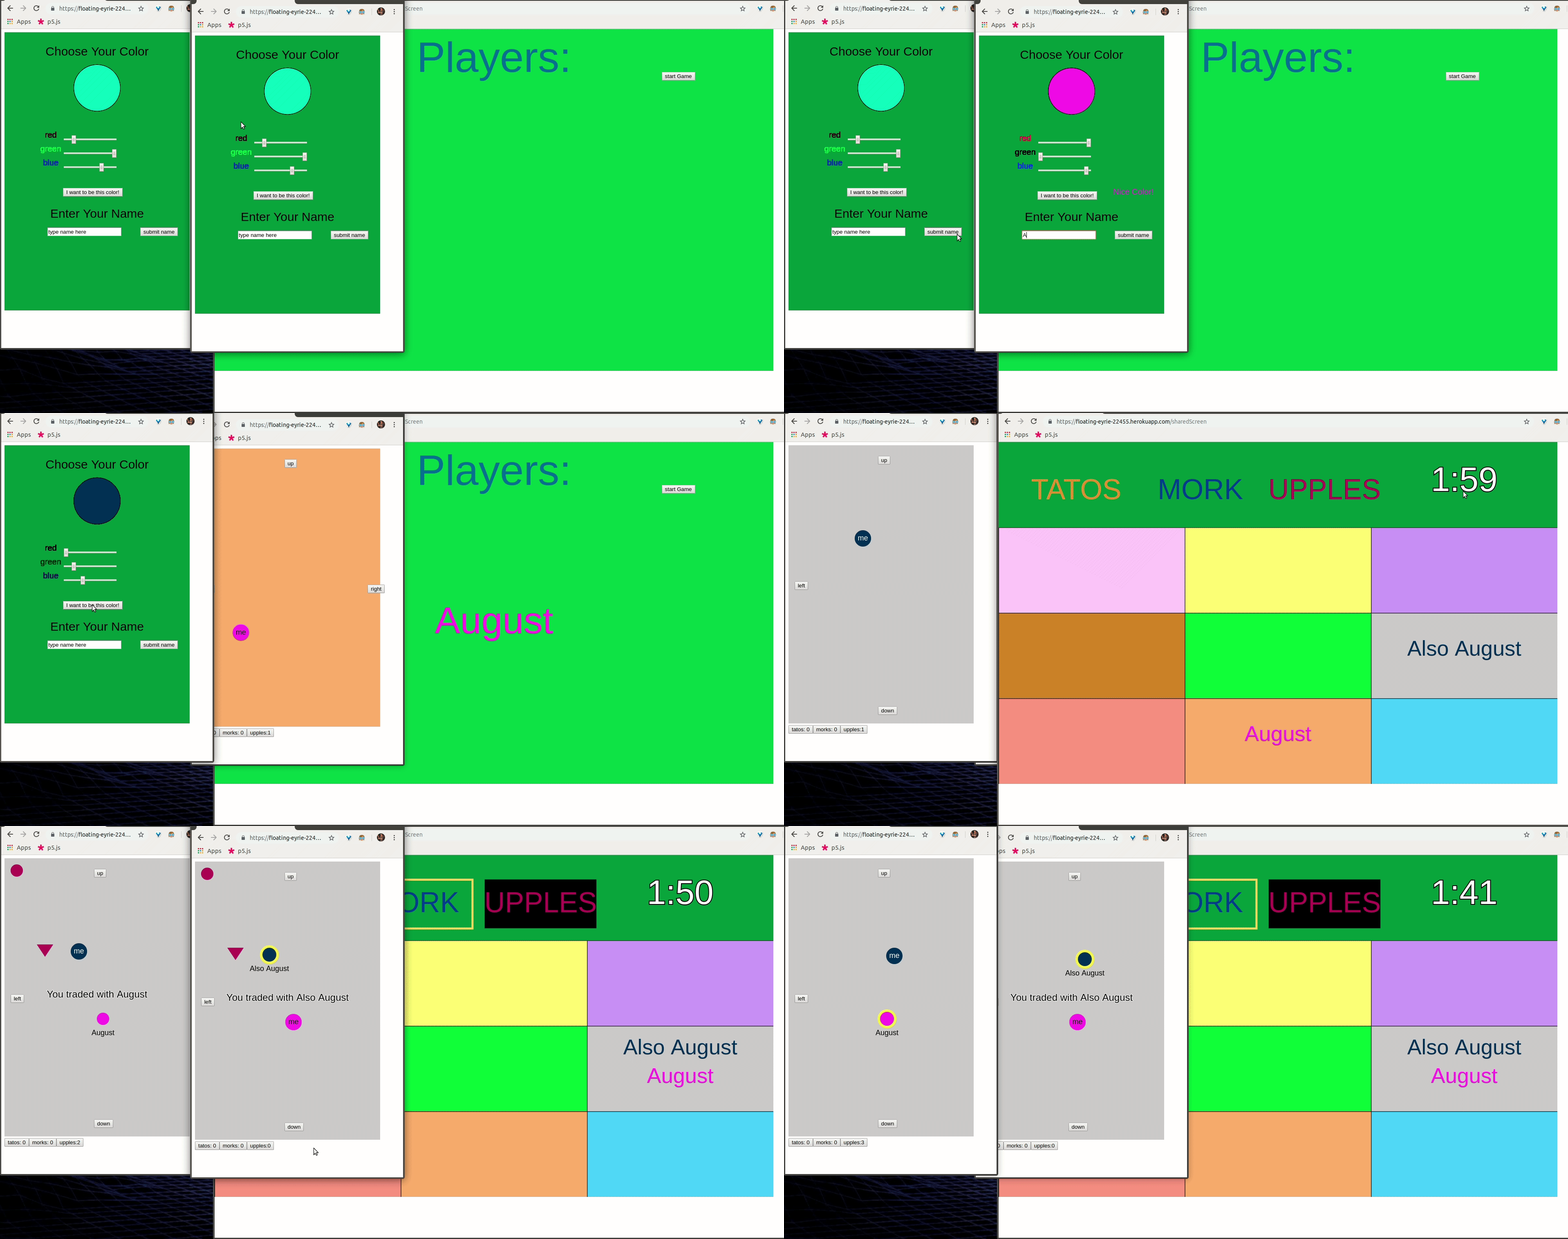
See below gif for an example:

Tradetatos.gif

It was actually a huge coincidence that the above example worked out so well. The coincidence that an upple spawned on our map immediately after the first trade went through is extraordinarily improbable…. So nice of the universe to do that for me.

It’s only been a week since I finished the game, but since I had spent about 10 days prior to that working on it non-stop, things are a bit of a blur. I’ll do my best to go through my process, but so many breakthroughs happened literally at 430 in the morning after I had been working on it for over 12 hours that I can’t possibly follow my own mind haha. All in all, was very happy with the demo in class; I really didn’t expect it to hold up that well with 12 players. It seemed like people enjoyed just being able to see each others avatars in real time, the game was sort of secondary, but I think that just speaks to how important the real-time interaction aspect is.

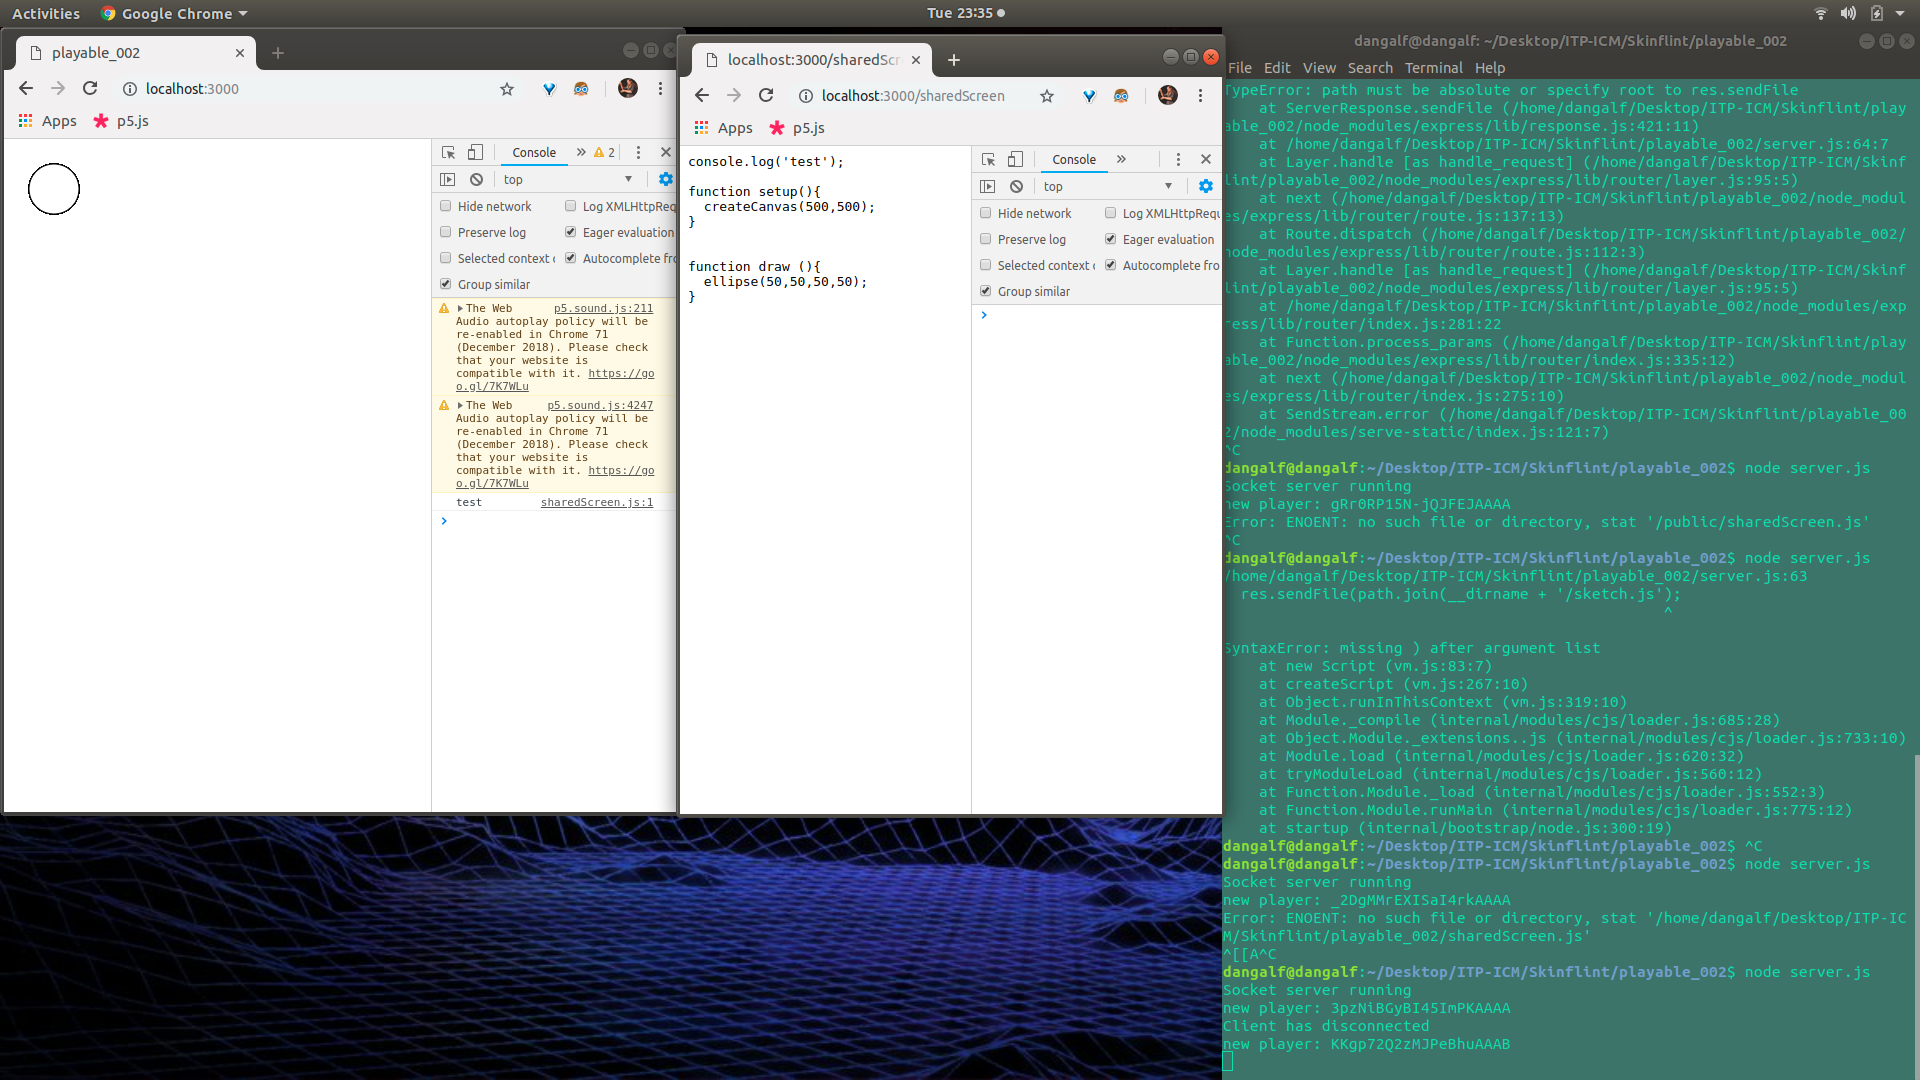
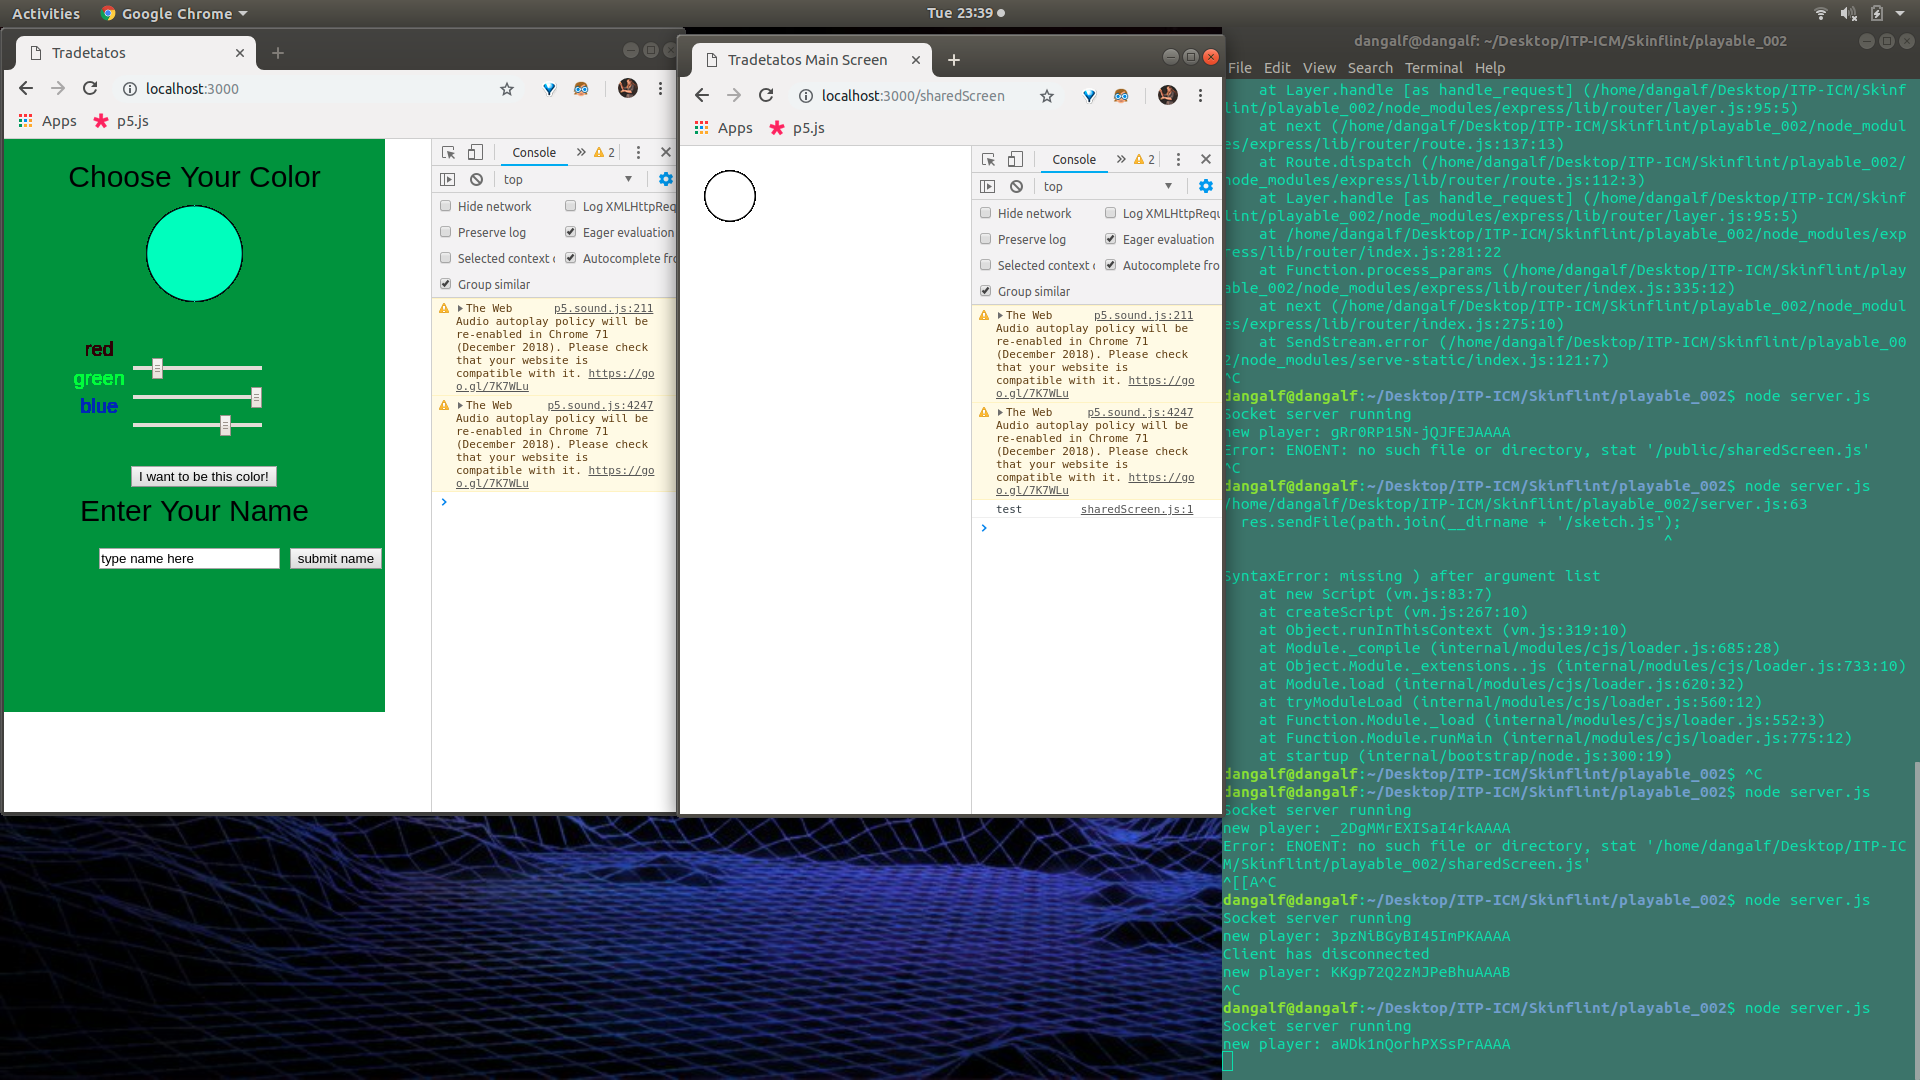
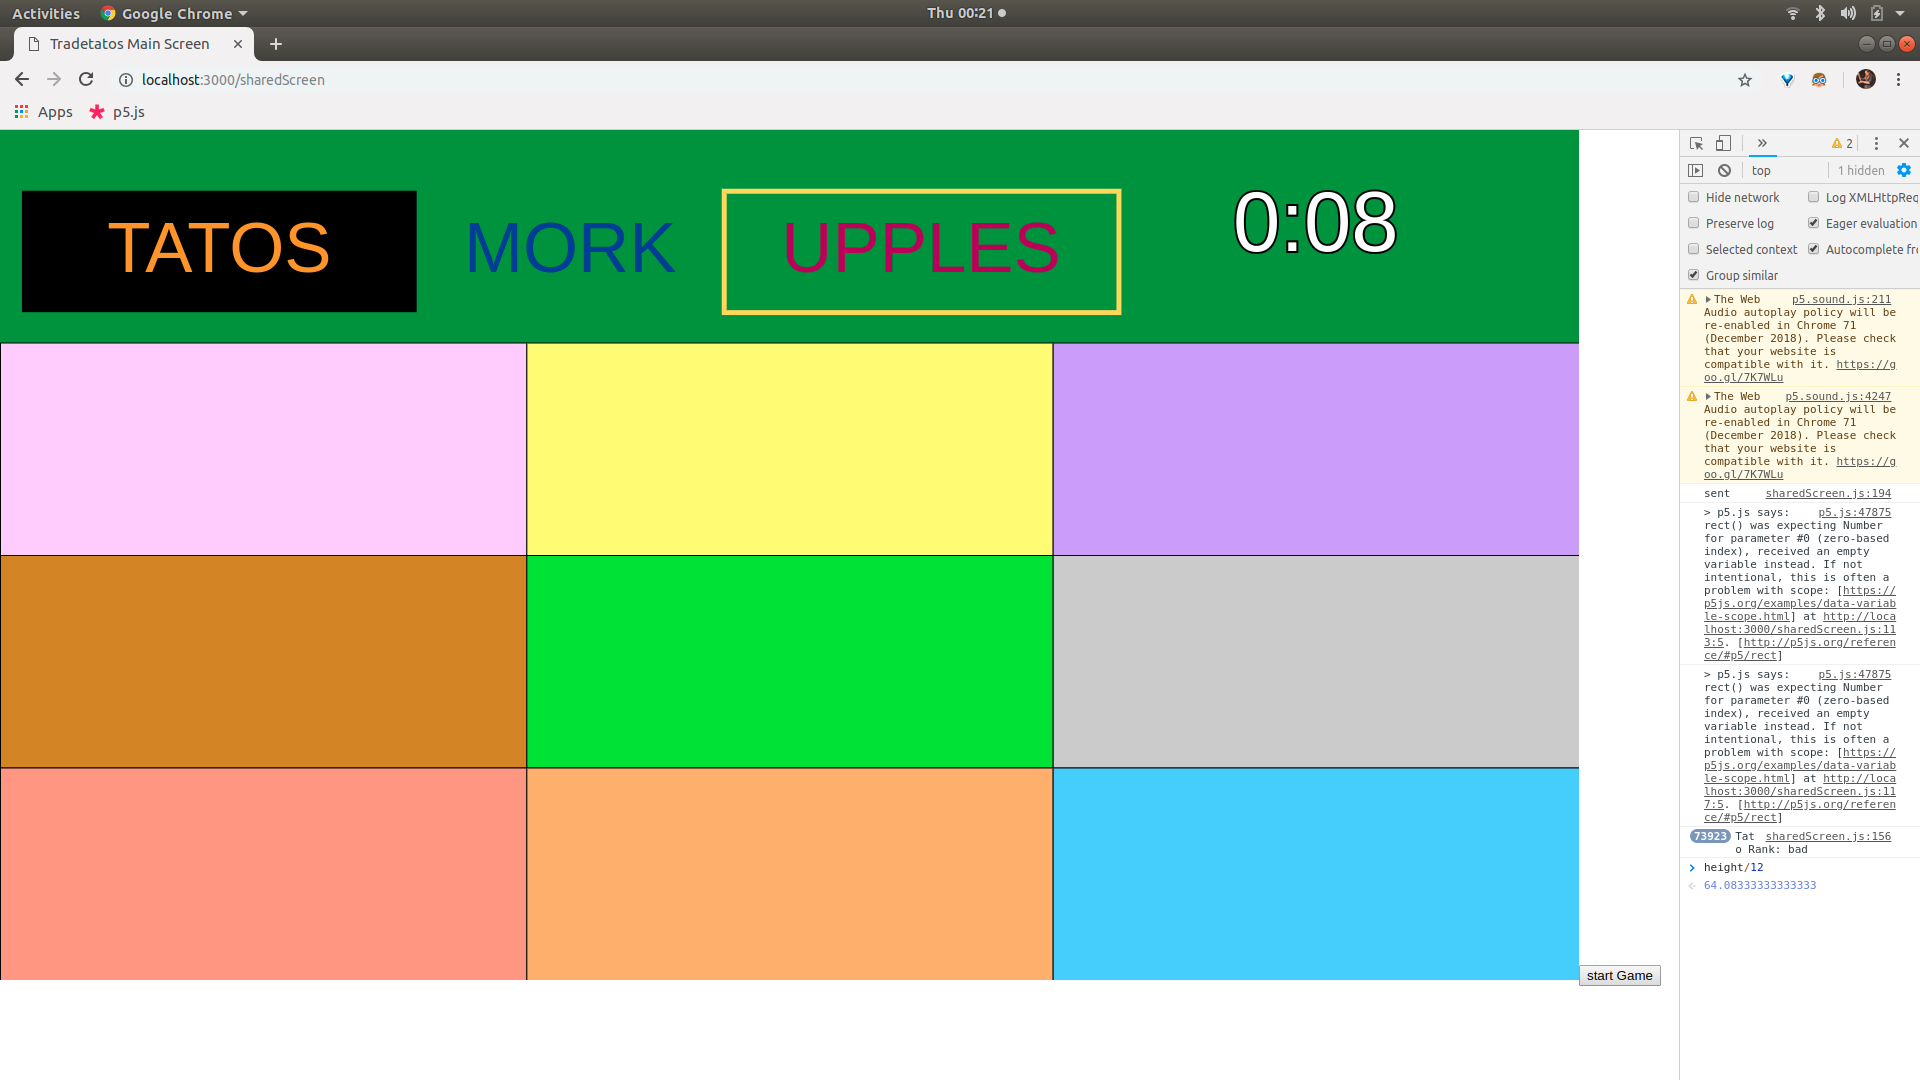
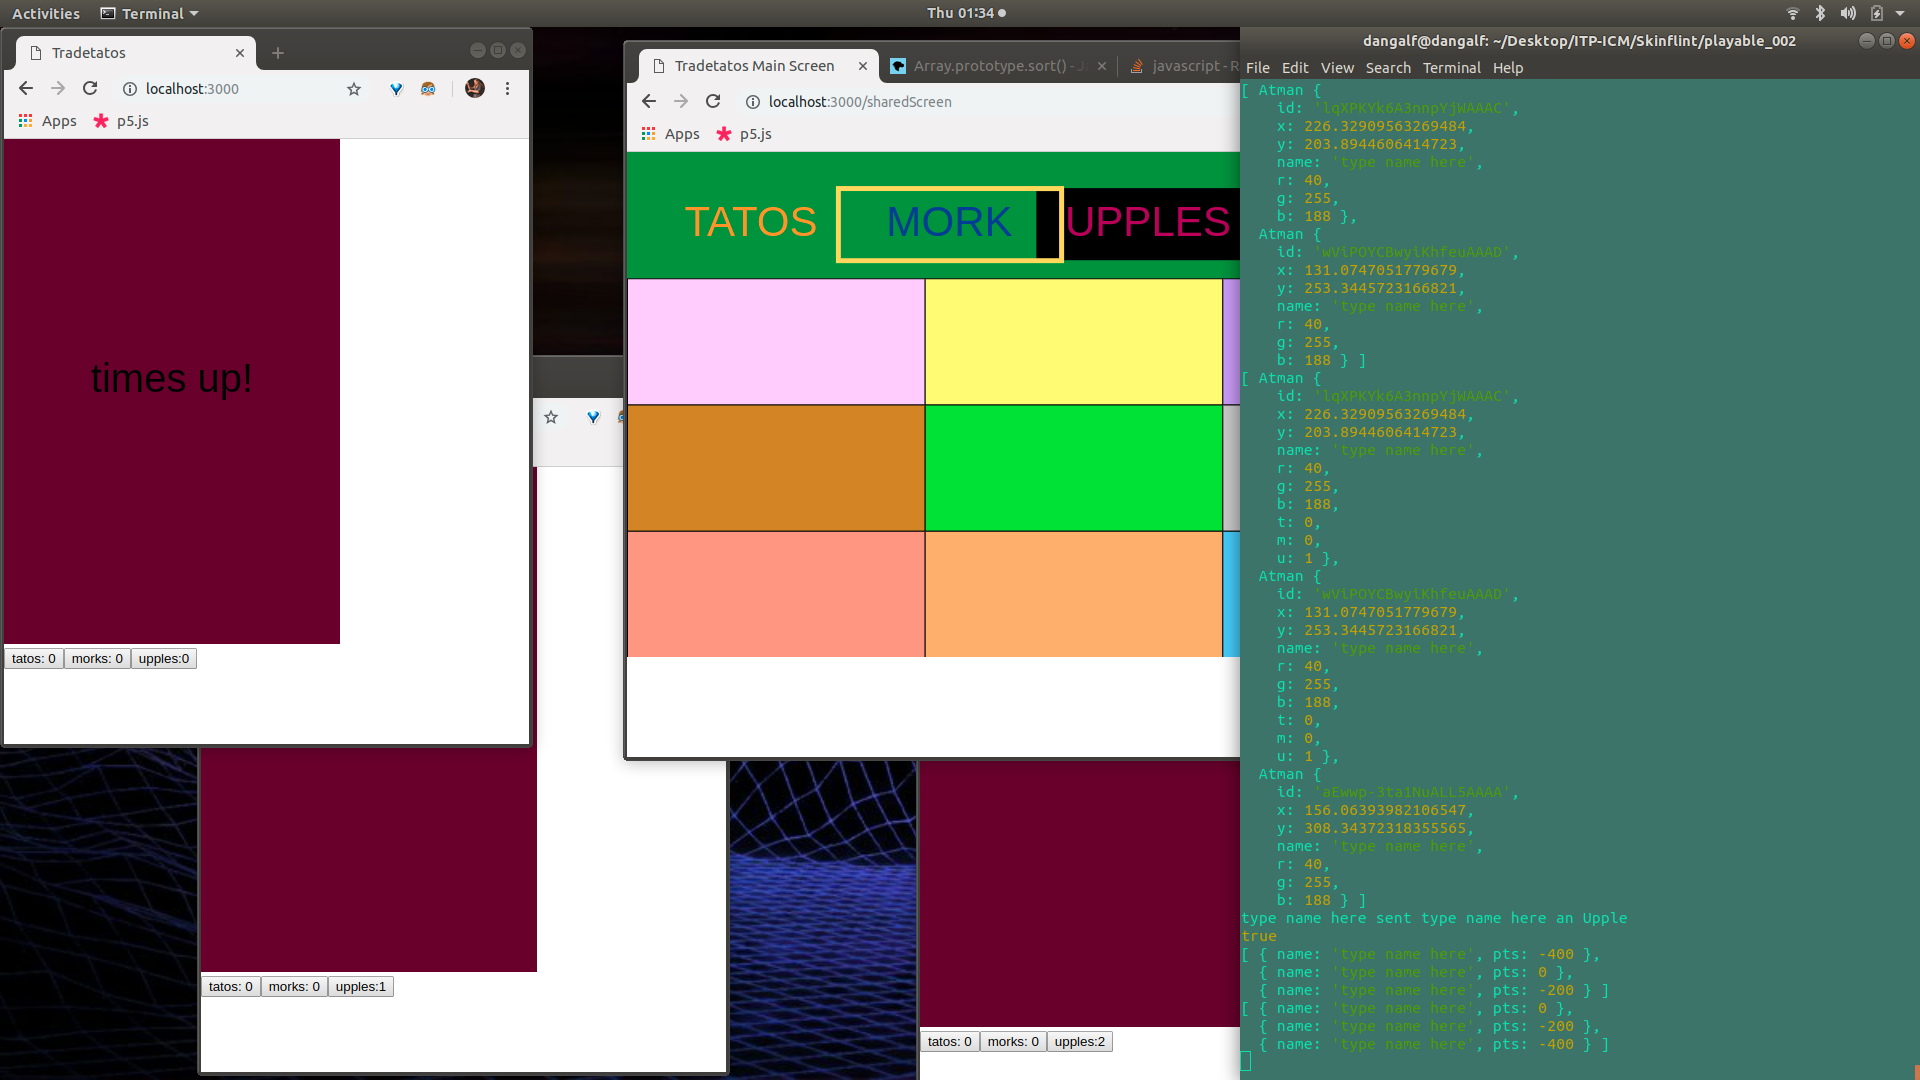
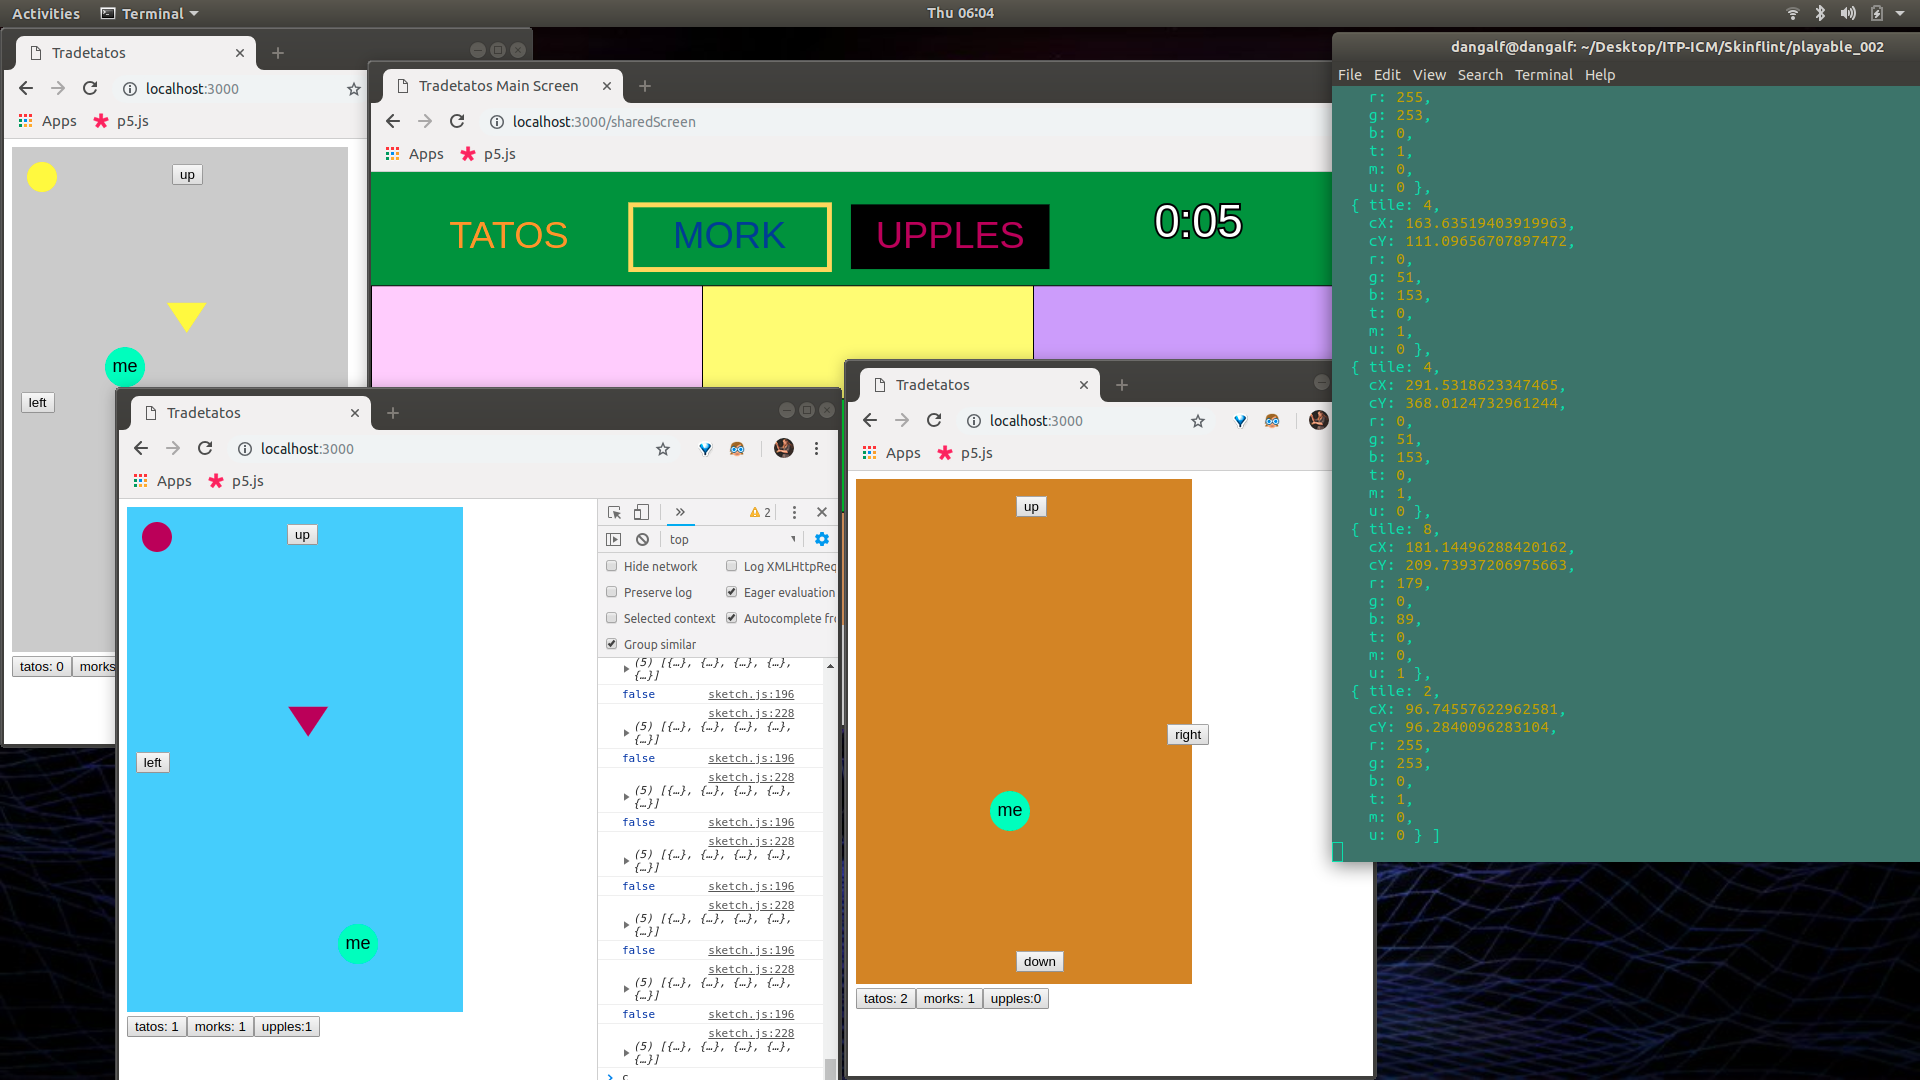
Here are some screenshots from the process, and I’ll go over the general flow below them.

View fullsize Screenshot from 2018-12-04 23-35-48.png
View fullsize Screenshot from 2018-12-04 23-39-32.png
View fullsize Screenshot from 2018-12-04 23-47-34.png
View fullsize Screenshot from 2018-12-05 00-08-23.png
View fullsize Screenshot from 2018-12-05 11-57-30.png
View fullsize Screenshot from 2018-12-05 22-07-03.png
View fullsize Screenshot from 2018-12-06 00-21-34.png
View fullsize Screenshot from 2018-12-06 00-45-24.png
View fullsize Screenshot from 2018-12-06 01-34-57.png
View fullsize Screenshot from 2018-12-06 01-45-14.png
View fullsize Screenshot from 2018-12-06 01-45-20.png
View fullsize Screenshot from 2018-12-06 02-25-01.png
View fullsize Screenshot from 2018-12-06 03-37-21.png
View fullsize Screenshot from 2018-12-06 04-01-56.png
View fullsize Screenshot from 2018-12-06 04-32-19.png
View fullsize Screenshot from 2018-12-06 04-34-38.png
View fullsize Screenshot from 2018-12-06 05-36-54.png
View fullsize Screenshot from 2018-12-06 06-04-00.png
  • So the first step was obviously to fix the problem I had during the playtest which was that the different screens weren’t actually able to communicate across the heroku-deployed server. This was much more of a hassle than I thought it would be. I scheduled office hours with Shawn Van Every that Monday as a back up, but ended up staying up all night sunday and figuring it out. Articles and Tutorials that I found online just weren’t helpful to me because they assumed a basic knowledge of web design (like the difference between an html file and a js file…), but once I spent a few hours getting up to speed on all that the rest was just trial and error. Changing the code from the Coding Train tutorial was the main step, I don’t know if his Agar.io code actually works… Once I had each client just connect to socket() instead of a specific socket like socket(3000) or whatever, that fixed the communication errors.

  • Then getting node to be able to send and receive messages from different js files was the next big thing. I had originally wanted to have a shared screen like jackbox, but figured that would be way harder (it was) so I started coding this to have a button where people could open different menus from their screen to see the map, timer, and economy indicators. I realized that was going to be way too cluttered and confusing, and that I needed to keep the user’s screen as simple as possible and offload all the shared information to the main screen. After messing around with file paths and eventually realizing I had to change the html files for each type of js file, I got the shared screen to be able to start a timer that would send a “times up!” message to the players after time ran out.

  • The atom picture was just to show my work environment, I ended up changing a lot of this code by the end.

  • Then I set to work on the shared screen, establishing the map tiles and their 3x3 grid. I just picked random colors that I thought would contrast the background and the fud icons. After playing with different layouts of the shared screen, I knew I needed to have the fud economy text match the user’s fud buttons (I tried getting the user’s fud buttons to change colors but couldn’t figure it out in time), and so putting the economy text and the timer on top was essential. I was worried having the map be stretched horizontal on the main screen would be confusing since the map tiles are vertical on the player screens, but in the end I don’t think people were even really paying attention to the map screen, so whatever.

  • I spent too much time messing with the scaling of the shared screen elements, since I wanted the text to be big enough but not overlap on smaller screens. Plus, I had to have the gold outline for the valuable fud and the black box for the spoiled fud, and when those overlapped it really bothered me too…

  • Once I was more or less satisfied with the layout of the shared screen, I set to work on the actual game functions, with the timer and fud calculations. I spent a lot of time on how the fud ranking system worked and how the server would handle all the fud information being sent from the players (on trades and pickups). I think the end result worked really well, with the server constantly tracking how much of each fud there was so that the rarest fud was the most valuable and the middle-quantity fud being the spoiled fud. Then when the timer ran out, the server would make a value calculation for each fud type based on overall percentage and applying the appropriate economy adjustment (x2 for the gold fud, x-1 for the spoiled fud). Then it would rank sort all the players based on their final scores and output the scores on the final screen. I had drawn up a really cool sorting algorithm during Apps class, but for some reason it didn’t work :( luckily Javascript has those things built in apparently… Getting the text to scale based on the number of players was interesting, but in the end I think all this section was great.

  • There was a huge chunk of time spent on trying to get the shared screen to communicate with the player screens well, but after messing around with the syntax I think I found a basic way to do it, but I’m sure there are better/more efficient ways besides just having a bunch of different events the server is reading and sending.

  • Then I had to get the map movement sorted out. The design went through a lot of variations, but I eventually settled on having prominent buttons on the player screen that would let them move around the grid, with their name being displayed on the main map to let them know where they were. I had an array to make sure that the direction buttons would only appear if the movement was valid, I knew it would confuse the hell out of people if they pressed a button and nothing happened. I assigned each player a random starting tile, and made sure their tile would have the same background as the matching tile on the main map. Getting the players to show up on the same map was tricky, but I ended up just including their map tile in the update object, so each player would only display another players avatar if their map tiles matched. This was later how I displayed the spawned fud too. This was the most conceptually crazy part I think, that in theory all the avatars were occupying the same rectangle, since there was no actual grid, there was just an array of objects that would contain players and only display the matching ones. Playing around with this movement was super satisfying.

  • Next was the fud generation, which I wanted to scale with player count, but ran out of time and ended up just having it spawn randomly every 3-20 seconds more or less. I had wanted to get fun assets to represent each fud type, but for simplicity’s sake, I just used triangles with colors that matched the fud text above the shared screen. Definitely not very intuitive, but I think repeat players would get it quickly. I had to make sure the pick up process was smooth and very specific since avatars would be fighting over these very quickly.

I wish I had gotten documentation of the playtest in class, since I haven’t had an opportunity to play it with anyone else since then. I’ll probably make my family try it over the holidays, but all in all, very happy with how this experiment in networked gaming turned out considering how little I knew about web stuff literally two weeks ago. Really eager to expand on this framework for the original game idea, Skinflint, and super happy I can use this as a template for the performance piece I’m doing for the winter show, Rhythm 0.0.2. Between all this and the “Collective Play” class I’m taking in the spring, I think I’ll have made some really rad stuff by this time next year. Stay tuned!

GITHUB LINK OF ALL CODE

To Do // Next Features to Implement

  • Be able to reset from the shared screen since player scores seem to persist if I don’t reset the server in between games.

  • Figure out how to organize my code. Do socket functions need to be in setup or draw or neither or does it not matter? Should I alphabetize my functions or have them listed in the order they’re used? Should I use shared variable names across server and client files or try and keep them unique to avoid confusion?

  • I’m not sure if mobile is working or not, I was having off and on issues where I couldn’t drag my avatar from mobile, and the map movement buttons were double clicking.

  • I also need to figure out the best way to scale the windows. I meant to try messing around with the mobile scaling advice from this awesome website (https://creative-coding.decontextualize.com/mobile/) but I didn’t have time.

  • Fix the fud spawning to scale to window instead of just (300,400)

  • I was using two different github repos for my code, one for heroku and one for local development, but that was super inefficient and a waste of time.

  • I want to have pretty code comments like Becca

  • I think people need a tutorial they can play after the character creation screen that explains the objectives, map movement, trading, and economy indicators. They could skip it if they’ve played before

  • I wonder if people would appreciate having a personal score screen on their device at the end displaying how much points they got from their fud types.

  • I need to figure out how to make the buttons different colors

  • Um, need to make it look good haha. Need to learn css.

  • Make another game.

categories: ICM
Thursday 12.13.18
Posted by August Luhrs
 

Animation: Unreal Engine Capoeira

I had lots of fun with this last assignment; I think there is just so much to explore in building 3D environments. If I had had more time, I would have loved to explore the game side of Unreal, since so many of my favorite games were built with this engine. I could see myself going a lot further down this path, maybe in conjunction with some AR/VR stuff, or my interest in weird 3D animations like Late For Meeting.

For this assignment, since I knew I wouldn’t have much time with all my other finals and the winter show looming, I decided to just build off of the world and characters I had made in the last class and to use the robust animation library (so much capoeira!). I mainly wanted to play with camera movement and exploring how distorted I could make the characters, so no emphasis on polish or detail really haha.

In the end, it was a lot longer than I had expected it to turn out, but I think it brings us on a nice little arc, especially with the music I found. All in all, it was nice to dip my toes into this type of software, and very eager to see what else lies beneath this mountain of confusing menus and screens.

categories: Animation
Thursday 12.13.18
Posted by August Luhrs
 

Design for Discomfort Final: Winter Show Performance of Rhythm 0.0.2

Since I don’t have documentation of my future performances yet, here is a placeholder with the notes I had before/after the last class. I’ll update the blog with my performance videos later next week!

Brainstorm // Questions for Class:

  • Commands

    • major issue — how to deal with the queue?

    • Should I have a queue of commands, one per user button press, or should I do a timed voting round, where every 20 seconds the command with the most votes gets pushed to the screen?

      • main consideration — much more emphasis on the group than the individual

      • could have running vote counts on display(top 3), to give voters a sense of urgency/pool votes

      • how does that play into the idea that some commands are continuous and some are one-off actions? doing 20 seconds of push ups is way different from eating a cookie for 20 seconds.

        • could have different round timers per action type?

      • is 20 seconds too long or too short? I just can’t imagine setting up the face shocker in any less than 10 seconds, but if 20 seconds, that’s only 180 commands per hour… I mean I guess that could still be a lot since I’ll do at least 360 commands, and depending on what that is, that’s a fucking lot…. if 15 seconds per round, that’s 240 per hour, potentially 960 commands per day… hmm. that’s a lot of cookies.

  • Space

    • 6x6’ space presumably

    • display screen back and to stage left/right (opposite table?)

    • table to side next to other project (sandwiching me between table and wall), where I place all props and the performer screen interface

    • do I need poster with instructions? or is url on display screen enough?

    • laptop on table for live streaming / screen capture

    • other camera in space for documentation?

  • Entrance Design

    • need to design so as to not need any direct audience guidance

    • Website

      • simple url landing page

      • intro and waiver

        • what do I say // how do I frame?

        • “From the next page, you will be able to press buttons to (vote/send) commands to my screen, which I will then perform.”

        • “Your input is totally anonymous, and I will not know who is sending me what command. Even if you are the only person standing here, someone across the country could have the app open, since I am also live-streaming this.”

        • “I have personally selected these options, but it is up to you to decide which I perform” (some sort of responsibility check?)

          • might stifle input

        • There is no personal log in, so personal statistics will reset if you exit the page

      • could have email input? for mailing list // sending them stats page of total commands over the Y minutes

  • App Design

    • just buttons?

    • menus of different categories? (muscles, mouth, skin, hands)

    • should I have personal stats page?

      • could be per press, stats like (% of other users have pressed that, I’ve done that X times already — for X seconds)

      • or could be at end, sending them what they’ve done over time

    • could have page you could click to to look at overall stats // your stats?

  • Display

    • time elapsed

    • current command

    • voting counts per round?

    • stats overall

  • Performer app

    • display current command so I don’t have to turn to screen

    • add/drop buttons

      • to remove or add options on the fly

    • pee break button, will send pause screen to all other screens

  • Assistant

    • needed?

    • could guide if users are confused

    • could run to get resupplies? fill water, etc.

  • Pivots

    • audience change places? not sure it makes sense

  • To Do

    • Stress Test

    • replace batteries of shocker

    • Any other interactions?

    • bring change of clothes

    • should have puke bucket on hand?

    • get cookies

Notes from Class Feedback:

  • Anonymity abstraction

  • Okay that user doesn’t feel responsible, that’s the point — regardless of how they feel, the result on me is the same (unless their feeling would adjust behavior)

  • Main questions

    • Space — user guide

      • Url on screen enough?

    • Queue or voting rounds

    • Statistics

    • Assistant needed?

    • Other interactions

      • Switching with audience

  • Present

    • Space guide

      • Explain process

      • Commands

    • Original Idea — perform today

    • Pivot — voting rounds

  • User space

    • More obvious the better, do as much signage as possible

    • Project space with projector \

    • Right above head

    • QR Code?

    • Block out space w/ tape

  • Pivot

    • No spam in code

    • Long queue

    • Prerecording?

      • Maybe a delay video projection

    • Assistant

  • Maybe just no spam

  • Could just cut the longer actions

    • Frenetic

    • More like an impressionsit painting

    • Button physical to skip to next command

  • Stats are totally secondary, don’t even think about them yet

  • SOUND feedback

    • Speaker?

  • Business cards

categories: Designing for Discomfort
Wednesday 12.12.18
Posted by August Luhrs
 

Intro to Fab: "Male Gaze (2018)" -- Motor Mounting

Alas, the time has come for the final fabrication assignment, one that beautifully encapsulated my experience making stuff for this class — agonizing over ideas, sourcing of janky materials, pivoting mid-way through, and both finishing and not finishing. It’s been a blast.

For this week’s assignment, to mount a motor onto something and to mount something onto that motor, I was conflicted on what to do. It’s finals, I don’t have a lot of time, I can’t order a ton of stuff with all the holiday madness — should I aim low to ensure completion, or should I take a risk and (probably) not finish… I was debating between two ideas.

I LOVED the inspiration link to Zimoun, an artist I had never heard of but now count among my favorites. Immediately after last class I watched this video and felt the ripple of influence across my life in 4 dimensions:

I’m a huge fan of art that takes a really simple, small component and uses 1,000 of them to do something really interesting. I can definitely see myself doing something similar in the future — mass quantity and huge footprints are attributes I appreciate in installations. But alas, I only had 4 motors in my kit, and even with a cheap DC Motor kit on amazon (20 for 12 bucks??? wow!), what would I do and how would I have the time to make 100 of something? Yeah, yeah, I could go smaller, but having 4 of something, or even 10 of something, just doesn’t compare to 1000 of something. You think 20 or 100 is a lot, and then you step back and realize volume SUCKS and your massive project is barely anything. I’m not bitter.

So plan B: what did I have on hand that could make for a good motor companion? Well I have over 150 transparent dildos because of this project, so I figured that was a good as reason as any to try and do something motorized with them. So I thought, dildos on DC motors? DCildos? That seems simple enough. But upon a perfunctory test, I realized it would be a lot of hassle (and some purchased shaft couplers) just to get the shaft to couple (eyyy) and that still wouldn’t be very interesting. Four dildos spinning in place? *Yawn*

I’ve been kicking around a concept for over a year that I call “Male Gaze” which would be a room full of dildos on mini bleacher stands, all hooked up to motors that adjust their position based on motion tracking software detecting people in the room. There are possible other variations, some messier than others, but that’s the core concept.

For anyone reading this unfamiliar with the term “male gaze”, I was advised that you might appreciate a definition:


”In feminist theory, the male gaze is the act of depicting women and the world, in the visual arts and literature, from a masculine, heterosexual perspective that presents and represents women as sexual objects for the pleasure of the male viewer.” — The All-Knowing Wikipedia

So anyway, I thought, hmm, maybe one dildo is enough in this case, perhaps even better than four; I’ll get one of those pan/tilt servo things we saw in class, strap the dong on that bad boy, and use some sort of face tracker web cam thing to have the dildo always point to the person’s face (and I’ll even throw a googly eye on there). It would be a prototype of the bigger room, but still a complete entity in its own right. Now we’re cooking with gas. But wait, I have to order a pan/tilt servo thing…

Hence the dilemma:
Do I try and rush ship a PTST (Pan/Tilt Servo Thing) and only have a couple days to try out a brand new type of interaction with tech that I’ve never used before? Or do I just put the dicks on the DC motors and call it a day? Well I told myself to play it safe and not do the PTST & face tracking combo, and I had myself believing that for a whole half day! Pshh, like I would just put dildos on DC motors like some amateur. Unfortunately that half day was just long enough to push my shipping date back to Sunday, and then because of life, that got delayed until monday night. So I didn’t have the PTST in hand until Monday at like 8pm, but nevertheless, with the help of some caffeine, I hunkered down and began to make some magic:

THE PLAN:

Use a dildo attached to a Pan/Tilt Servo Motor to follow a user’s face based on face tracking software coming in through the camera on a raspberry pi.

View fullsize 1211180021.jpg

At first when planning the design, I planned on doing two dildos each with one eye. I was really intrigued by the example passed around class of the ping pong ball eyes controlled by one lever in the back — it would be great to do something like that since the eye movement was so realistic. But I was a bit hazy on how the motor would fit in with that, and the thought of adhering the dildos to a round surface with all the weight jutting out like that… no. So then I thought, well I could get two PTSTs and then they could each just get the same signal, but then imagining that movement led me to believe it wouldn’t be realistic eye movement. Which was good because I could only get one PTST shipped quick enough. I considered doing two dildos on one, but I was worried about weight and once I saw how insanely tiny the PTST was, I knew I had to stick with one. But I think it worked out for the best.

So upon some quick google searches, it seemed like the best plan of action would be to use OpenCV with Python on the Pi and control the servos with a prepackaged script from Pimoroni or some servoblaster library. There were a lot of PTST face tracker apps already out there, so I figured it would be a piece of cake to just drag and drop the files into my project. Hoo Boy… It’s never that easy. To go over all the issues I had between 8pm and midnight would take a whole other blog post, but they include me being a Linux N00b, the articles I was copying were Six Years OLD, and one of my servos being broken out of the box (I think). Suffice to say, I had a moment of reckoning at midnight where it felt like I had made negative progress, and I knew I wouldn’t have time the next day to figure anything out, I had to have this thing working by the time I went to bed or abandon all hope. So with one last ditch effort, I took a sharp detour, went back to the shameful safety of Windows, and found redemption:


PLAN B:

Use a dildo attached to a Pan/Tilt Servo Motor running off an arduino to follow a user’s face based on a p5 sketch running PoseNet coming in through the a webcam on my laptop.

I don’t know why I don’t just start with Tom Igoe’s code everytime I do a project. It’s sure as hell where I always end up. After finding the gold mine that is (surprise surprise) the ITP PComp online tutorials, I knew I could get something to work. The above video was my final test at 430am.

I had to change a lot of my intended designs with this shift, and because the top servo was giving me hell, I limited the motion to one axis (horizontal). I was a bit nervous using poseNet for the first time, but after messing around with the default example, knew it would be super easy to implement if I just ignored everything but the nose object, and used that to dictate where the servo should point. The biggest hassle was figuring out how to get the right info sent from p5 to the arduino over serial. I’ve done a few projects with serial but I feel like every time I do, I have to completely relearn the core concepts of binary and ASCII text and all that fun jazz. Luckily I found a forum post that helped me get the arduino to filter the incoming string messages and only send them to the appropriate servo (since I was sending X data to the bottom servo and Y data to the top servo, or so I hoped). Then it was just tweaking the mapped values and having to reset the serial server over and over. But it did the thing! And it was good.

Then I had to go back to the drawing board for what the actual mounting would be. I had first envisioned a box with the PTST mounted on top, the pi camera peeking out of a secret hole in the front, and a neck tie draped over the front for fun effect. The box would feature totally self-contained tech/hardware, with just a power cable coming out, but now that the laptop was here to stay I had to figure out what to do. I also figured I might need to go get more screws because the PTST obviously didn’t come with any, and I only had two SUPER TINY screws. When I got up in the morning — EXHAUSTED — to go find a box at the container store (no more shoe boxes for this boy!), I threw the necktie onto my desk and realized… Hey, I don’t need a box. I’ll just mount the PTST directly to the triangle knot of the tie, and ditch the box since I don’t have a whole lot of hardware I can fit in there anyway. Plus, I can sew the motor onto the tie through the screw holes, and not have to go buy screws or a box! Hooray! As the Dan Shiffman of Painting would say, “a happy accident”.

View fullsize 1211181224a.jpg

Working on the floor was a lot of fun. I generally don’t do a lot of my microcontroller based work there just because I keep all my hardware stuff at home (I can’t fit it in my locker/toolbox/shopbin…). But circumstances necessitated it, and I was happy to place my dildo center stage in the lounge. Got a lot of fun looks and conversations out of it, including a visit from the man behind my curtain himself, Dan Oved! It was an honor to have him see my application of poseNet. When I got to sewing, my friend Idit showed up like the fairy godmother of fashion design and textiles and offered some sage wisdom (and helped thread my needle once).

I grabbed some scrap wood from my bin because I knew the tie wouldn’t be able to hold up the rotating servo on its own, so I made a little base by stapling the tie down to the wood. For mounting the dildo to the PTST, I considered adhesives, tape, cock ring around the plate, etc., but at the end of the day, I decided a clear zip tie threaded through the plate would be the simplest and most effective solution. To get the googly eye to stick to the silicone, what else to use but my trusty Goop?


SO FOR MY FINAL FABRICATION ASSIGNMENT, I USED:

THREAD, STAPLES, A ZIP TIE, and GOOP

I’ve really come a long way, haven’t I?

View fullsize 1211181442.jpg
View fullsize 1211181457.jpg

For the final touches, I got a wig I had in my locker and tried to spice things up with it. I figured it could work as an enclosure of sorts for the arduino, to reduce the amount of exposed wires since I had so many that were unavoidable.

All that was left after that was to sit back and watch the horrorshow unfold.

At the end of it all, it definitely feels (and looks) rushed, but I’m happy that I took the risk and made something that works. My take on this piece, and pretty much every fab assignment, and pretty much any project I’ve ever done is:

You can always make a good idea look better later, but a shit idea will always be shit, no matter how much you try and spray paint it gold.

Next steps would be to make it work more reliably (with two axis servos and a better reset for the sketch), and to really focus on the appearance. I think my end goal for this iteration of Male Gaze would to have a tiny subway seat that the tie was draped over, with the servo secretly mounted to the heavy plastic, and a tinier wig floating above the moving dildo. Maybe for the spring show ;)

Fun ideas after feedback from class:

  • would be great to have the servos hidden

  • could incorporate an eye into the actual dildo itself, or even have an eye that could blink with a motorized lid

  • wear the tie in a conversation and have the interruption be the point

    • could even lose the dildo and have the tie itself erect (similar mechanism to Peiqi’s penis wall)

  • Should collab with Andri on sex-ed stuff

View fullsize 1211181503.jpg
View fullsize 1211181526.jpg

LINK TO GITHUB w/ ALL THE FILES

categories: Intro to Fab
Tuesday 12.11.18
Posted by August Luhrs
 

Designing for Discomfort: Reading Response #5

  • Jordan Wolfson’s Violence VR

    • wow, that’s hardcore

    • the focus on passivity was an interesting choice. i wonder what it would be like if participants had the option to move their avatar closer/farther away, it seems especially cruel to make the user cemented in place as if paralyzed. though, would it be crueler to make them seemingly have the option to stop the violence by moving between the aggressor and victim, but in reality there’s nothing they can do to stop it, no matter how hard they try?

    • hmm the metal bars are a curious touch, seems strange to focus on that when the bars aren’t a part of the scene

    • the instagram video of the person’s face as the scene unfolds is so unsettling

    • yeah, I wonder how this piece would be perceived if it had a pop-up show at a trump rally…. so scary.

    • i don’t know if i agree with the conclusion — i don’t think it’s possible to have violence without context. I don’t think it’s possible to have anything without context.

  • Nietzsche Brain Pickings — Embracing Difficulty

    • reminds me of Brene Brown’s stuff on vulnerability, which I love

    • A professor I had at a poetry workshop in Paris told me the best thing once: the best gift you can give a writer is a broken heart

    • totally agree that hardship and joy operate in an osmotic relationship. I once wrote an essay referencing a part of Khalil Gibran’s The Prophet, where the core concept was that our sorrow carves the cup of our soul deeper, for it to hold that much more joy. A teacher of mine in high school once compared it to a ruler in a mirror, the more you try and diminish the amount of one, the more the other diminishes. I think you see that a lot in people with depression, they’re either someone you think of publicly as the happiest person in the room (and then they kill themselves), or their depression is more of a total numbing to emotion.

    • I actually have a lot of feelings on this concept haha, which is why I was so interested in taking this class in the first place. A tattoo I want to give myself one day is a quote from Pema Chodron that fits nicely with all this — It is only by exposing ourselves over and over to annihilation that that which is indestructible can be found within us.

categories: Designing for Discomfort
Wednesday 12.05.18
Posted by August Luhrs
 

Intro to Fab Week 12: Materials and Adhesives

For this week’s assignment, I wanted to keep it easy, breezy, beautiful. Faced with the seemingly infinite possibilities of creating a piece where two different materials were joined together, I decided to start with what I had on hand and just go from there. So i went to my handy dandy tool bag and dug out all the adhesives that had made the travelling team from Los Angeles, along with my sad bag of zip ties.

View fullsize 1203181242a.jpg
View fullsize 1203181246.jpg

Then, wanting to stick with the “free” motif, I made a jaunty trek over to the shop to peruse the treasure trove that is the free-shelf/dumpster. In all of 34 seconds, I picked up three different materials, and by Jove, the muses granted me a lighting bolt of inspiration. I held Art in my hands:

View fullsize 1203181243a.jpg

Only two questions remained: What true form lay beneath these humble materials and how would I encourage them to cooperate and unlock their hidden beauty?

For the latter, I made a pilgrimage and consulted the all-knowing oracle, This to That, and lo and behold, I had known the answer within me all along. The answer is always Goop.
So I had a plan for the acrylic and plywood, but what of the ficklest member of this divine trio, the cardboard? What part would they play in this ménage à trois? I had considered laser cutting the acrylic to create slots or holes the cardboard could interact with, but a voice in my head warned me to not use mystery plastic in the laser cutter, and I obliged. Wanting to explore the cardboard’s natural features, I ran my fingers along their many-orificed edges and found myself thinking back to the zip ties. I would use the zip ties as a bolt and the cardboard as a giant sliding nut! I drilled the holes in the ply wood and delighted.

View fullsize 1203181250.jpg
View fullsize 1203181302.jpg

Then for the tricky task of joining the acrylic to the plywood with the Goop, I knew clamps would not help me, and I didn’t want to waste time on a jig or some other devilish device of stabilization. Once again drawing on my innate resources, I turned to my hurricane tape and decided to use it as an Olympic athlete might use joint tape. Why hurricane tape over any other tape, you ask? I was really digging using the stuff I had brought with me from L.A., and it ultimately was a perfect amount of support without sticking too much or leaving any residue. So using a natural brush (a flake of plywood veneer that had fallen off), I set to work on bringing together a more perfect union:

View fullsize 1203181330.jpg
View fullsize 1203181334.jpg

Then, channeling my inner mother-hen, I sat and waited for my creation to emerge triumphantly into existence… I went to Moma with my partner and found out that Duchamp had clearly used my idea as inspiration for one of his pieces. It was okay, but I think the arbiters of art history will smile kindlier on the better of the two (mine).

1203181539a.jpg

The next day, I excitedly returned and finished assembling my fabulous Frankenstein. I tried different orientations, eventually eschewing my initial brutish, vulgar design (cardboard in front, zip ties protruding) for a more coy, more exploratory approach (cardboard behind, zip tie “bolt-heads” in front). I also knew the correct orientation was to have the cardboard’s naturally exposed ridges grazing the back of the acrylic, symbolizing the teeth of God nibbling upon the human condition. This allowed the plywood to really shine, as I wanted to highlight the brave choice of the plywood to molt its veneer, emerging cicada-like into its new life as art masterpiece:

1204181102.jpg
View fullsize 1204181100.jpg
View fullsize 1204181103a.jpg
categories: Intro to Fab
Tuesday 12.04.18
Posted by August Luhrs
 

Animation Week 11: Drag Race Final Video

I have a feeling this is going to get taken down any second due to audio copyright:

categories: Animation
Thursday 11.29.18
Posted by August Luhrs
 

Designing for Discomfort Week 11 pt. 2: Rhythm 0.0.2 (Final Project Proposal)

Rhythm 0.0.2

Final Project Proposal

For my final project, I’ve decided to build from one of the previous challenges and do another iteration of my performance art piece Rhythm 0.0. I outlined my idea for complete fruition of this piece in my previous blog post for Rhythm 0.0.1, so I’ll just go over my goals and plans for this specific prototype.

Summary

Rhythm 0.0.2 is a performance where I will occupy a room on the ITP floor for at least two hours while onlookers can anonymously send me commands over their phone for me to perform. The audience will be within eyesight of me, but hopefully there will be enough people on their phones that I won’t be able to tell who is sending me what. There will be a screen in the room with me, probably big and on the wall so the people can see it also and so that I can receive the prompts without having to check my phone. I might have a device on me to just highlight the commands I’ve already performed, but other than that I will probably be in constant motion, acting out the prompts. The commands will range from repetitive and physically tiring motion, to consumption of food, to removing/adding articles of clothing, to self-inflicted pain or electrical shocks, and more — running the gamut between good/bad.

User Command Options

  1. Muscles

    1. do an ab workout

    2. jump on one foot

    3. hold a handstand

    4. dab

    5. stretch

  2. Mouth

    1. eat a cookie

    2. drink water

    3. suck on a lemon

    4. deep breath

  3. Skin

    1. flog yourself

    2. shock yourself

    3. slap self in face

    4. (belly flop?)

  4. Hands

    1. paint your body

    2. juggle dildos

    3. take an article of clothing off

    4. put an article of clothing on

    5. stop performance (only unlocked after 2 hours, or if I unlock during performance)

Goals

  • I haven’t discovered the ultimate purpose/message of this piece yet, because I haven’t performed it enough. But I’m interested in the main question of: “What would Marina Abramovic’s Rhythm 0 have been like if the audience could have interacted with her body anonymously? I’m not trying to say anything profound about cruelty in chat rooms or senseless violence so much as I’m just trying to make a thought-provoking game that uses my body as the medium. It’s not very game-y right now, but in future iterations I hope to make each user a distinct player with stats, unlocks, and rewards. Further than that though, I hope to explore something I think about every time I make interactive art — audience agency. I want to know what people feel when they realize my body is at their fingertips — whether it makes them feel powerful or powerless or neither.

  • I also want to explore what effect this power or lackthereof has on the user, especially in circumstances where they choose something painful or hard for me to do. My second performance art piece ever included me and one of my best friends branding my chest with red-hot metal on stage, and I always say that it hurt him more than it hurt me. Was it cruel of me to ask my friend to torture me? Will my audience for this piece resent me for making them feel complicit in my pain?

  • Stats page? Will hopefully have some sort of data display in the room or on the app where people can see a graph of some sort counting how times I’ve done each action (sent from my device?) Originally this was to display a “red vs blue” style team tug-of-war where the actions would be categorized as either good or bad and users would see which type of action was “winning” overall.

  • I will hopefully get feedback from a comment box or text input on the website, to hear what people’s thoughts are and if they have any other ideas for commands. In 0.0.1 there was an option for people to write out their own commands but I think it led to the opposite-intended effect where people were reluctant to put any commands because they wanted to put something clever.

User Personas

  1. Role-based

    1. Many users of this playtest will simply be playing the role of a supportive friend, and will want to interact minimally and only enough to make them feel like they are helping my art (usually something positive, unless they are a good friend, then they will do the extreme ones — I’ve found that only your best friends love you enough to be cruel to you).

    2. Some will take the role of stress-tester / troll and will delight in pushing me and my piece to its limits. I was hoping for some of these people in my first playtest, but no one opted to choose hyper-repetitive actions.

    3. I wonder if anyone will take the role of protector and feel bad enough to try and skew the actions towards good ones or at least ones that are easier for me to perform.

User Journey

  1. User encounters me in the room, or a crowd watching me in the room.

  2. Either by asking someone or by seeing the big sign over the room, they see they can log onto a website to interact with me.

  3. Pulling up the website, they see a series of menus with different buttons. Each button has clear labels of what each action is.

  4. After pressing a button, they can look to the screen inside and see their action queue up behind the others.

    1. They might be annoyed at the way the queue unfolds?

  5. The rest of the experience is a feedback system of watching me and pressing buttons until either they get bored and leave or the performance ends.

Visuals

View fullsize marina.png
View fullsize 1105181325.jpg
View fullsize 45481191_1626053574368080_5597174034090426368_n.jpg
View fullsize 45487663_1566903120076491_6440469319104069632_n.jpg
categories: Designing for Discomfort
Wednesday 11.28.18
Posted by August Luhrs
 

Intro to Fab Week 11: Death Box Quiz Thing

20181127_184825.gif

I was originally thinking about doing one of two things for this week’s assignment:

1) a control board game where I would have a panel full of various buttons, knobs, displays, and the like and create a group puzzle game where a group is trying to find the winning combination of settings to complete the puzzle, but one person at a time. One player enters the room with the board and takes one action (flips a switch, presses a button, etc.), then the board gives some sort of feedback to let the player know if they were going in the right direction with their action. Then that player would switch places with the next player in the group, and as they pass each other, the first player can say one simple sentence to the second, to hopefully give them an idea of what to do next to get the box towards the win state. Thought it would be a fun social experiment / team building exercise while also tapping into everyone’s natural inclination towards flipping switches and pressing fun buttons.

2) Another idea was an enclosure for a different project of mine that’s been sitting on the shelf, the Deathwatch. I’ve been wanting to redesign it for a while, to make it waterproof with a clear enclosure that would still show off the cyberpunk guts. Then I realized I didn’t have enough time and rather than continue the trend of half-finishing my assignments, I should double up with another class assignment.

So it was great that this week I had to make a memorial for Designing for Discomfort. Since the prompt for that was to make a memorial that would exist in a physical location and bring attention to an important topic you feel goes under-noticed in society, I knew I wanted to make it about mortality and impermanence. I figured I could do a spin off the Deathwatch and make it a physical installation as opposed to a wearable, but still inspired by the same quote from G.I. Gurdjieff:

"The sole means now for the saving of the beings of the planet Earth would be to implant again into their presences a new organ … of such properties that every one of these unfortunates during the process of existence should constantly sense and be cognizant of the inevitability of his own death as well as the death of everyone upon whom his eyes or attention rests. Only such a sensation and such a cognizance can now destroy the egoism completely crystallized in them..."

So I decided to stick with the idea of giving an expiration date to the user, hopefully setting them up to think about what it would really feel like if that was the true day of their death. I wanted to sort of trick people into getting that message by having them blindly interact with a seemingly fun game only to have that twist at the end. I also thought it would be better to make something interactive and light as opposed to a memorial that was very heavy and uninviting. So the box experience was:

  1. Users see the box, buttons and display lit up, with a message “Press One”. The colors of the message (“Press” in white and “one” in green) correspond to the colors of the giant arcade buttons to the top and bottom respectively. Hopefully that’s enough leading to get them to choose and press a button.

  2. Then a random assortment of binary “this or that” questions are presented in the same color structure. There are twenty different pairs that could be displayed (“teeth/toes”, “daddy/zaddy”, “PB&J/pizza”, “3 kid/3 $$$”, etc.) and after they make 6 choices, the display reads “look below”.

  3. The display and a noise leads them to look on the front of the box, where a small receipt is being printed. Once it’s done, they rip off the paper and receive their message, which reads “Congratulations! You have: X years, Y months, and Z days left to live. What will you choose next?”

The choices are totally arbitrary, the arduino doesn’t even record which button was pushed, it only increments a countdown until they’ve made 6 choices. I wanted to get across a funny, absurd flavor for what living is like, you make all these stupid choices, and then it doesn’t really matter either way, because you’re going to die no matter what. The death-date prediction was based off the Deathwatch statistical sketch, but I adjusted the probabilities to make it skew toward sooner deaths. It’s not as interesting when 90% of the people live until they’re 81; I wanted people to really have to think, “What if this is right and I only have 9 more years left to live? What then?” Which I hope is guided by the last message of “What will you choose next?” — I usually don’t like being so overtly self-help, but I felt like the receipt was disconnected from the buttons without that last part. I was excited to be able to use a mini printer for the first time, and hopefully they can keep their forecast like a fortune cookie.

The build went nice though, it was my first time doing stuff with arduino since coming to NYC since I waived PComp, and I was worried I would be rusty. But I got it all done in one day, learning two new libraries (for the RGB matrix and the mini printer) and remembering how much i hate debouncing buttons in the process. For the enclosure I was originally going to go to the container store and do that thing we saw in class where you can laser cut the top and just slide it into a premade box, but because of the snow last week, I had just bought my first pair of waterproof boots and realized the shoebox was perfect. I love using cardboard, so I was really stoked that I could re-purpose the box instead of just trashing it and buying a different one. I thought about laser cutting it, but figured that was way over-engineering it since I’ve gotten plenty far with just an X-Acto knife in the past. That turned out to be perfect, and I cut the button holes so precisely that I could actually screw in the buttons to the cardboard. That got me a little hot and bothered. The wire-hell inside has yet to be addressed, but that’s only because I worked entirely from home and all my jumper wires and stuff like that are at school, so I’ll hopefully be able to clean it up before class tomorrow.

Overall, really happy with how it turned out, and excited to leave it up tomorrow during the day and see what people think of it (and their inevitable demise).

View fullsize 1126181311.jpg
View fullsize 1126181310.jpg
View fullsize 1126181311a.jpg
View fullsize 1126182046.jpg
View fullsize 1126182211_HDR.jpg
View fullsize 1127180155.jpg
View fullsize 1127181442.jpg
View fullsize 1127181442a.jpg
View fullsize 1127181452.jpg
View fullsize 1127181502.jpg
View fullsize 1127181515.jpg
View fullsize 1127181536.jpg
View fullsize 1127181518.jpg
View fullsize 1127181542_HDR.jpg
View fullsize 1127180203.jpg
categories: Intro to Fab
Tuesday 11.27.18
Posted by August Luhrs
 

Designing for Discomfort Week 11: Memorial

Memorial:

Death Box Quiz Thing

Since the prompt for this week’s assignment was to make a memorial that would exist in a physical location and bring attention to an important topic you feel goes under-noticed in society, I knew I wanted to make something about mortality and impermanence. Death is something I try and embrace, with my goal to be keeping a near-constant awareness of my own mortality and that of everyone around me, in order to appreciate life, keep things in perspective, and ironically, to keep things light and fun. I figured I could do a spin-off of a previous project, the Deathwatch, and make it a physical installation as opposed to a wearable, but still inspired by the same quote from G.I. Gurdjieff:

"The sole means now for the saving of the beings of the planet Earth would be to implant again into their presences a new organ … of such properties that every one of these unfortunates during the process of existence should constantly sense and be cognizant of the inevitability of his own death as well as the death of everyone upon whom his eyes or attention rests. Only such a sensation and such a cognizance can now destroy the egoism completely crystallized in them..."

So I decided to stick with the idea of giving an expiration date to the user, hopefully setting them up to think about what it would really feel like if that was the true day of their death. I wanted to sort of trick people into getting that message by having them blindly interact with a seemingly fun game only to have that twist at the end. I also thought it would be better to make something interactive and light as opposed to a memorial that was very heavy and uninviting. So the box experience was:

  1. Users see the box, buttons and display lit up, with a message “Press One”. The colors of the message (“Press” in white and “one” in green) correspond to the colors of the giant arcade buttons to the top and bottom respectively. Hopefully that’s enough leading to get them to choose and press a button.

  2. Then a random assortment of binary “this or that” questions are presented in the same color structure. There are twenty different pairs that could be displayed (“teeth/toes”, “daddy/zaddy”, “PB&J/pizza”, “3 kid/3 $$$”, etc.) and after they make 6 choices, the display reads “look below”.

  3. The display and a noise leads them to look on the front of the box, where a small receipt is being printed. Once it’s done, they rip off the paper and receive their message, which reads “Congratulations! You have: X years, Y months, and Z days left to live. What will you choose next?”

The choices are totally arbitrary, the arduino doesn’t even record which button was pushed, it only increments a countdown until they’ve made 6 choices. I wanted to get across a funny, absurd flavor for what living is like, you make all these stupid choices, and then it doesn’t really matter either way, because you’re going to die no matter what. The death-date prediction was based off the Deathwatch statistical sketch, but I adjusted the probabilities to make it skew toward sooner deaths. It’s not as interesting when 90% of the people live until they’re 81; I wanted people to really have to think, “What if this is right and I only have 9 more years left to live? What then?” Which I hope is guided by the last message of “What will you choose next?” — I usually don’t like being so overtly self-help, but I felt like the receipt was disconnected from the buttons without that last part. I was excited to be able to use a mini printer for the first time, and hopefully they can keep their forecast like a fortune cookie.

Overall, really happy with how it turned out, and excited to leave it up tomorrow during the day and see what people think of it (and their inevitable demise).

Reading Responses

  • Doris Salcedo — The Materiality of Mourning

    • I think there’s a lot to unpack with the idea of using “permanence” to demonstrate “impermanence” — or rather, using the less impermanent to call attention to the impermanent (or I guess in the abstract, the infinite… I digress.).

    • Wow, would love to see some of her concrete sculptures, they sound incredible. Giving me a lot of ideas… I should try out concrete.

    • Wow, the grass table coffins. Damn.

    • The first thing that came to mind for something that I could do in a similar vein would be to make sculptures referencing the cartel violence in Cuidad Juarez that was happening throughout my adolesence and peaked during my highschool years. So many stories coming across the border with my classmates — bodies cut up in coolers and sent to families during Christmas for “tamales”, decapitated men in women’s lingerie hanging from highway signs, and many other horrors — that lend so well to this kind of stark visual representation in a sculpture. But those aren’t my stories to tell, my family was lucky enough to not have felt any of the violence first-hand, so that’s not something I plan on pursuing. Lot to unpack there as well.

    • I think public art as direct action is something I really want to explore further and could possibly be the most important day-to-day application of art, in my opinion."

    • “Solitary making but collective art”

    • “Making by unmaking'“

    • This is really challenging me to think about how to make my art mean more. I’ve always embraced an absurdity and anti-cerebrality to my work, but perhaps I need to step out of my comfort zone and try to actually say something…respond to something… make a conversation about something…

    • It’s interesting to hear her constantly refer to these works as acts of mourning, because they are represent entire peoples and countries, whereas I’ve done a lot of work and research on very personal mourning. But it’s the same, I guess.

    • Brainstorm

      • something iterative, repetitive, using small pieces but huge

      • in a park? but how to clean up? what could remove itself but not be litter?

      • something that reminds them of their mortality

        • button you press and it just tells you you’re going to die (boring)

      • making by unmaking — self-destruction box

        • button — press me — “this box will destroy itself after 1,000 button presses. You are press number 23.”

        • or “the person who pressed the button last is now dead. You will die the next time this button is pressed. Plan accordingly.

      • shredder box

      • Harrison Bergeron box would be fun, performative

  • Sam Durant Doesn’t Need Defending

    • This is something I’ve thought about a lot as an affluent, white, male-presenting artist, so I’m eager to hear what’s presented.

    • “Protest isn’t the same as censorship: The former is done by those who lack the power to change a situation, the latter by those who have it.”

      • I’ve never heard this phrased like that, makes a lot of sense. I practice a lot of double-think when it comes to censorship, so debates like this always get me agitated haha. On the one hand, I think censorship (by power or protest) is completely antithetical to the entire purpose of art, but at the same time, I think there’s a lot of bad art — art that’s irresponsible, cruel, and/or oppressive — and we should do something to ensure that art doesn’t get much light.

    • I often think about one art drama back in Los Angeles when it comes to censorship. There was an art student in L.A., I think at UCLA, that had done a piece for their seasonal show that included a swastika; the student was Korean if I remember correctly, and their piece was using imagery from Korea’s long history, trying to do something along the lines of “getting back to their roots”. A Jewish student in the school complained (saying their grandparents were holocaust survivors and were going to attend the show or something) and after some protests and a long email debate, the school ordered the artist to remove the piece. This infuriated me for several reasons. First off, I don’t know what it’s like to experience genocide, and I imagine that if there were a symbol that reminded me of the senseless murder of almost my entire cultural or ethnic family, I wouldn’t want to see it. But I don’t think ordering it removed so no one can see it would be the right move. An accompanying warning or some sort of sign decrying the symbol might be warranted, but I think what makes me the most mad is that I don’t think two wrongs make a right. Basically, in my mind, Hitler and the Nazi’s appropriated the swastika from Asian culture, and turned it into the most widely recognized symbol of cruelty and death, completely overshadowing the symbols original meaning over centuries of use in Asian religions. Now here was a student attempting to address this complex issue both in a world-context but more so in a personal one, as an Asian person clinging to their culture in a euro-dominated society, and you have more white Europeans (though whether Jewish people are considered white is too big a question for me to tackle here) trying to tell this Asian person that they have more power over an Asian symbol and therefore should control where that symbol is used. It seemed like exactly the kind of problem the student was attempting to bring attention to in the first place, and they lost the battle to privilege again. I don’t have a resolving conclusion for this thought, other than it’s still something that keeps me up at night.

    • I do like the contrast between how this piece was handled vs the Dana Schutz controversy — it’s almost as if Durant was saying, I feel strongly about this message, but ultimately it’s not mine to tell, so I’ll give you my art and it’s up to you what you do with it. That seems to me to be the best compromise between acknowledging the complex issue of a person of privilege wanting to use that privilege to amplify marginalized voices and acknowledging that there are lots of ways to give power to marginalized communities that don’t keep the privileged person center-stage.

categories: Designing for Discomfort
Sunday 11.18.18
Posted by August Luhrs
 

Animation Week 10: Kavanaugh & After Effects

This software is crazy! I love how intuitive it is, or rather, how intuitive it is after spending 2 hours getting used to it. The puppet tool took some wiggling around to get the effect translatable from brain to composition, but I think overall I understand the basic motion capabilities. It was super fun messing around with the distortions; I wish now that I was doing a project where I could just make really silly grotesque characters (perhaps that’ll be my unity project…). Now just to figure out what other dance moves I want good ol’ Brett to do (while hopefully avoiding eye contact, man, he gives me the creeps).

kava2_gif.gif
kava2Drop_gif.gif

I had to reprocess some of the original illustrator files to make sure they were transparent and clean, and while I was there I should have changed the frame boundary (?), but I didn’t know that would be an issue until later. The only thing I had trouble with was with the layers on the first animation — they would cut off at the boundaries if I moved them too far away, which resulted in Brett’s legs being stuck behind an invisible wall. Looking online led me to believe there was an effect tool I could use called “grow bounds” but I never found it in the menus and by the time I got to the second animation, there was no longer that issue… So not sure what happened there.

categories: Animation
Wednesday 11.14.18
Posted by August Luhrs
 

Designing for Discomfort Week 10: Surveillance of Jason Yung

“Hello lovely list,

I need your help with some surveillance and you need help paying off your student loans, so lets make a deal. Here is your target:”

Jason_low.jpg


“For every photo of Jason Yung you send me between now and next Wednesday (11/14) at 3pm, I will pay you $0.01. 


If you can manage to get a photo of him right after you've given him a compliment, each of those photos is worth $0.50.  (see below)

This offer stands until either Wednesday at 3pm or until I receive $25 worth of photos. 

You can email me the photos or email me to meet up for a download, at which point we can arrange preferred payment method.

Feel free to contact me off list with any questions/comments, thanks!

August”

dog_low.jpg

Reading Responses

  • Lauren McCarthy — Follower

    • I’m obsessed with this. I’m obsessed with Lauren McCarthy. This is brilliant.

    • The pictures absolutely blow me away — I’m a big fan of mundane, slice-of-life, everyday sort of art where one infinitesimally small part of someones life manages to get across something universal not just of the subject, but of what it means to be a human. I love that any of these pictures could have been taken of some rando on the street, but knowing the context that the person was followed for a whole day and this was the moment captured — that was the part that made me fall in love with this. It really makes you think, there are so many days that you wish could be recorded and re-lived, and so many days that are totally uneventful and that you’ll never remember. If one picture was taken during your life, which day would it fall upon? It reminds me of one of my favorite quotes — from a poem by Mary Ruefle: “What book will you be reading when you die? If it’s good, you’ll never finish. If it’s bad, what a shame.” Ugh.

  • Mediated Social Touch

    • This isn’t entirely relevant, but the first thing I was reminded of was a hilarious experience I saw at Indiecade 2016 in Los Angeles: Kitty VR. Kitty VR was a VR massage experience where you would lie down with a VR headset on and watch as kittens massaged you in virtual space. In physical space, however, the person running the experience put on kitten gloves and mimicked the kittens by massaging the same spot the kittens were virtually touching. It was such a funny thing to watch out-of-context, and I never found out if the person experiencing it was told they were going to be massaged in real life before it happened.

  • Debugging the Empathy Machine

    • Using VR as a tool to create empathy is the most exciting application of the technology, in my opinion, so it’s interesting to hear some more perspectives on this here. It’s interesting to hear the term “embodiment machine” though also, because I guess I never really made a connection between my desire to use VR to show someone what it’s like to live as someone else and my fascination with digital avatars as a way to live as someone else who is represented differently physically. I wonder how a VR short about what it’s like to live as a woman being catcalled would be different if the participant were a man who catcalls vs a trans woman who is at the beginning of her transition.

  • Twin Peaks and the Sublimity of Awkwardness

    • I feel very validated that it says people with too much empathy can’t enjoy cringe comedy, because I’ve always felt physically ill trying to watch those kind of shows haha.

categories: Designing for Discomfort
Wednesday 11.14.18
Posted by August Luhrs
 

Intro to Fab Week 10: Laser-Cut Dome Prototype

On this week of “August Bites Off More Than He Can Chew”:

I’m applying for a Burning Man Honorarium grant soon, for an installation I’ve been working on all year, Corpus Phallosum. I have some 3D model renders for the proposal, but the actual designs of the model aren’t transferable to a physical blueprint, the struts are all random lengths:

FrontDome.png

Is it a brain? Is it a butt? Nobody knows.

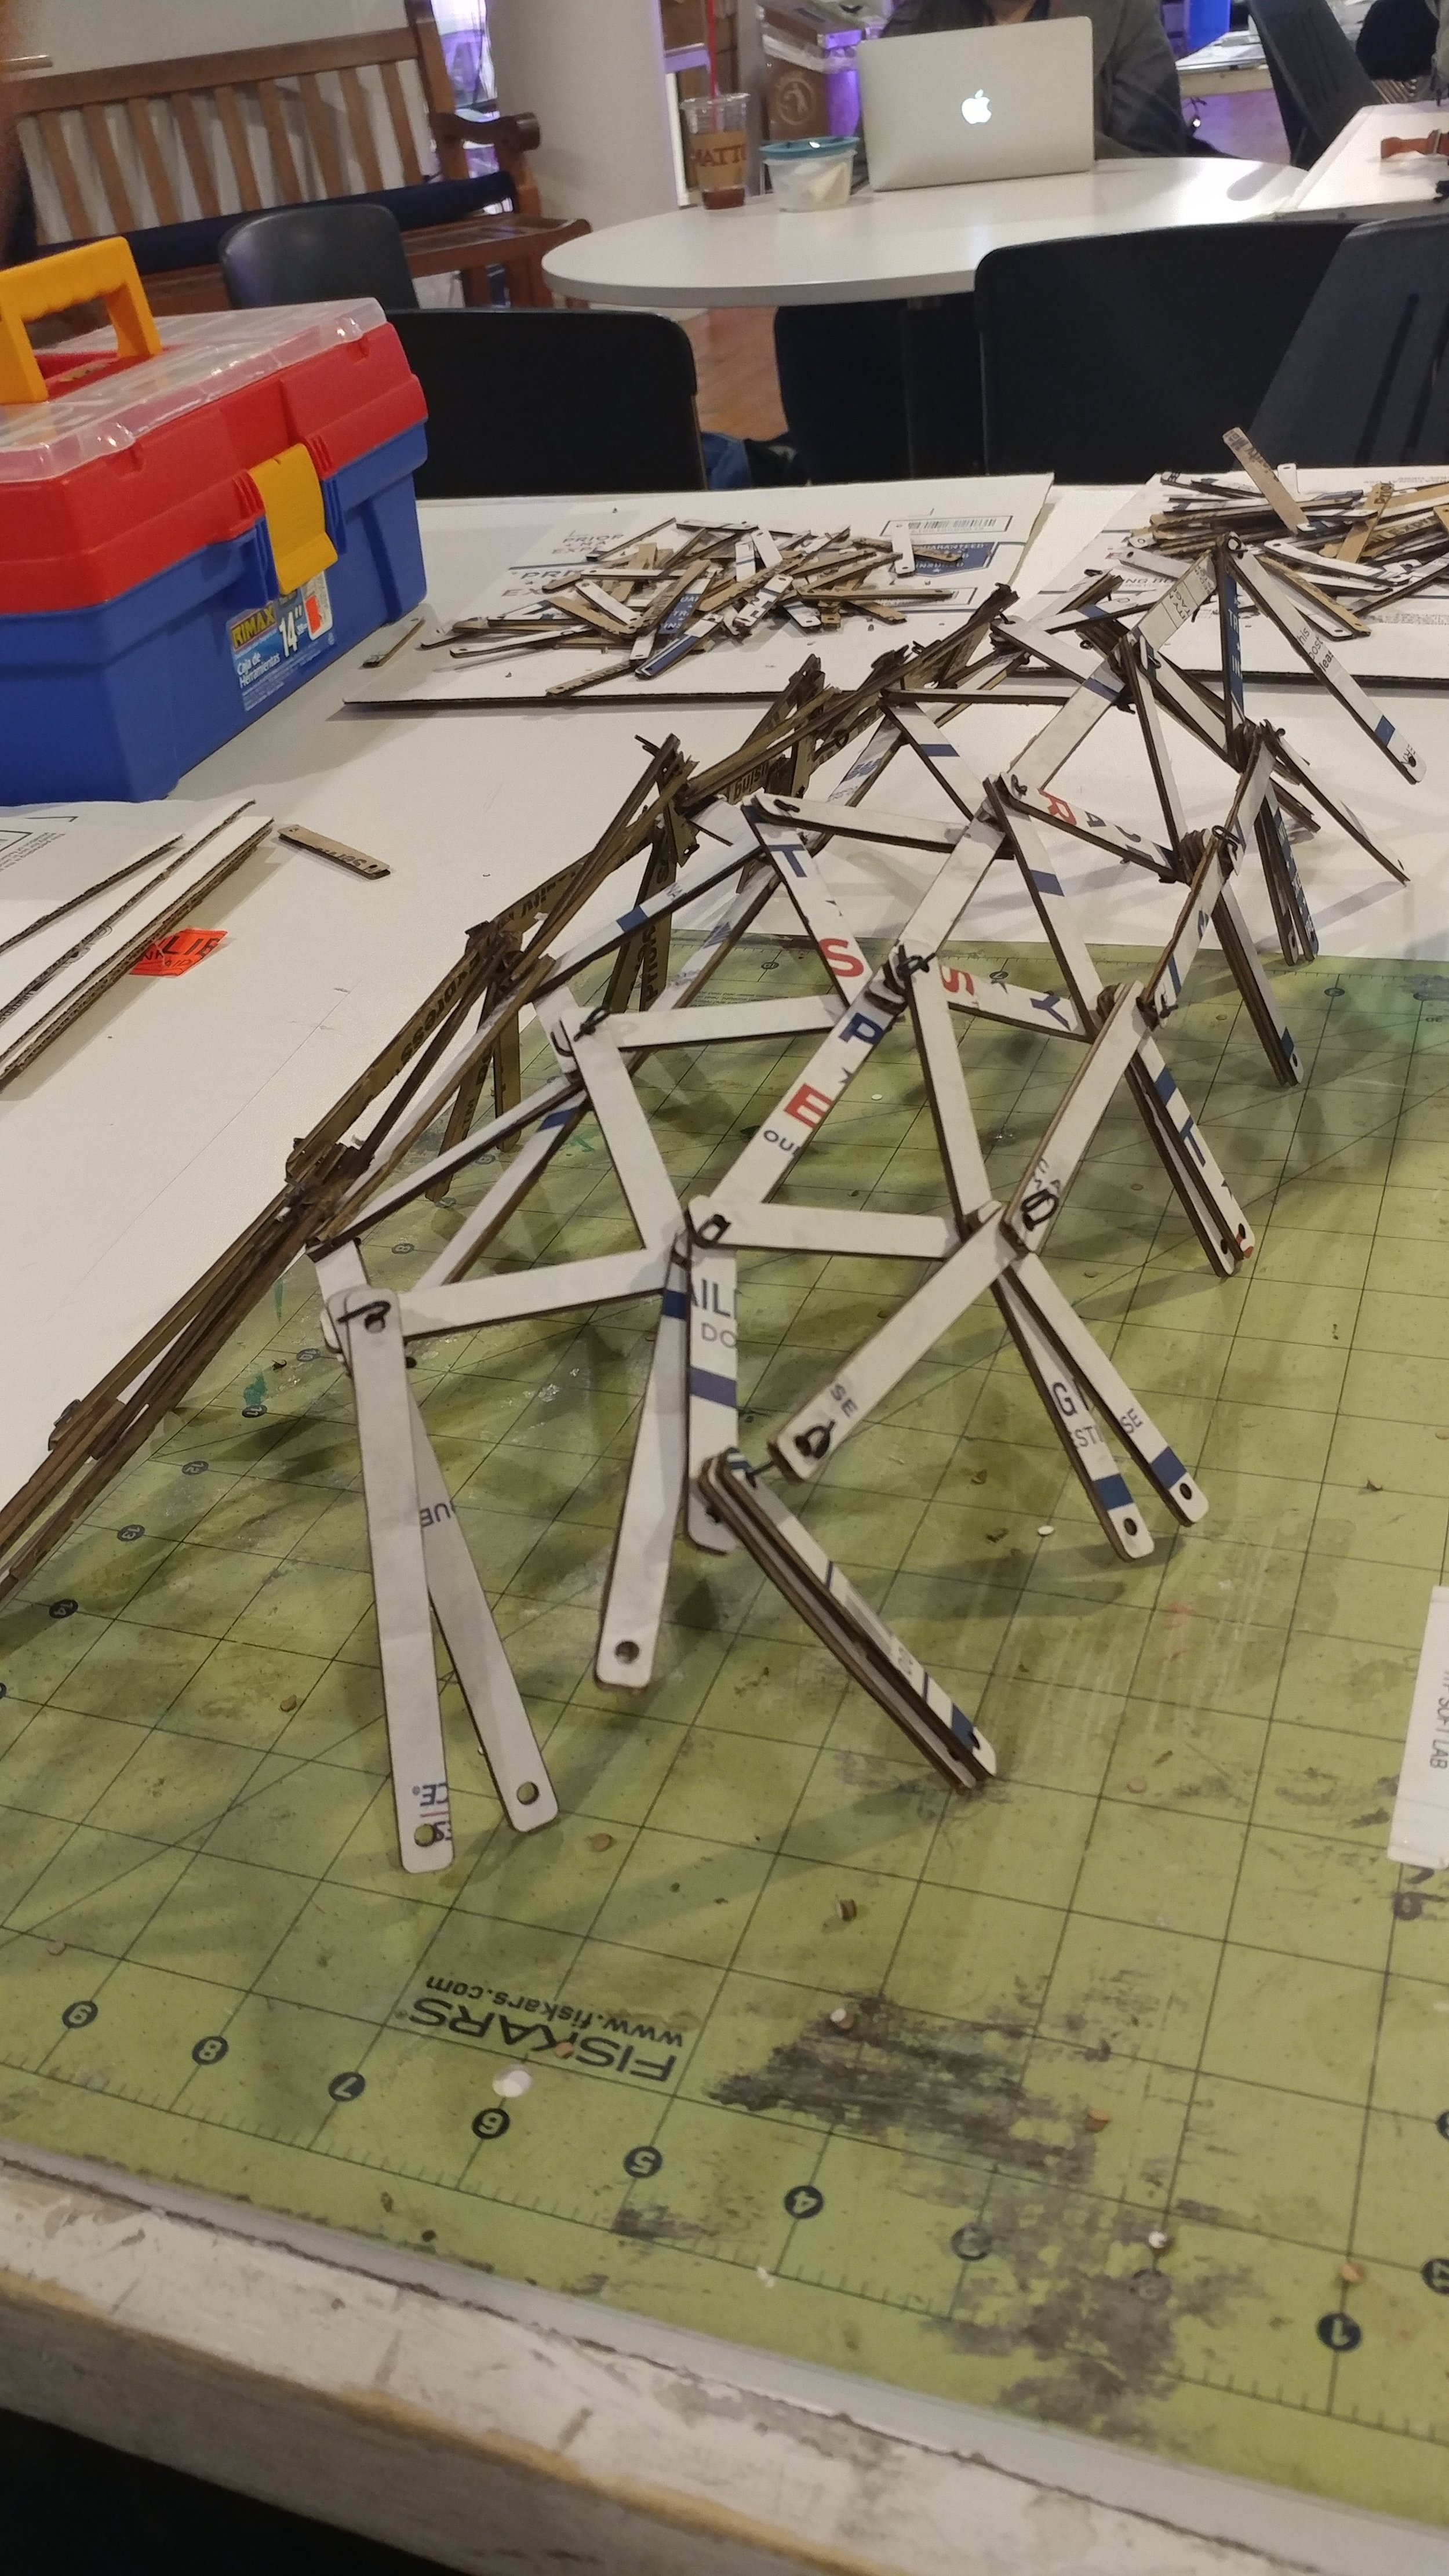
I don’t know enough about CAD or other engineering software to know how to design this same structure, but only use 3-5 different strut lengths. So I figured the best way to do that would be to try and play around with something physically until I came up with a new design.

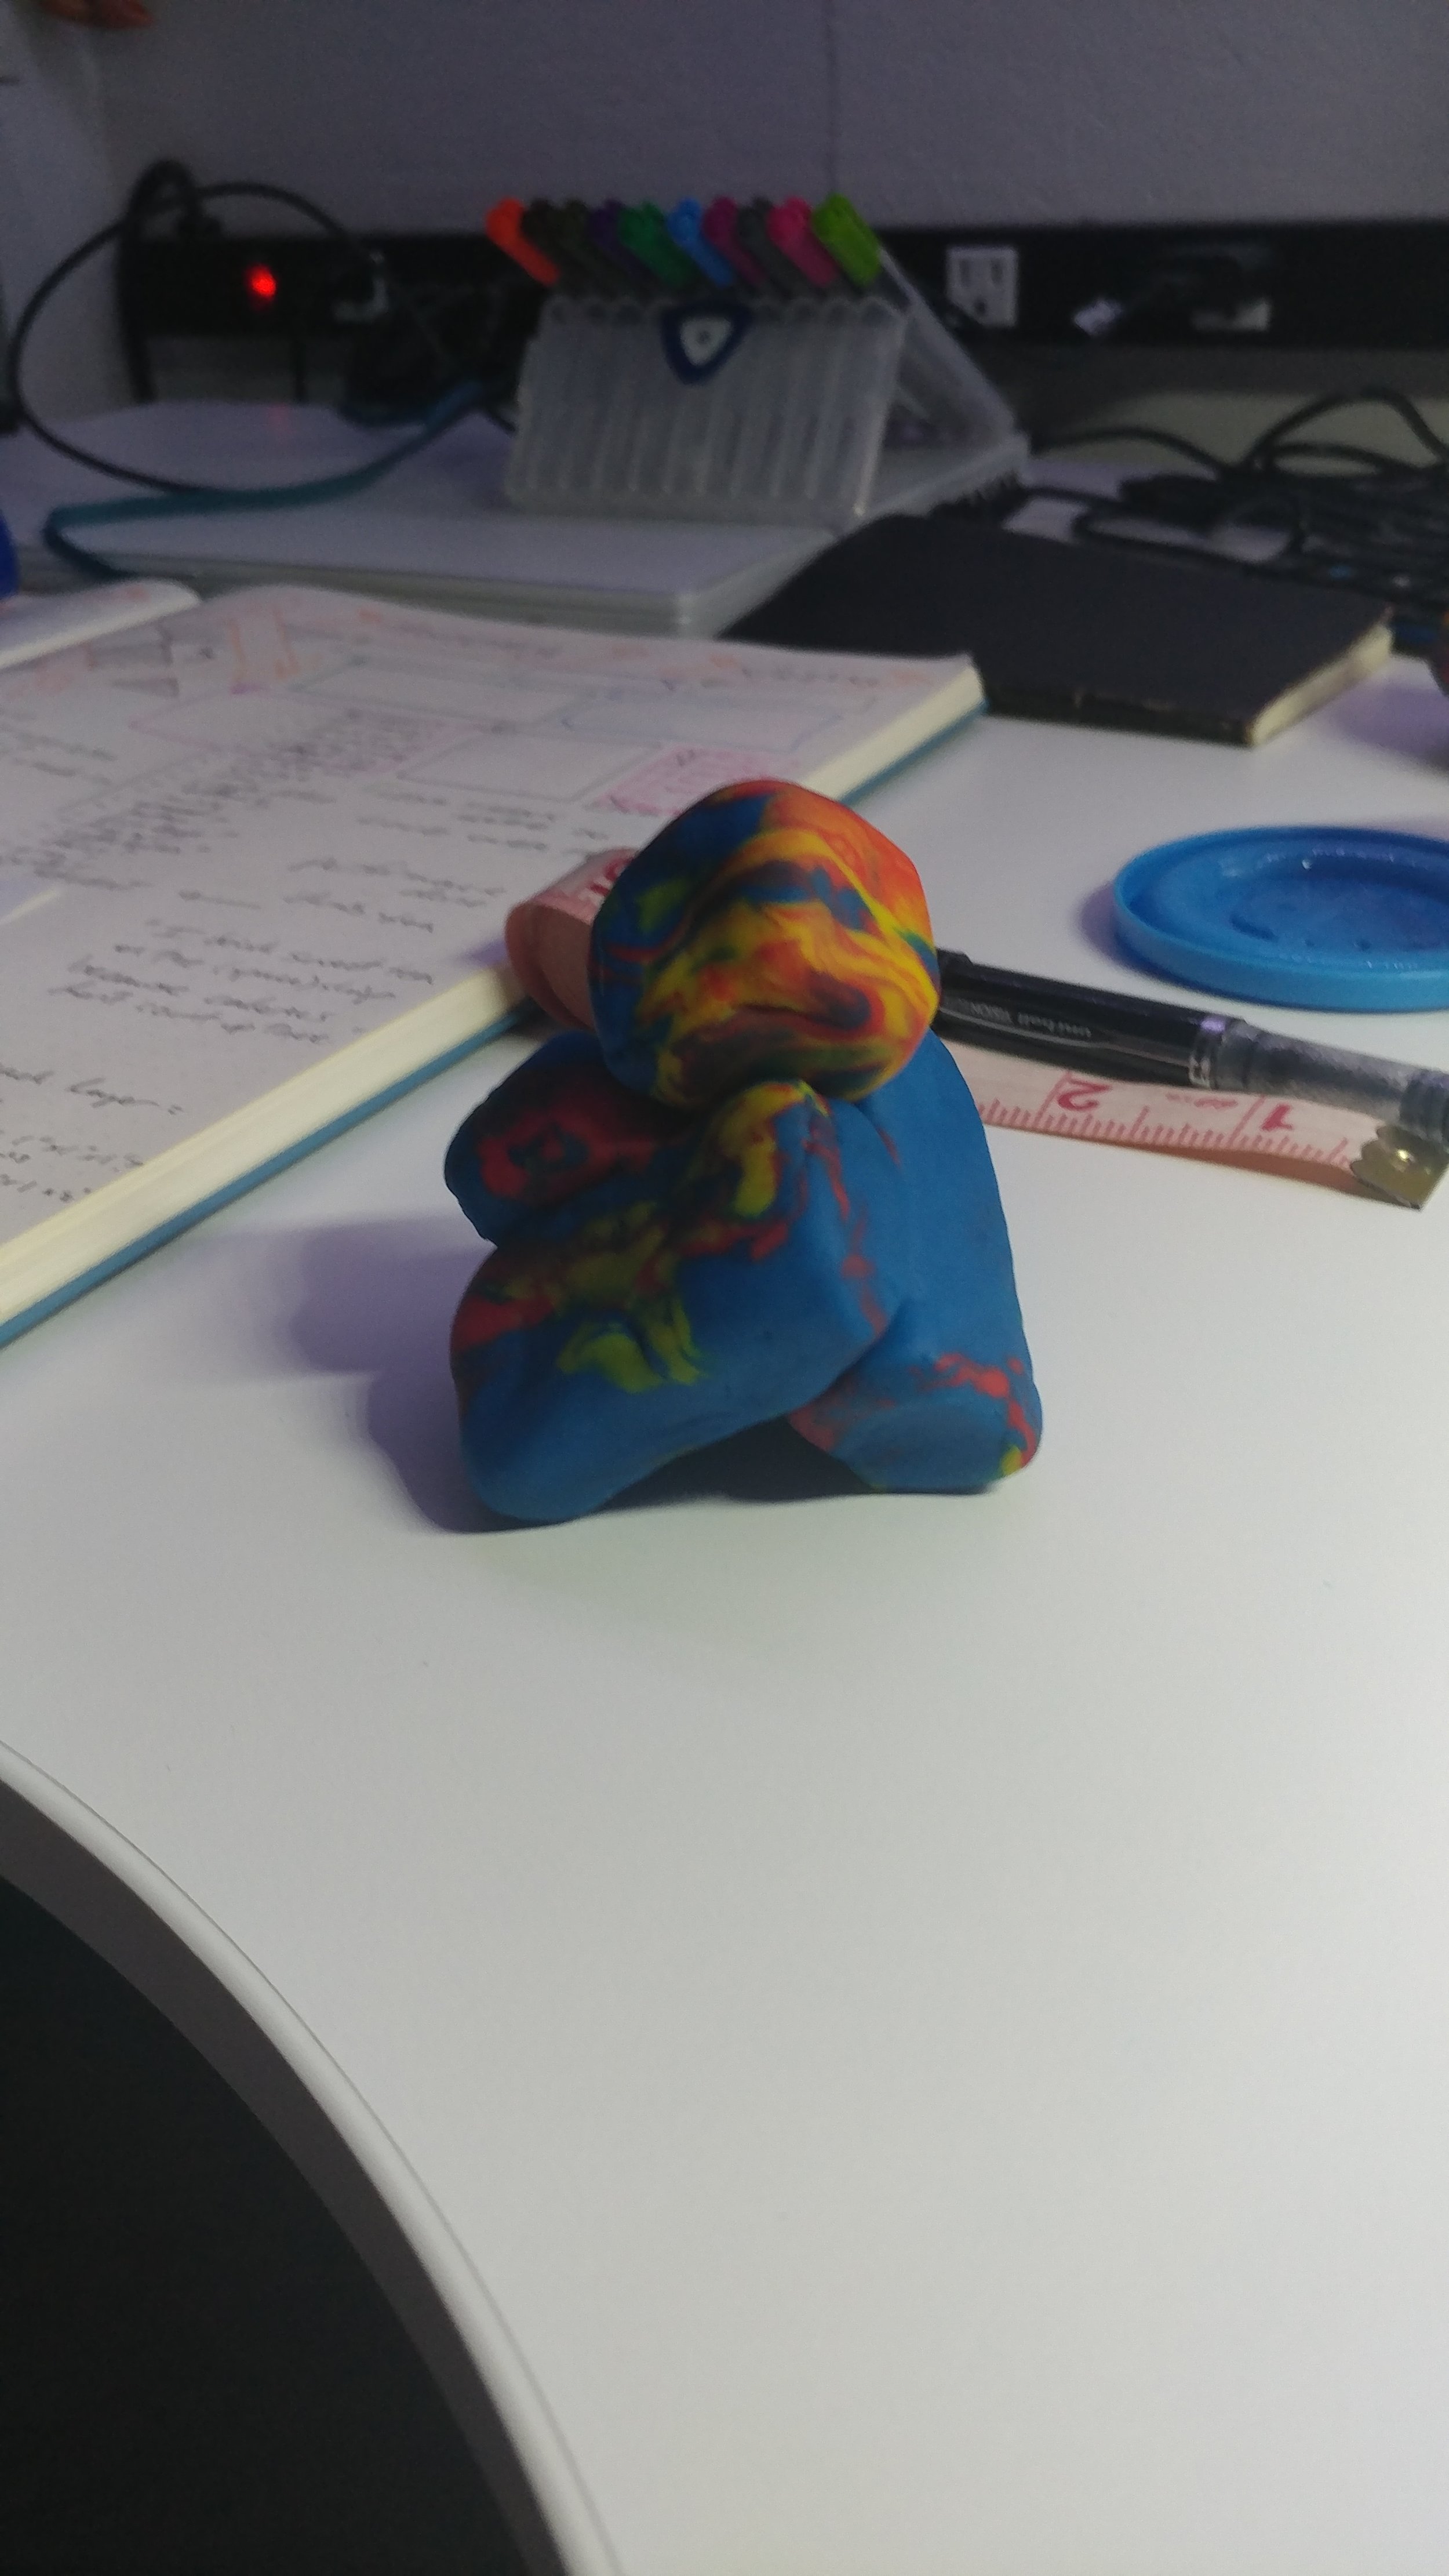
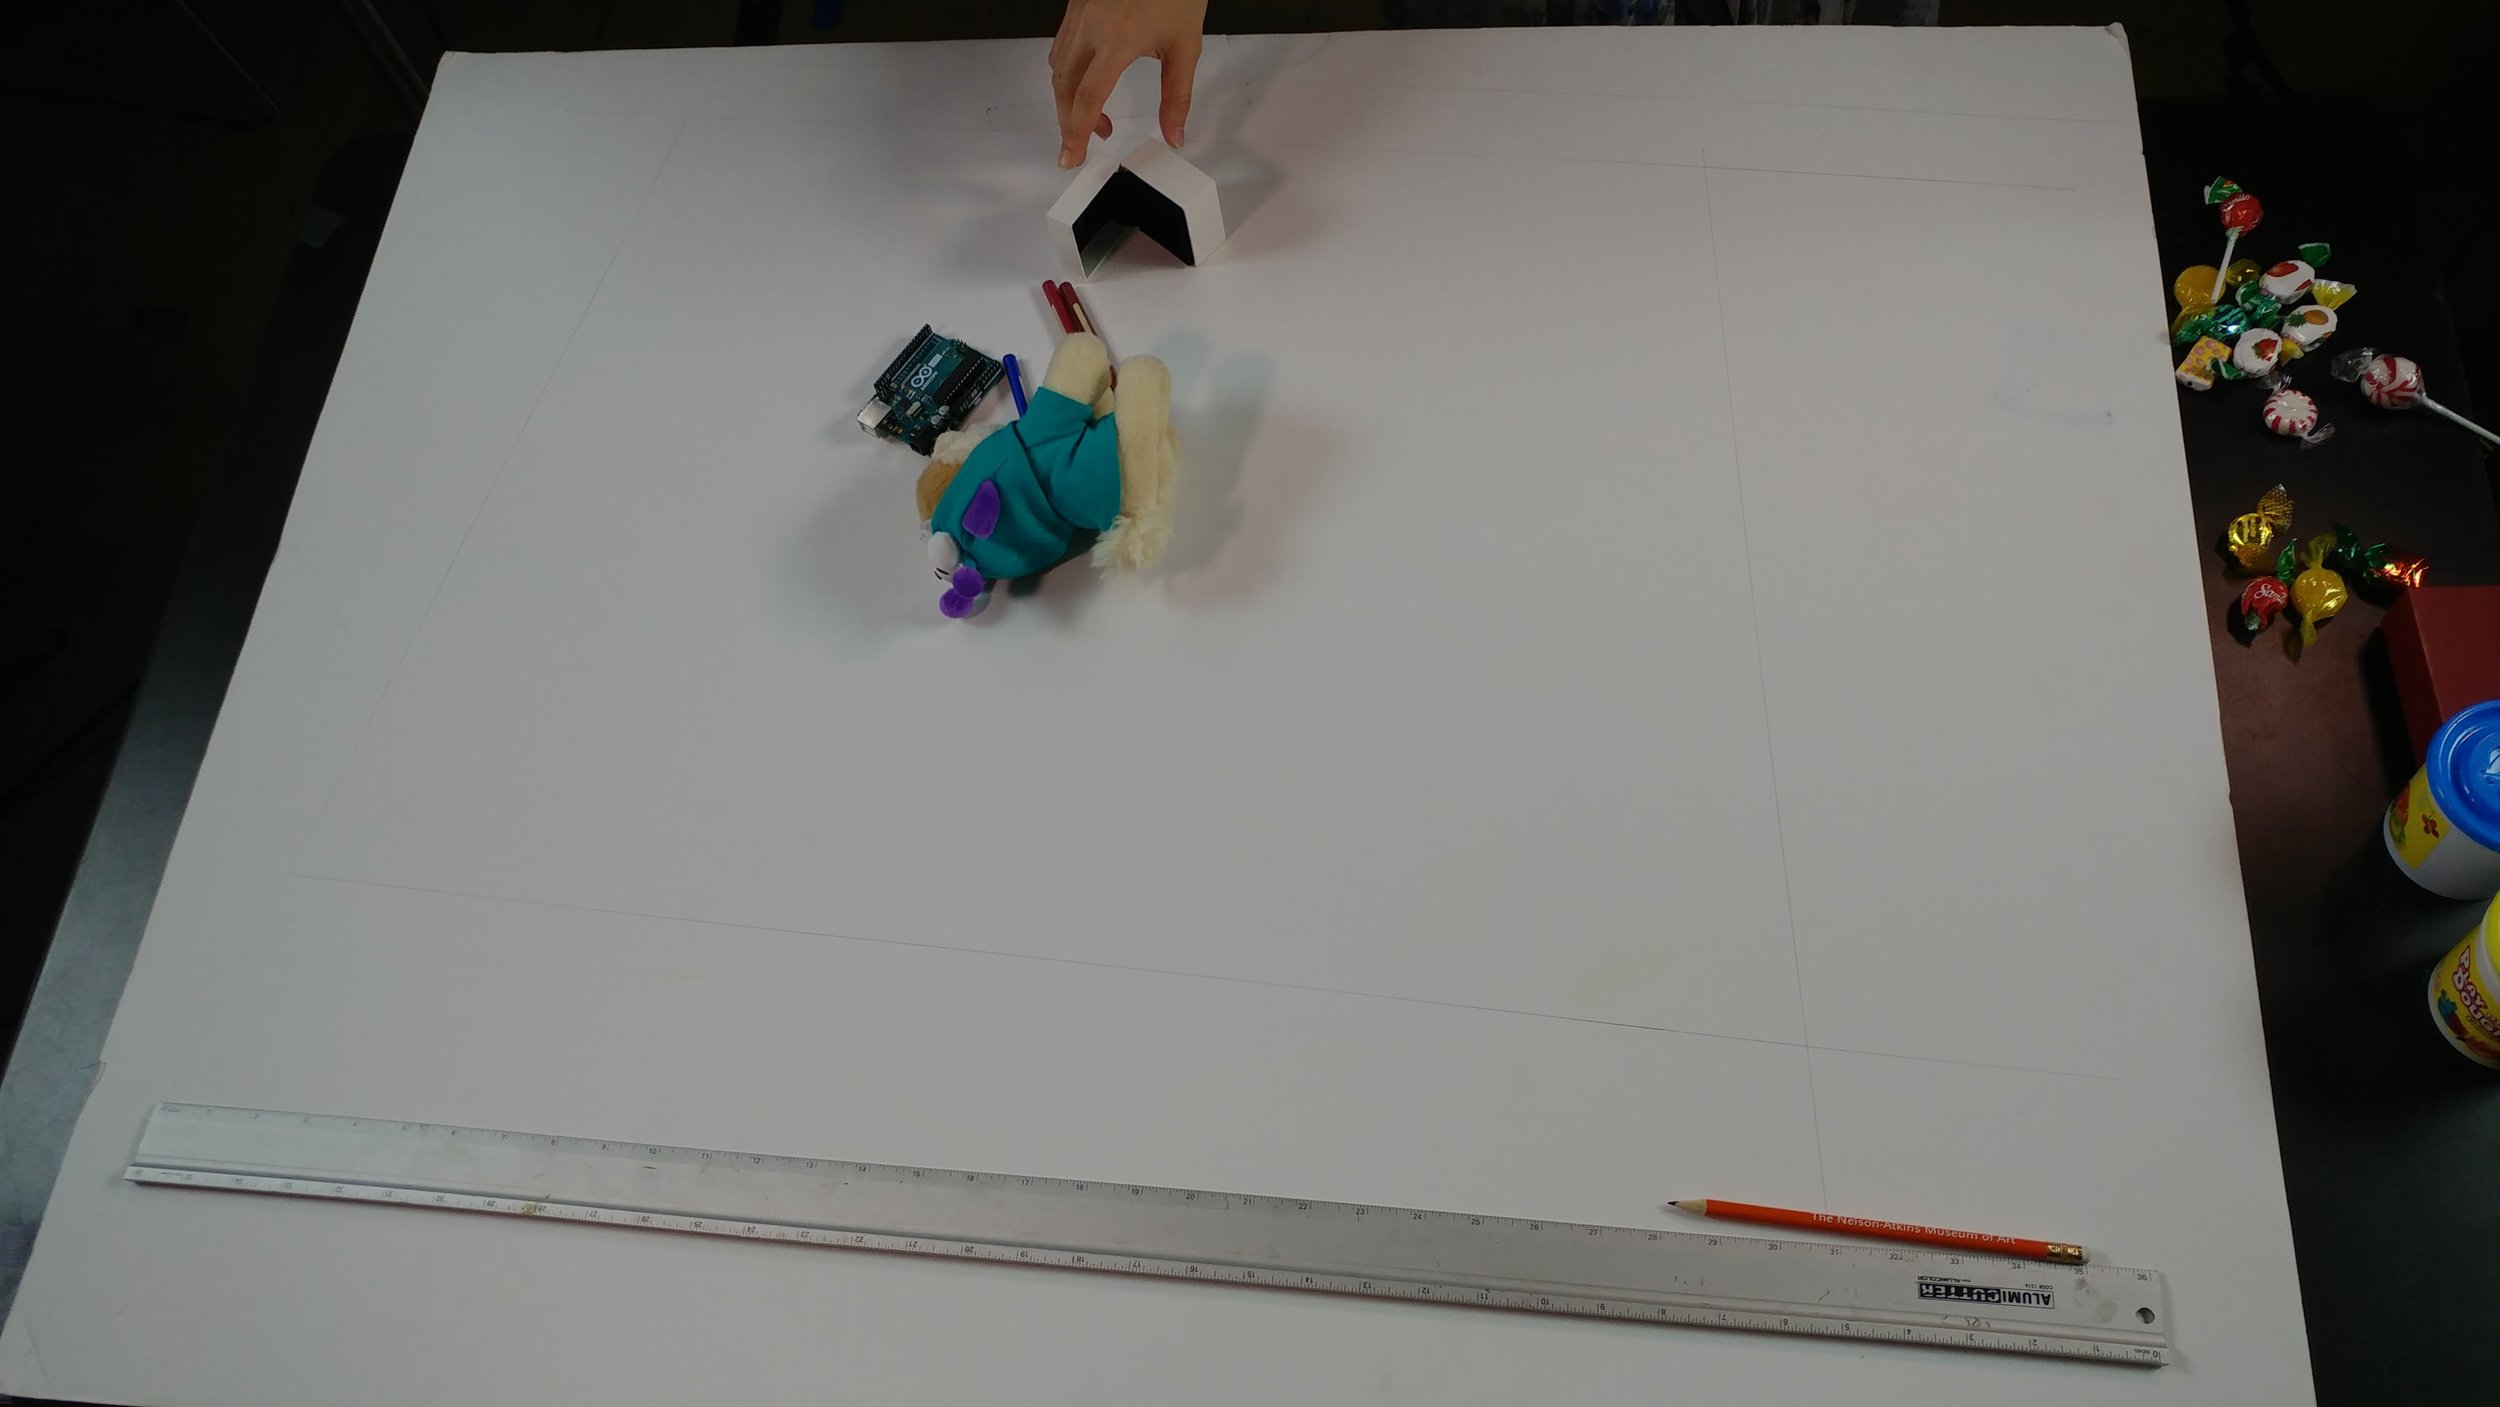
I decided on arbitrary lengths (4”, 3.5”, 2.5”) since those ratios are similar to the ratios of the strut lengths of the first dome I made, and started by using popsicle sticks and play dough to see if my idea would even work theoretically:

1102182007.jpg

Then I decided to try and cut some struts out of the free cardboard in the shop. Figured 1/4” wide was enough, but didn’t take into consideration how the corrugated filling would affect the sturdiness of the material. The first test proved that I would have to find another material, but I was able to demonstrate the core concept:

1109181813.jpg

So I asked Ben for advice on what kind of material would be cheap, relatively load-bearing, and still flexible enough to allow for bending at the vertices. He suggested mat board or thin cardboard (like what post office boxes are made from). I went for the free option, and found a place across the street from my apartment that was happy to give me some free USPS boxes!

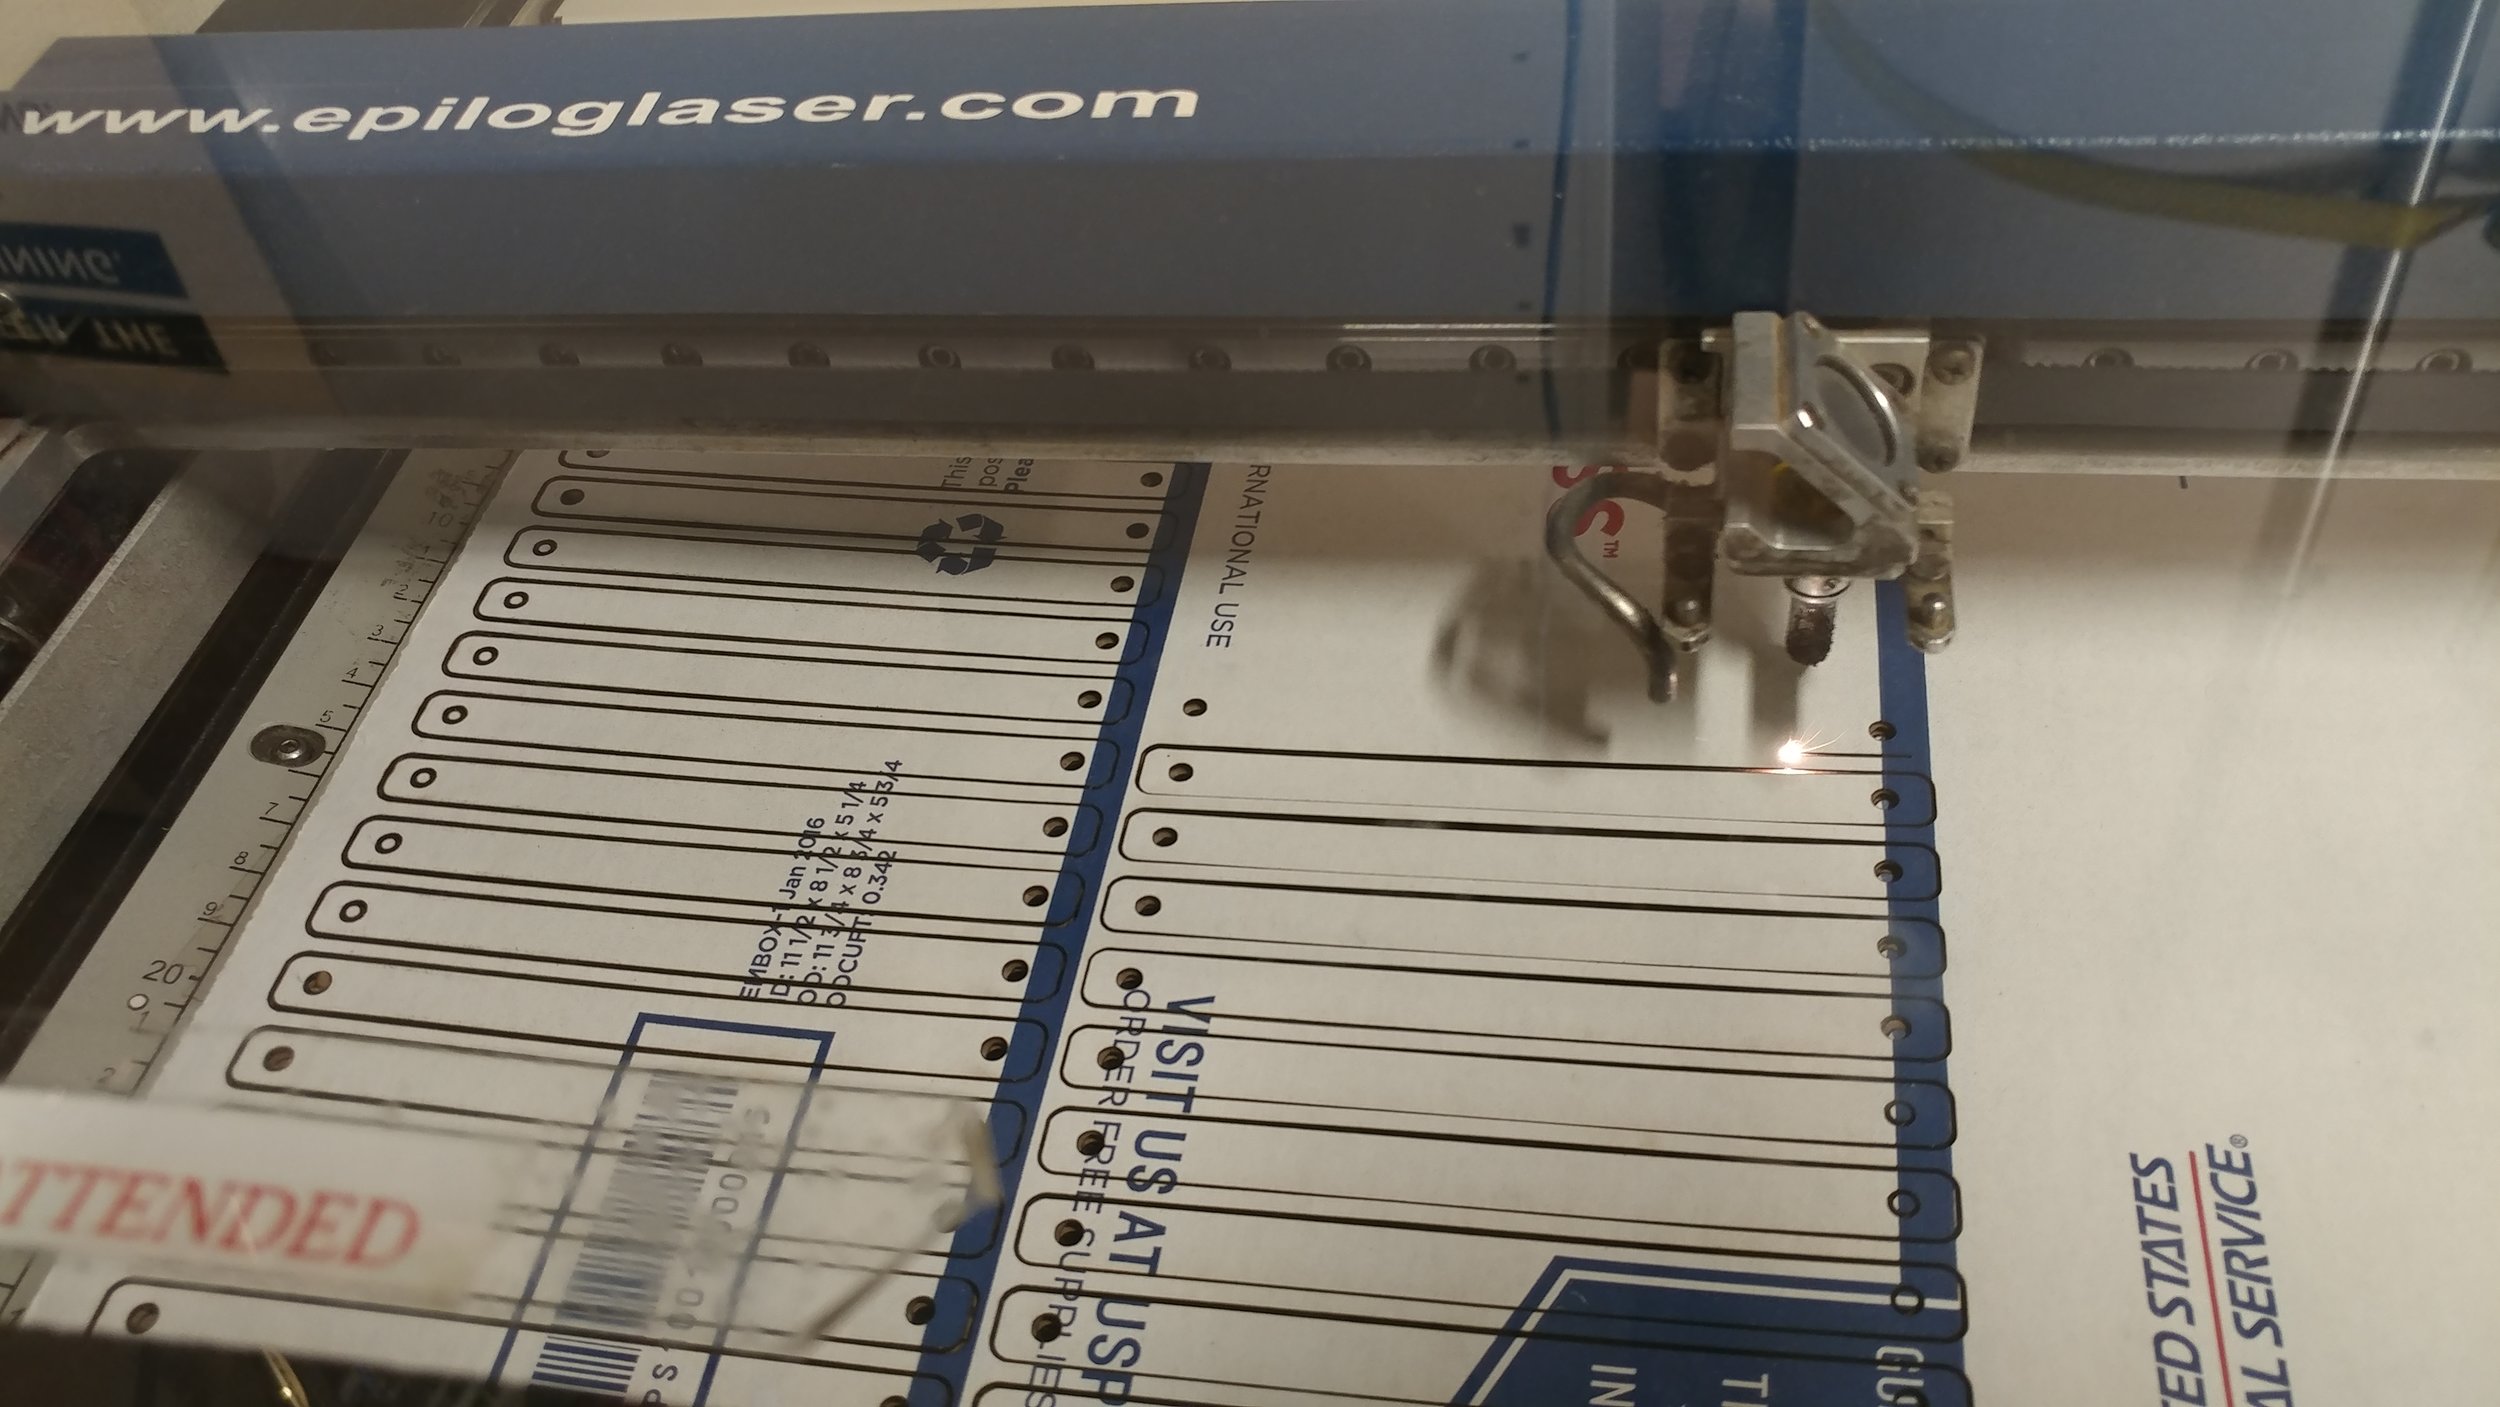
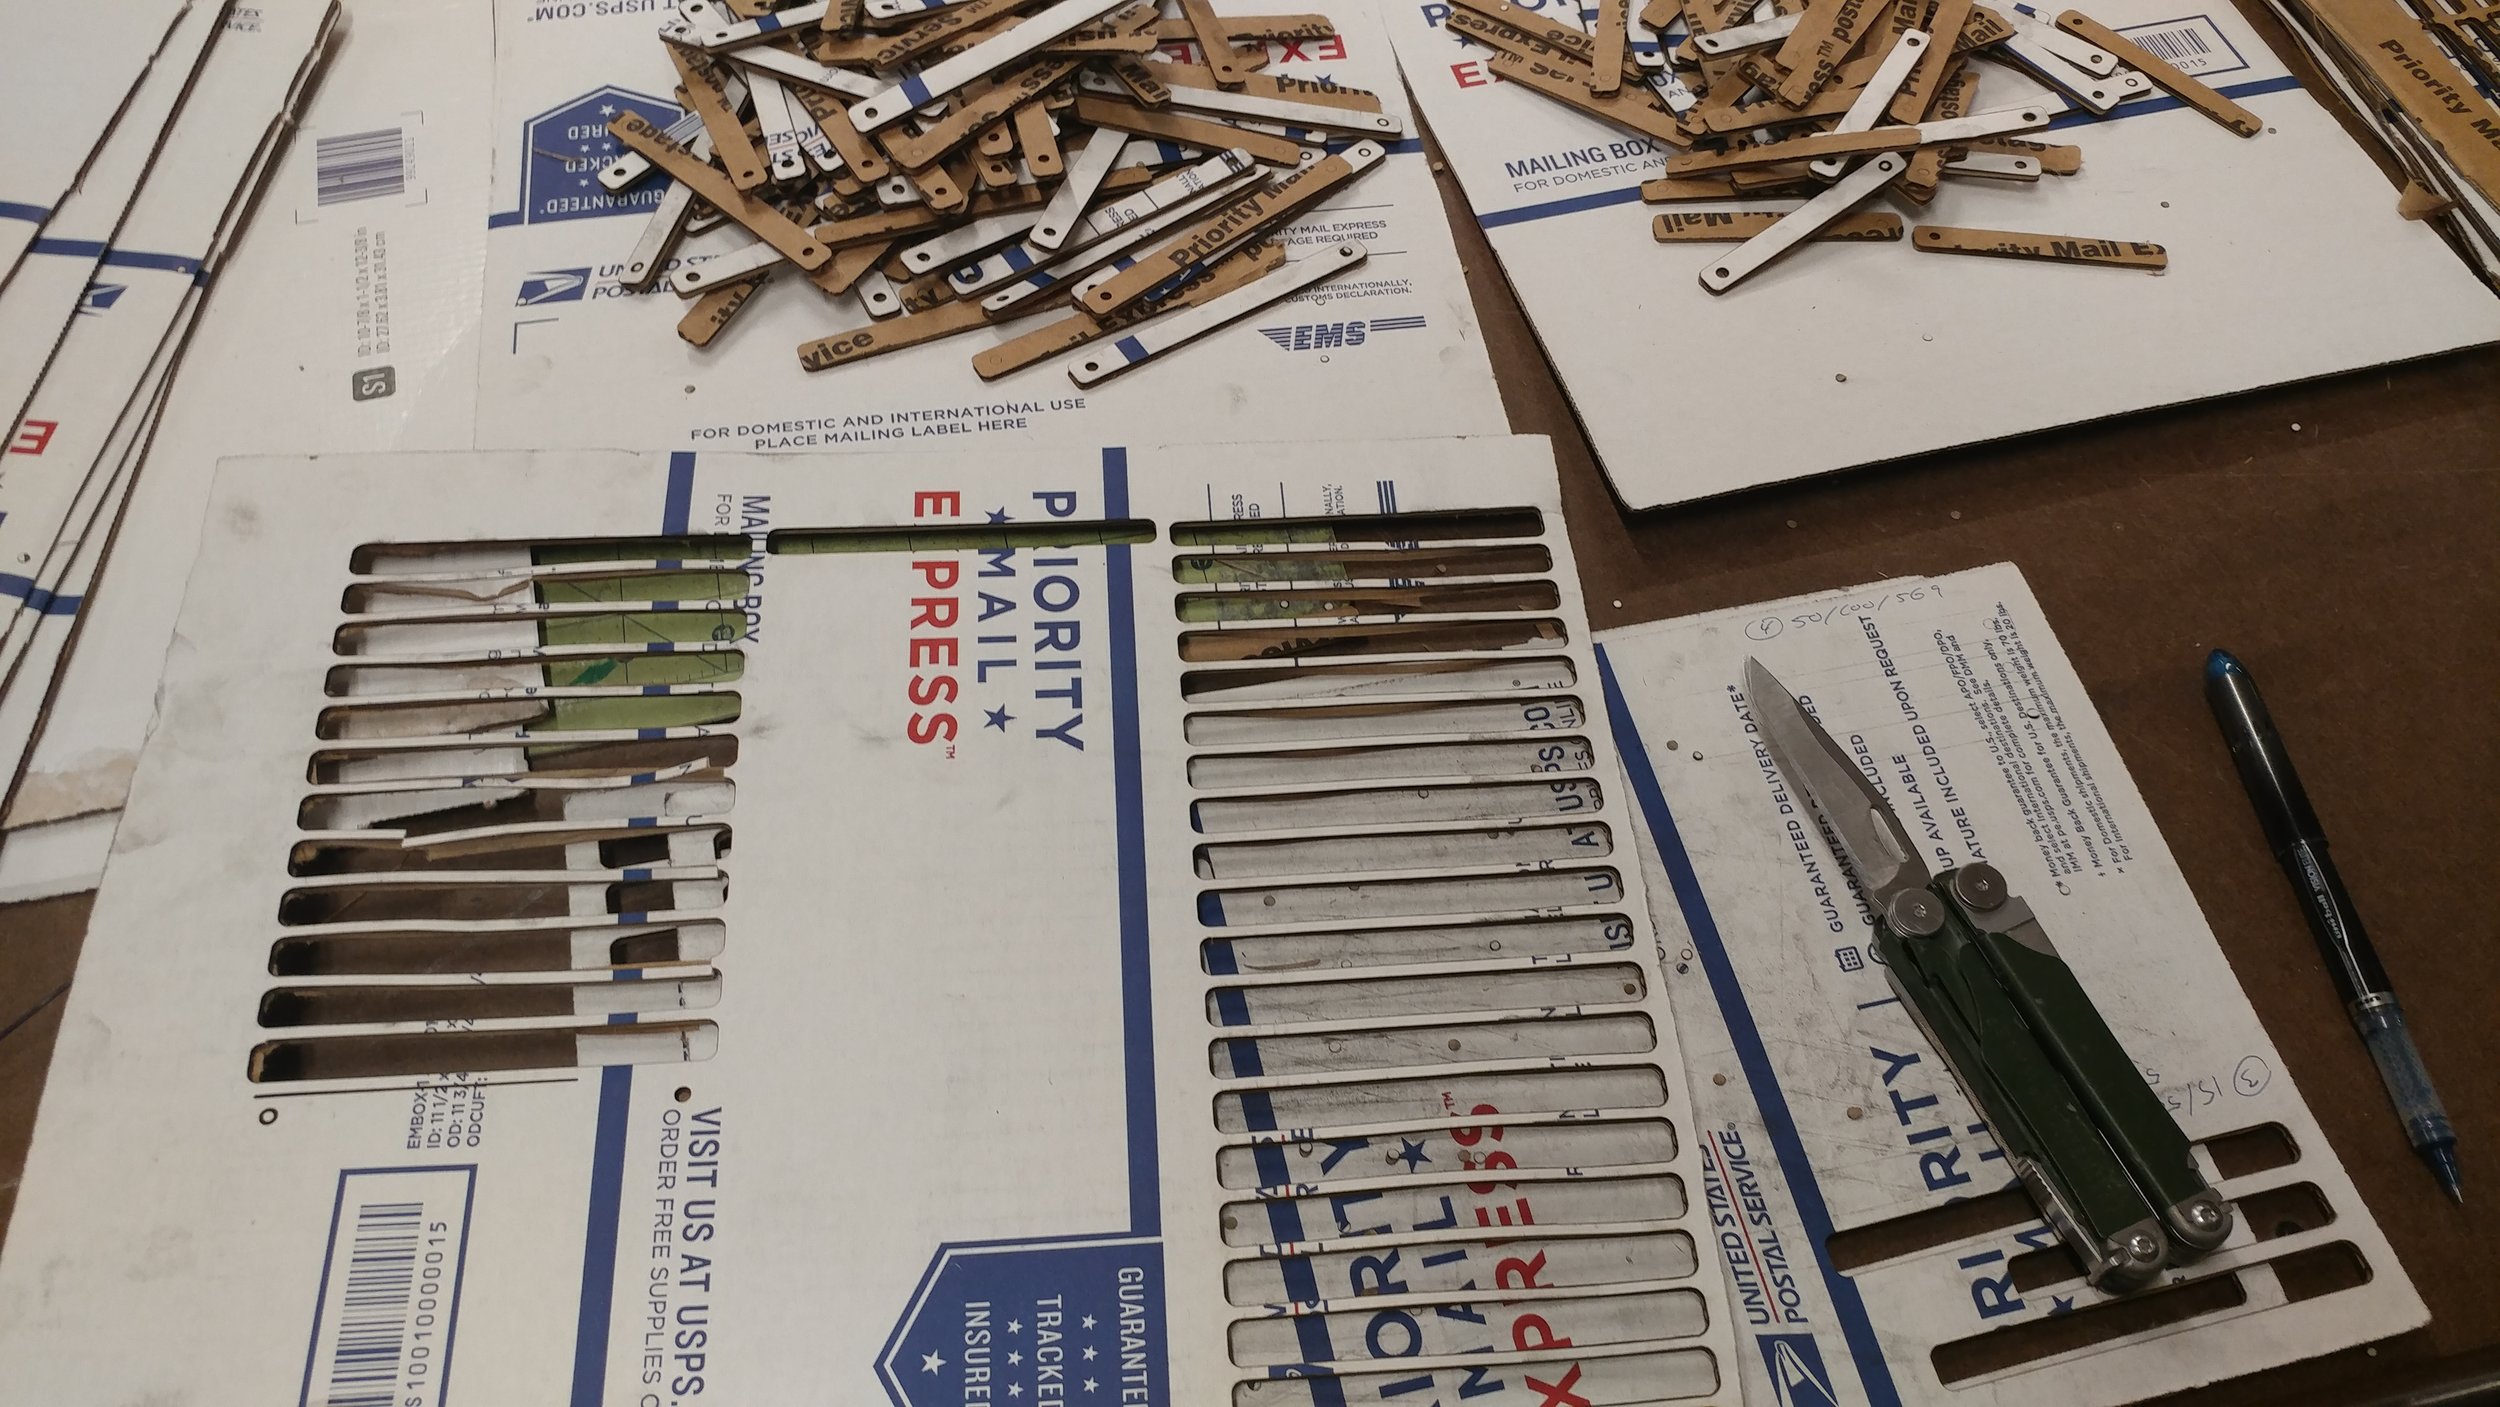
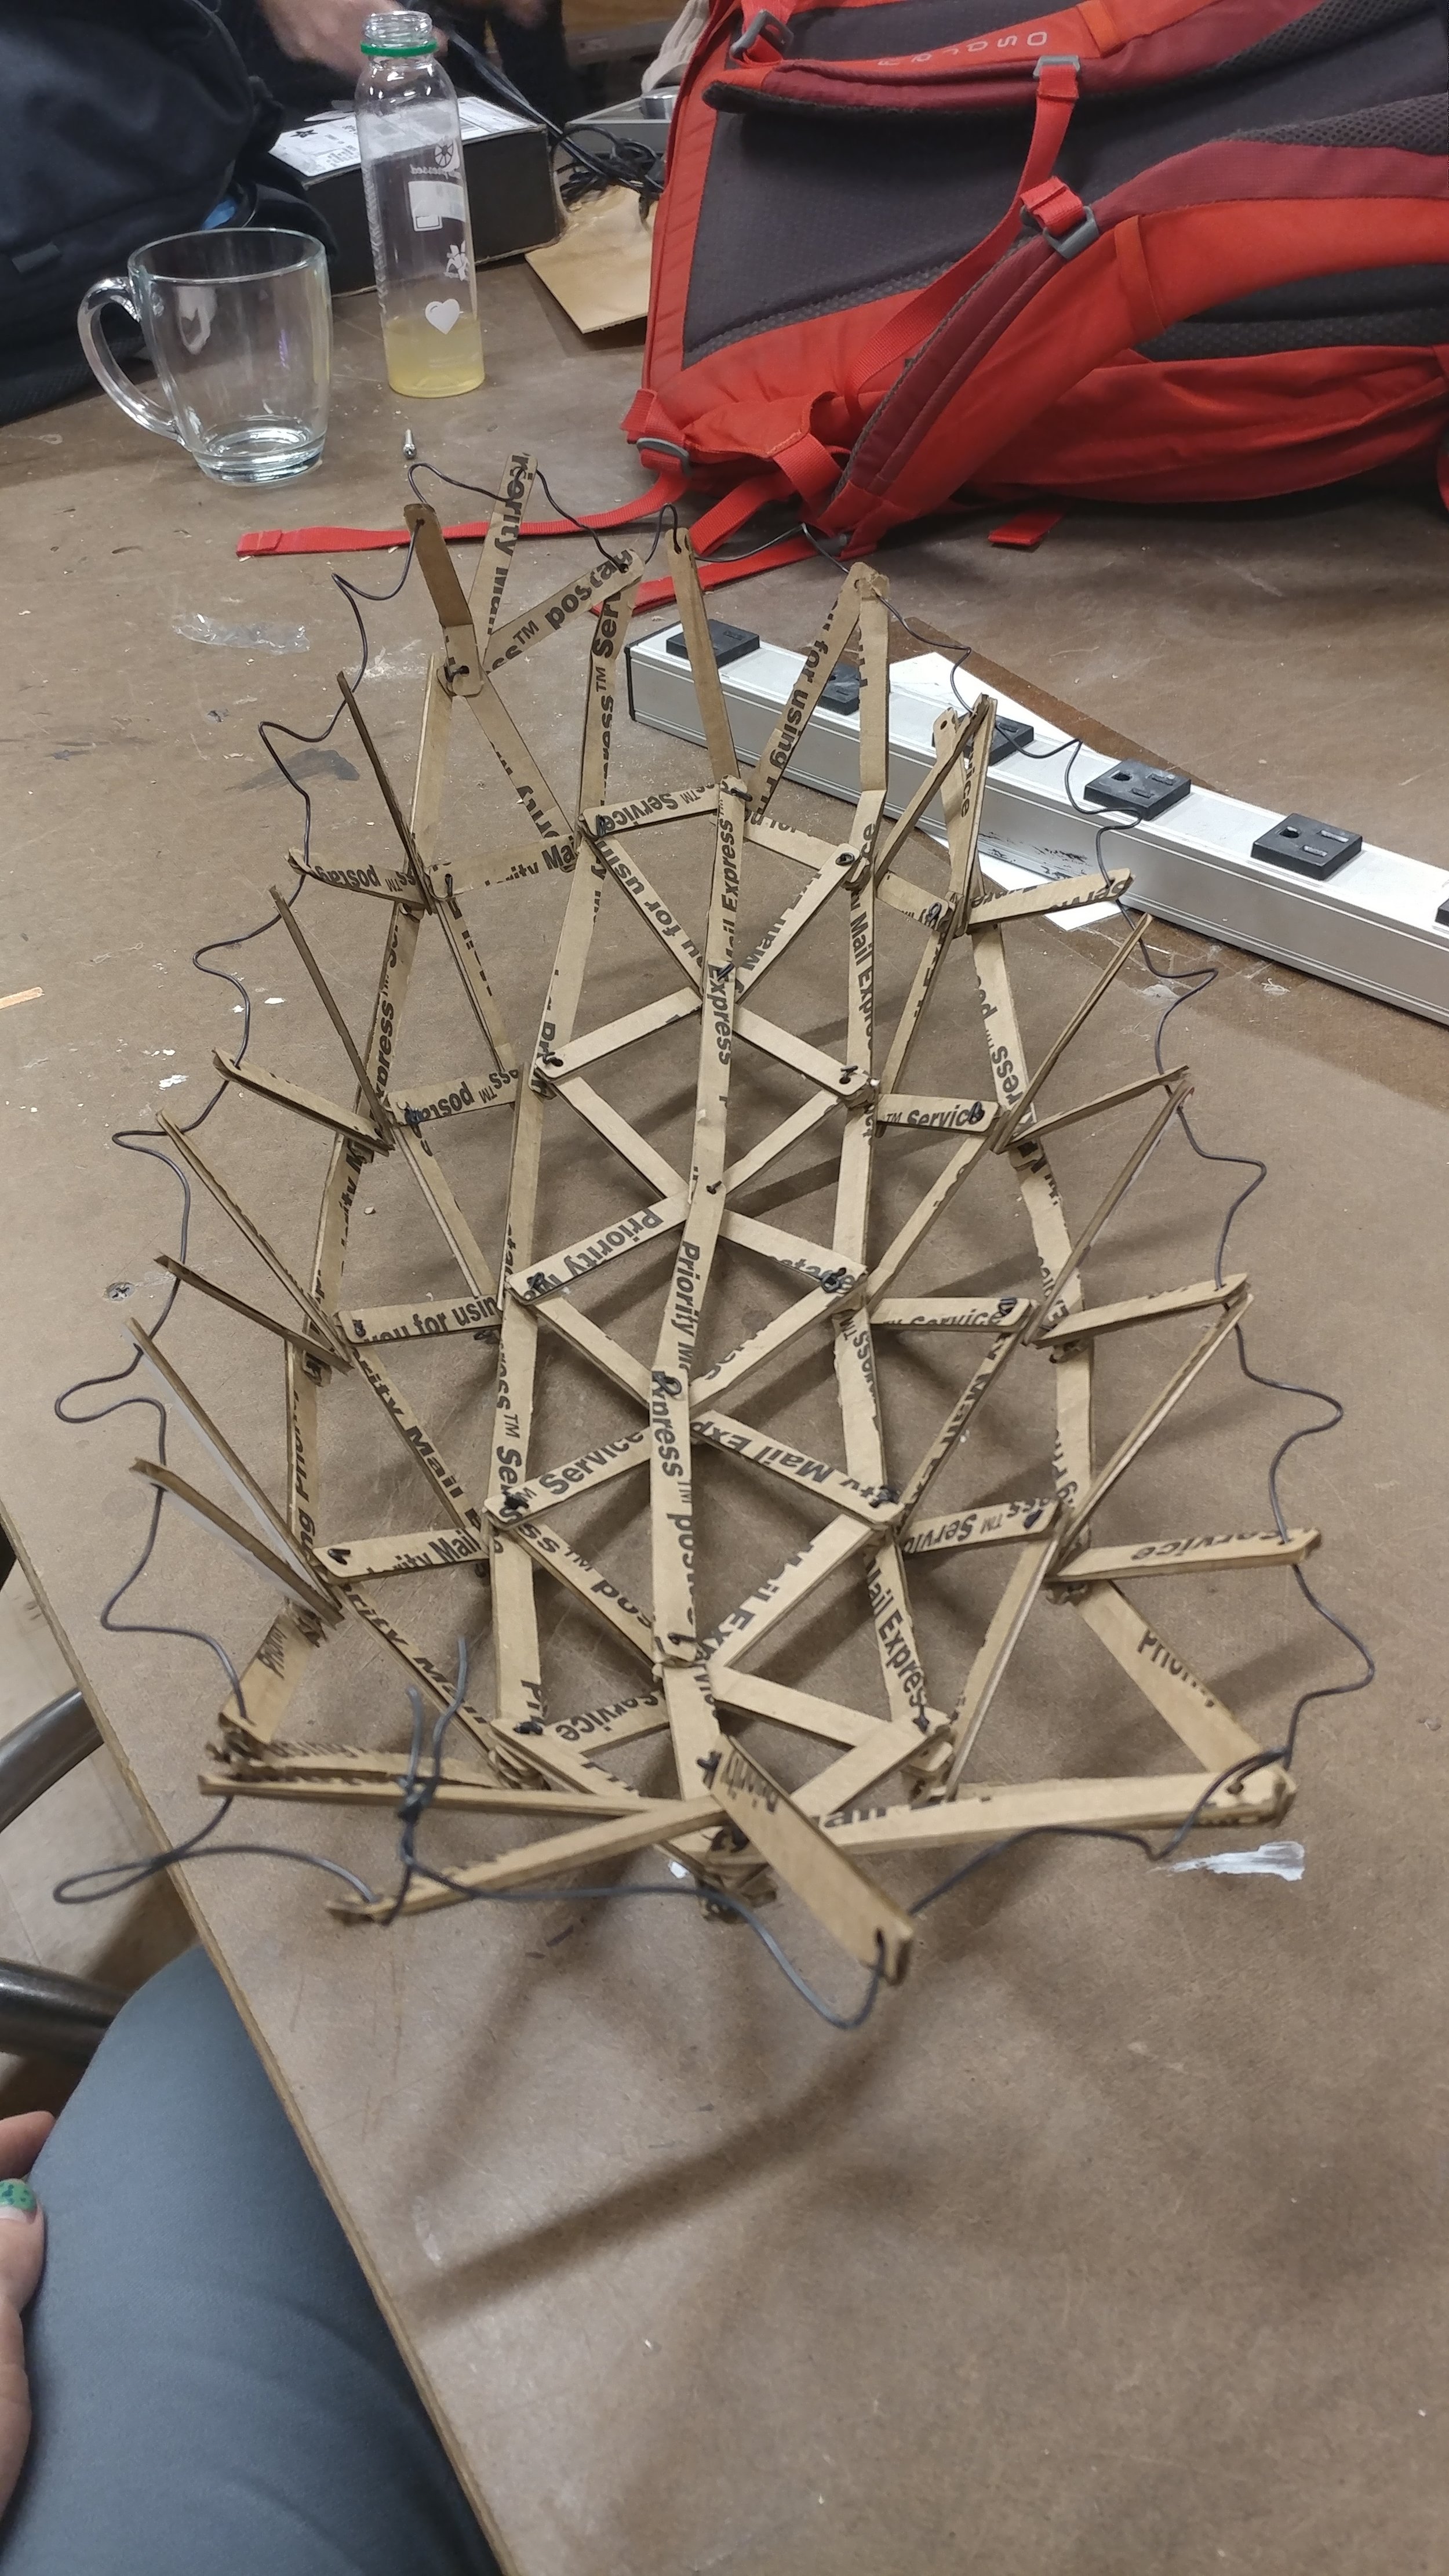
These proved to be exactly what I needed. After cutting them to size, I did some tests with the laser, adjusting the settings to what the manual suggested for mat board (50, 50, 500). That wasn’t quite enough, and I ended up with (15, 50, 569). That just took forever though, so I decided to test (40, 100, 569), and after some trial and error, ended up at (30, 100, 569) which was quick enough to get all the struts cut, but I still had to use my pocket knife to cut some pieces out. If I had unlimited time I would’ve just ran it slower, but I had an hour reserved on the 50W, and luckily no one came after that and I was able to use it another 30 mins. I couldn’t afford to spend longer than that there though. The machine also randomly stopped part way though, and the whole shop staff was stumped at why it wasn’t working. After a few resets, we fiddled with the contacts on the lid and that seemed to do the trick.

1112181458.jpg
1112181603.jpg

Then came the fun part. I had no idea how to start other than using the same guidelines from my other dome build: start from the top, and lay out the struts in groups based on the vertices, then bolt each layer together as you move down the dome. The only tricky thing was the brain wasn’t a sphere that I could start at the apex with, I either had to start with the two highest ridges, or start with the corpus callosum and build up and out. I opted for the corpus callosum, since I figured starting with the middle would be better. I had an intuition of how the triangles should be arranged based on my previous 3D model, but I was pretty much flying blind and just sort of guessing as I went. I figure that since I have different sizes, I’ll be able to make the shape somehow… It may not be the most geometrically astute design, but I just need it to work. I also realized my idea for basic bolts (wire wrapped around the vertices) wouldn’t work as initially intended, and I had to basically try and turn wire into a nut/bolt combo — a single axis that wouldn’t allow either end to escape.

View fullsize 1112181627.jpg
View fullsize 1112181639.jpg
View fullsize 1112181640.jpg
View fullsize 1112181647.jpg
View fullsize 1112181735.jpg
View fullsize 1112181751.jpg

Once I had built out from the corpus callosum enough to feel like I was at the top of the two ridges and ready to start building down, I figured I could do what I do with my metal dome, and just prop up the bottom layer of struts to start the next layer. However, this is not burning man, and whereas metal pipes with sharp ends will dig into the desert floor very nicely, smooth cardboard does not have the same relationship with a cutting mat or desk top. So the propping up plan wouldn’t work as intended, and I didn’t think going through the trouble of making a little perimeter for the ends to butt up against would be worth the time. I figured I might be able to just continue building out on the 2D plane and then shape it later, but I really felt like I needed the visual feedback to know where to continue shaping the triangles. So I ended up stopping early, not really sure where to go from here. I’m not sure whether it would be a better use of time to continue with this physical process, or just try and find a way to play around with the same concept digitally. I had an idea for a p5.js 3D sketch with struts you could move around and stick together, but after running through the design in my head, I realized I was trying to make CAD software from scratch… so scratch that.

View fullsize 1112181759.jpg
View fullsize 1112181809.jpg
View fullsize 1112181813.jpg
View fullsize 1112181814a.jpg
View fullsize 1112181813c.jpg
View fullsize 1112181817.jpg

So the final iteration of this project was just to try and make a bottom layer that would hold a shape in place. It’s not very brain like, but it’s a cool cocoon. Cornucopia? Corpus Cardboardsum?

View fullsize 1113181507.jpg
View fullsize 1113181508.jpg
View fullsize 1113181508a.jpg
categories: Intro to Fab
Tuesday 11.13.18
Posted by August Luhrs
 

ICM Week 9: Skinflint Pitch

Skinflint

semi-cooperative survival RPG

live gaming over phones on local network

mysterious post-apocalyptic time-rift setting

social deduction and hidden roles

legacy system — persistent players, but ephemeral PCs

30-120 minutes

2-12 players

when you have nothing, will you trust anything?

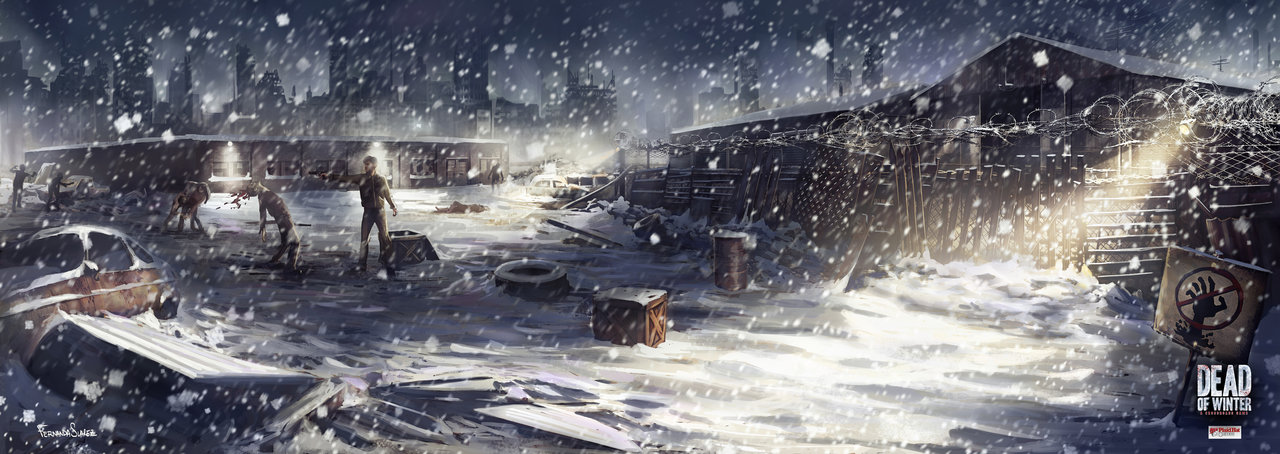
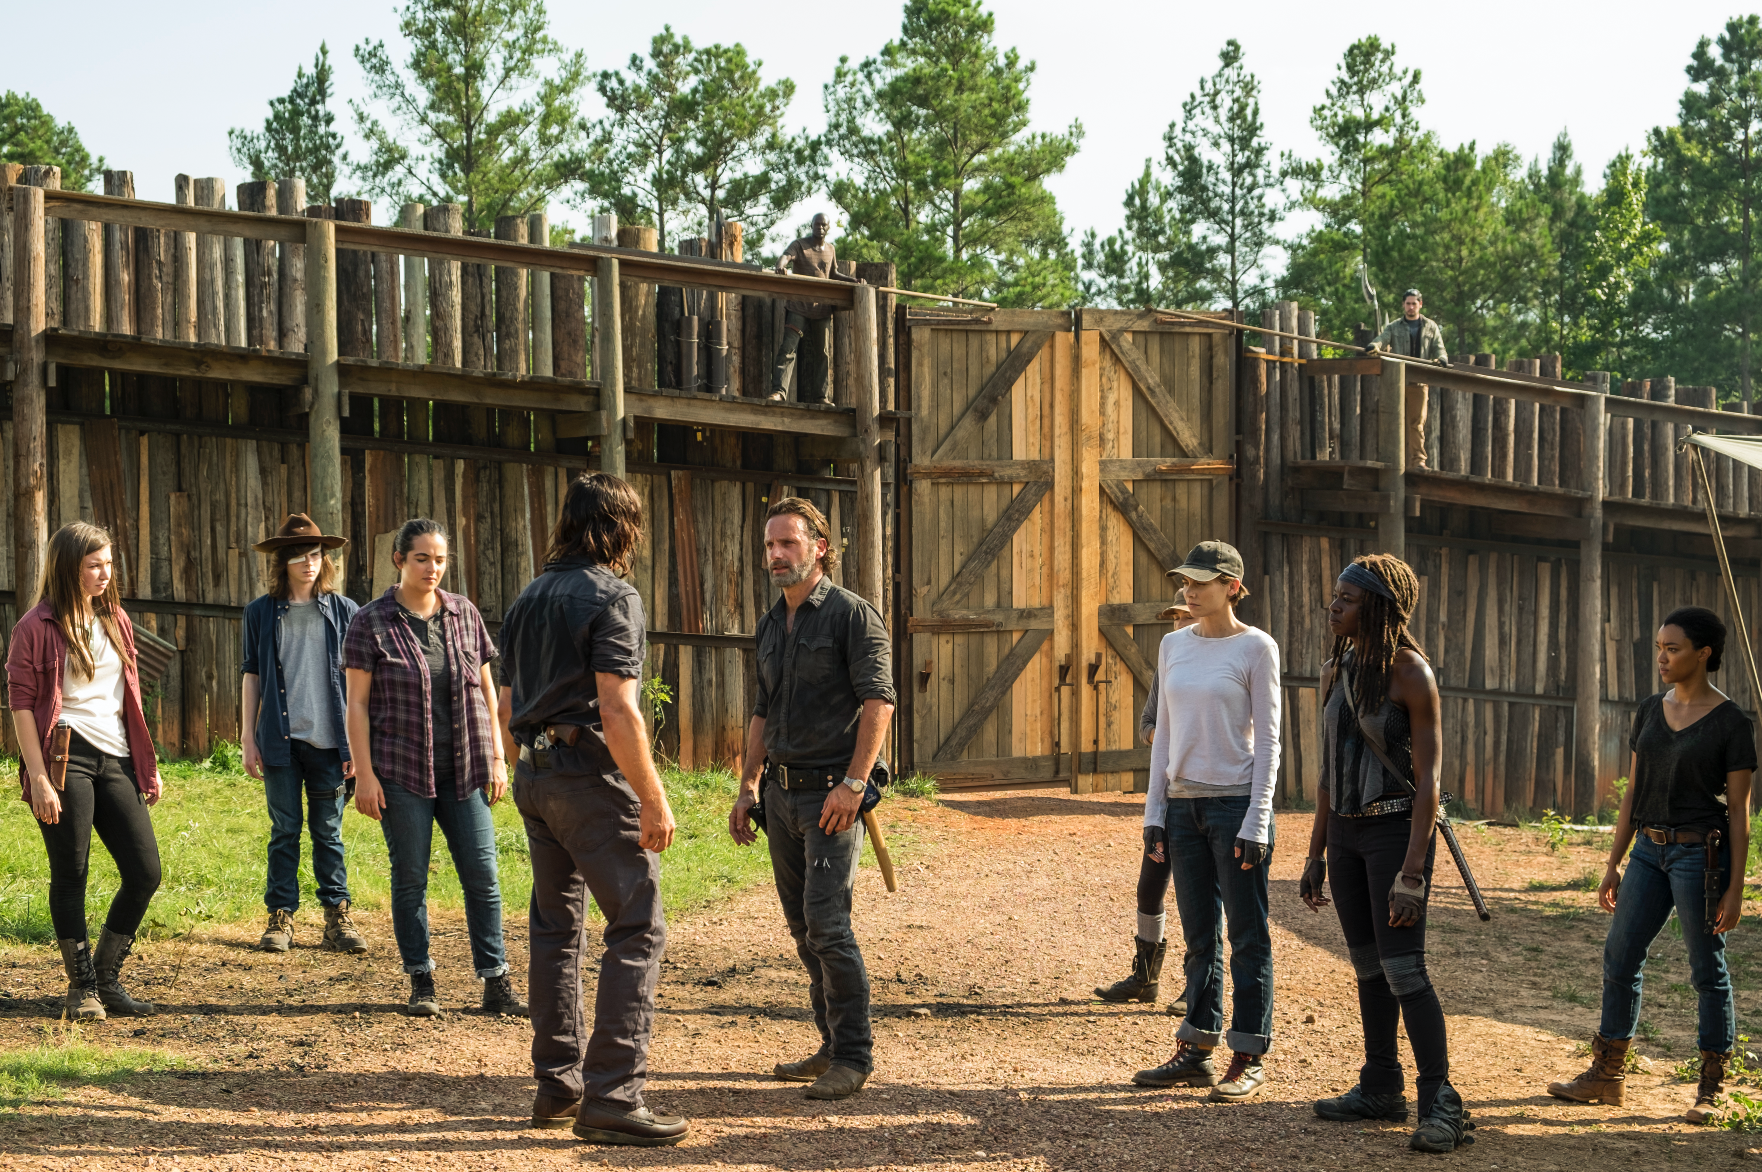
Setting // Feel

deadofwinter.jpg
walking dead.png
campcook.jpeg
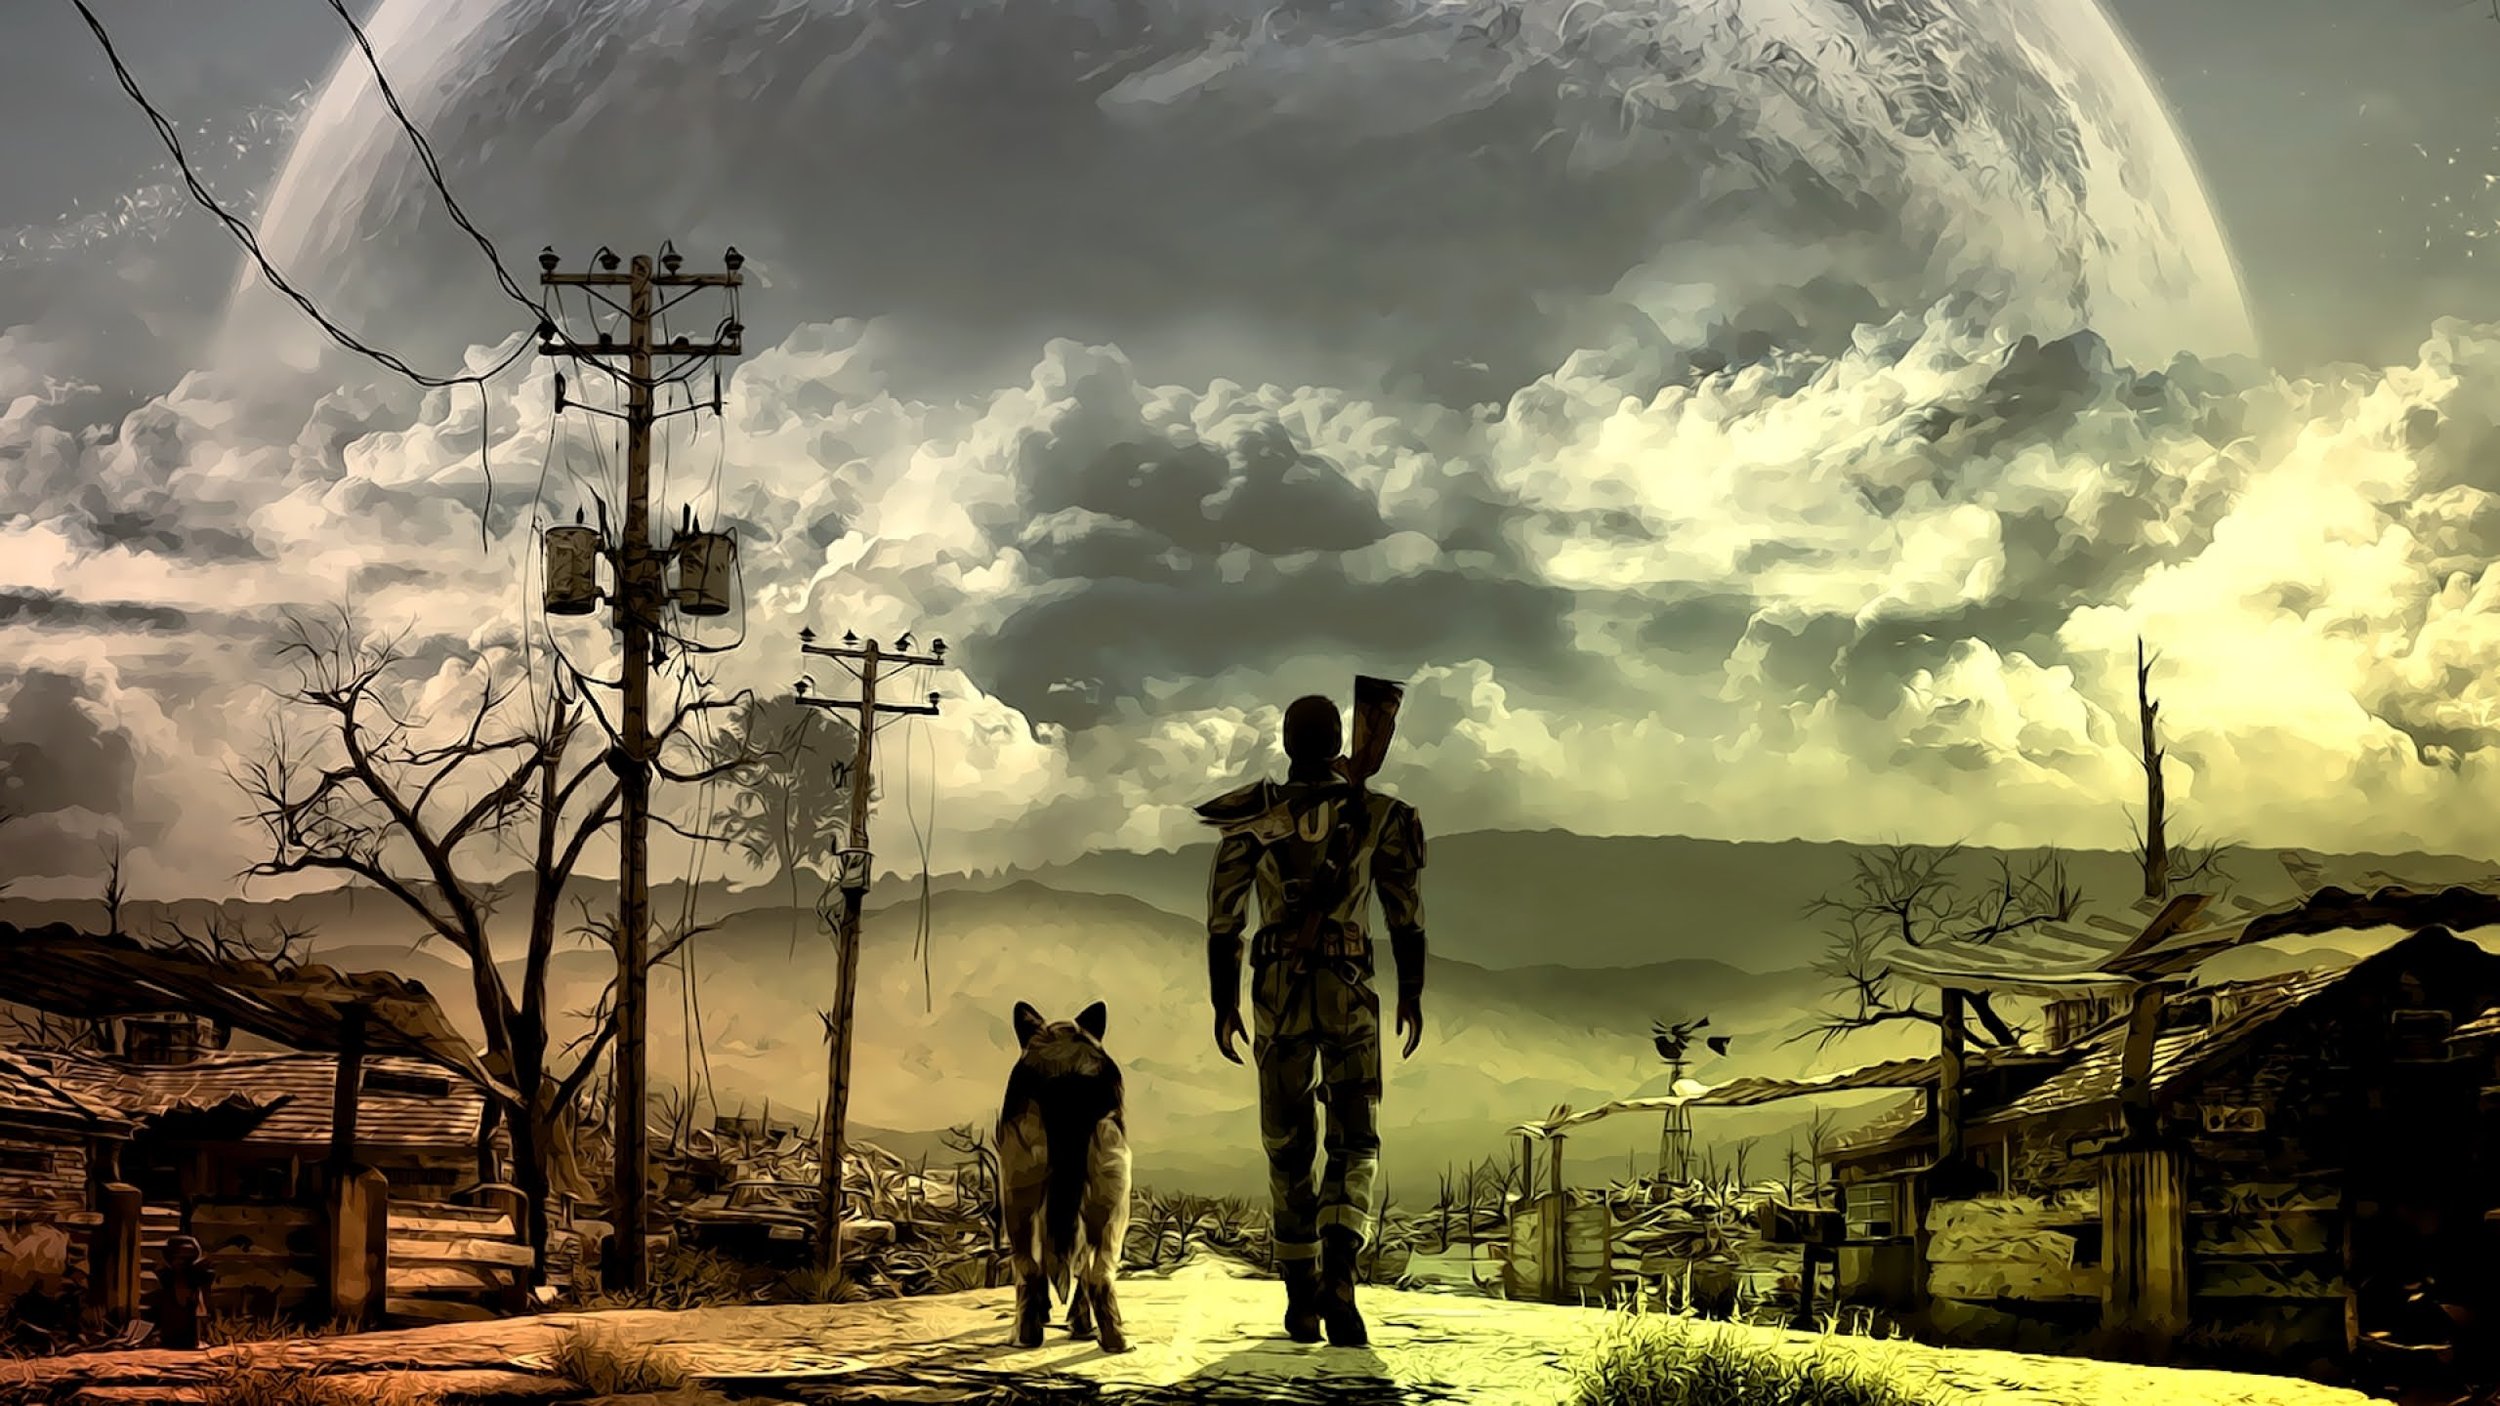
fallout.jpg
madmax.jpeg
deadofwinter.jpg walking dead.png campcook.jpeg fallout.jpg madmax.jpeg

Playstyle

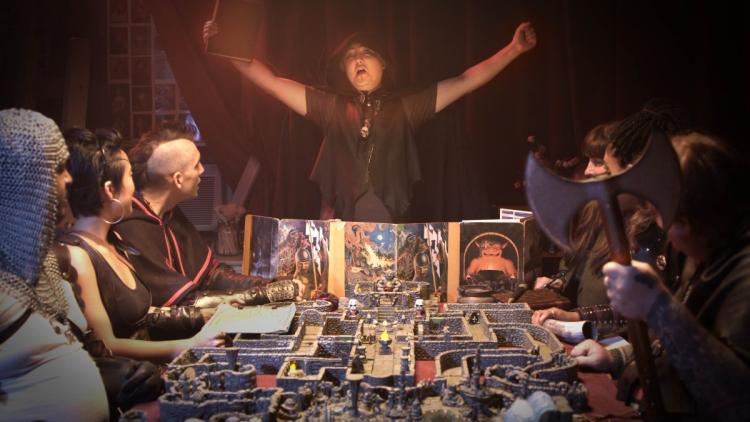
dnd.jpg
jackbox.jpeg
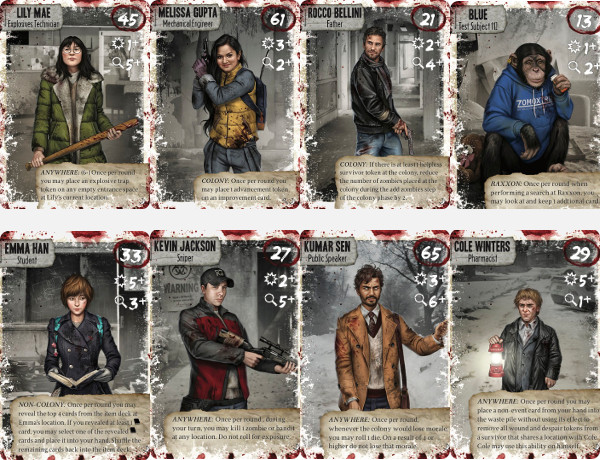
DoWPCs.jpg
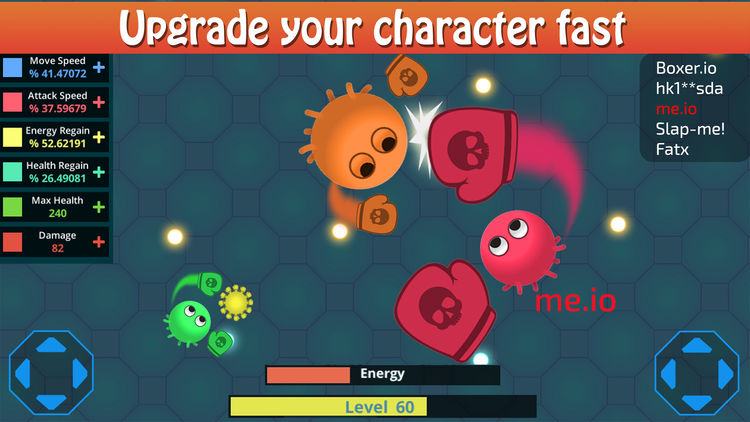
io.jpeg
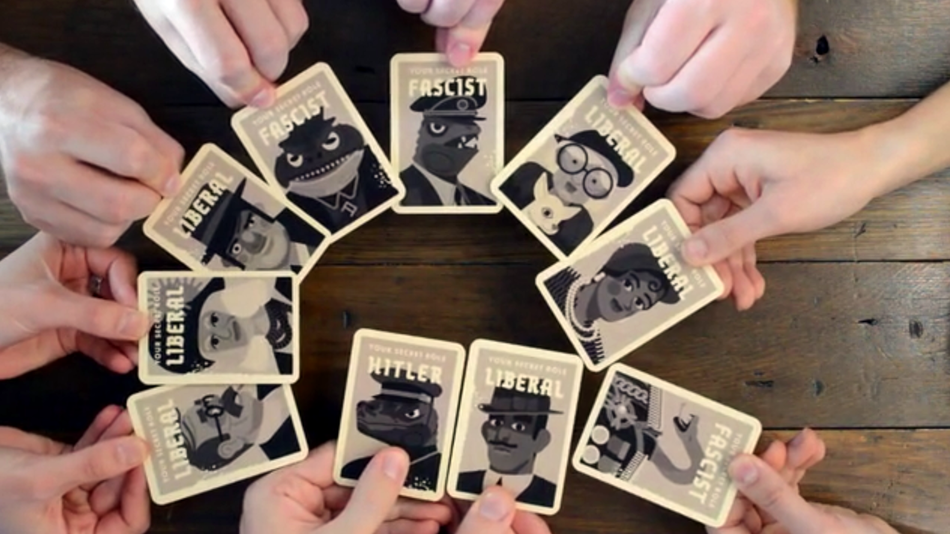
secretHitlerroles.png
megagame.jpeg
dnd.jpg jackbox.jpeg DoWPCs.jpg io.jpeg secretHitlerroles.png megagame.jpeg

Proposed Project

Have a working prototype where users can log on to a website from their phones, create a character, and interact with other users on a shared map.

The interface would be a p5.js sketch, and the networking would be done using node.js.

skinflint_demo.gif
categories: ICM
Wednesday 11.07.18
Posted by August Luhrs
 

Designing for Discomfort Week 9: Rhythm 0.0.1

snort.PNG

One of my main reasons for wanting to take this class was to be able to explore more performance art ideas that I have been sitting on but not doing. I’m really glad that I had to do one for homework, because since my performances are usually so hard on me, I dread doing them to the point that they rarely happen… But there’s one idea that I’ve been sitting on since September 2017 that I knew I wanted to develop this semester: Rhythm 0.1

After seeing the Abramovic retrospective at the Louisiana museum in Denmark (July 2017), I knew I wanted to do some sort of reimagining of Rhythm 0. The initial seed idea came from a set of muscle stimulators that my friends and I had been using as a game for years — I want to do a performance where I can stand on stage and the audience can press a button on their phone and shock my nipples. I’m a simple man with simple dreams.

So I began ideating my version — working title Rhythm 0.1 — and quickly realized it would take more work than any performance I’ve done combined, so it would have to wait (cue ITP). However the design was as follows:

  • I am on stage sitting within a huge contraption, 72 mechanical apparatuses surrounding me, and the audience stands before me, phones in hand.

  • On their devices, they can log on to a website where they are presented with a few buttons that control various mechanisms within the machine — i.e. “shock nipples”, “fire paintball gun”, “feed cookie”, etc.

  • At first they would only have access to a few buttons, but much like an RPG leveling system, depending on what buttons they press, they unlock more buttons of the same flavor, albeit a more powerful iteration. So if they clicked on “play X sound” button 5 times, maybe they unlock “display X video”, whereas the person next to them who pressed “feed cookie” 5 times unlocks “pie to face”.

  • I’ve also tossed around the idea that they are generating some sort of currency or points that they can spend as they want, and the higher powered buttons cost more. I’d like it to be some sort of system where the more they interact, the more points they have to spend — a participation currency.

  • One of the most important aspects of this is anonymity. It’s essential to me that each user can access the commands on their phone and press buttons without anyone watching. Partly because I’m terrified to imagine what would have happened to Marina had a participant been able to anonymously load the gun and fire it.

  • I think simultaneous commands are ideal, with plan B being a successive order list you can add to. I just think simultaneous is better for ensuring people feel that no one will be able to tie their choice to them. If I see my neighbor press a button and then “shock nipples” comes up on the order list, that’s not really anonymous is it? Though I guess the list could be hidden, and I guess automatic orders might have the same effect anyway…

  • I’ve considered having some sort of screen displaying statistics, and in one iteration I was considering having explicit distinctions between “good” and “bad” actions, and displaying those “team” statistics on a screen to see how that would affect group choices. But that’s less interesting to me now, especially since a lot of “good” actions could also be bad. “Feed cookie” is benign until someone presses it 50 times.

  • Obviously some of these high-ticket choices would be one-offs, earned only by the most active participants. I also decided to not do the core idea of being able to shock my nipples after reading about how dangerous transthroracic current is (I want my audience to have a heart attack, not me!) Maybe if I can find wireless electric-fetish clamps or something…

The major roadblock to bringing this to fruition at this point is my lack of knowledge in networked apps and connecting websites to physical hardware. I think in a few months I’ll be at a point where I can do that, but for now, I have to keep it low-tech. So for this assignment, I knew I wanted to to a prototype of Rhythm 0.1 — Rhythm 0.0.1. I just wanted to test various hypotheses of mine regarding choices and anonymity, so the main focus for this was to make it a playtest, something I could fail quick and early at to get as much information as possible on how to make the next one better. And I succeeded at failing! Well, the performance went fine, but I just made a lot of mistakes that I’m glad to have gotten feedback on.

The premise was simple: I would be in a room surrounded by objects; a webcam would be streaming video, and I would have a laptop screen on which to receive instructions. Outside the room (in a spot I couldn’t see from anywhere in my room), there was another laptop displaying the webcam feed and a way to input commands. Since I didn’t have the ability to make a website people could go to individually, I figured a shared google doc was a simple low-tech option that would still demonstrate the function. I knew signage was going to be an issue since the laptop was removed from the actual site of performance, so my partner graciously offered to be an assistant and guide people if they were confused. I had 18 commands pre-written, nine continuous actions and nine discreet actions:

Continuous:

  1. Do an ab workout

  2. do jumping jacks

  3. stretch

  4. paint your body

  5. shock your arm

  6. juggle dildos

  7. balance on one foot

  8. flog yourself

  9. dab

Once per Command:

  1. Drink some water

  2. Eat a Cookie

  3. Suck on a Lemon

  4. Take an article of clothing off

  5. put an article of clothing on

  6. take a deep breath in/out

  7. do a line of Soylent

  8. slap yourself in the face

  9. stop (warning: will end performance)

I was really excited about most of these, and really worried about some…. Speaking of which, here’s me doing a line of soylent:

clip from the first playtest of Rhythm 0.0, a prototype performance art piece where participants anonymously and digitally send me commands at ITP, Nov. 5 2018, for Designing for Discomfort thanks to Hayley Pasley for assisting, and all those who had feedback on this demo!

Here’s the full list of commands I received.

The first one I gave myself at 1:20pm, and the “stop” command came at 2:00pm. You’ll notice that after about 10 minutes, people went off script and got creative.

  1. begin

  2. drink some water

  3. paint your body

  4. dab

  5. eat a cookie

  6. juggle dildos

  7. do a line of soylent

  8. count from 1 to 100 progressively, using a gesture and each number must be iterated with that same gesture but increasing the violence and energy of that gesture with each number.

  9. turn the lights off

  10. turn the lights on

  11. be gentle to yourself.

  12. when you do not feel like being gentle to yourself, yell the word ENOUGH.

  13. shut off the lights

  14. turn on the lights

  15. wear something that's not a hat as a hat

  16. hug yourself

  17. keep hugging yourself

  18. balance on one foot

  19. balance on one foot

  20. balance on the other foot

  21. put on ten hours of dogs barking and listen to that while you continue balancing on one foot and being gentle to yourself also- LIKE REALLY LOUD. obnoxiously loud.

  22. when this becomes unbearable, behave like a dog (revised after my assistant suggested that would never happen)

  23. when this becomes slightly unbearable, behave like a dog

  24. lie down and relax

  25. stare out the classroom window like an animal in a cage desperate for freedom (most fun one, see below)

  26. pretend to be like those fish in the abyssal zone of the ocean that have a light (angler fish) with your iphone. turn the room lights off.

  27. stop

The major takeaways for me:

  1. IT WASN’T ANONYMOUS!!!! Man! I spent so much time trying to figure out how to ensure people felt like they were anonymous by making it so that I couldn’t see or hear the people giving me instructions. But just because they were anonymous to me doesn’t mean they were anonymous!!! There was a huge issue I think with people feeling really self-conscious about what they were putting down, both because they didn’t want to pick a bad thing necessarily, and because once people went off script, they wanted to be more creative than the last person. But more than that, instead of people having their own private device, everyone had to share a laptop! So one person might be watched by a whole group of friends, like negative peer pressure! Beyond that, having my assistant there was great for troubleshooting, but terrible for inhibition. Definitely the most important confirmation of my initial hypotheses: People need to feel like no one will be able to tie them to whatever action I’m performing.

  2. Man, I knew signage was going to be an issue but it was even worse — I really should have focused more on the design of the input space. I had a sign up for people walking by the room that said “To interact use laptop ——>”, but even that sign should have been more obvious and inviting. Oh well, I don’t think that would be as much of an issue in my intended performance space anyway, since people will be congregating directly in front of a stage, instead of walking by a normal classroom and not looking in because why would you?

  3. Don’t trust camera rentals from the ER… I thought I had recorded my whole performance, but got two 4 second clips… Awesome.

  4. Having the ability for participants to write in their own instructions was really interesting and made for a lot of surprising, fun activity, but I don’t think I’ll keep that as an option moving forward. My assistant said there was this tone of “I have to write something more creative than the last person, since my classmates are judging my input” and I think that ultimately lead to less interactions overall. There was already a barrier to input from people being shy about choosing the commands, but when you add the additional anxiety from having to come up with something on their own, it made it so that there was less than 1 command per minute on average, which is not at all the frequency I had hoped for. I think it’s interesting that Abramovic offered finite options, but since they were objects in the control of participants, there were way more than 72 options. That’s not so much a possibility with my planned machine, so maybe I should consider other ways of giving control to users, other than the control of option-combos and frequency.

  5. DON’T SNORT SOYLENT. I have a (bad? genius?) habit of planning performance art pieces by imagining what do I NOT want to do, and then realizing if I don’t do that thing I’m not a real artist…. So when I thought, man, it would be so dumb to do a line of soylent, I immediately hated my brain. After doing a line in the performance, I literally thought I was going to die. I almost had a panic attack when I was getting lunch after the performance because I coughed up a cloud of soylent and convinced myself that my lungs were going to get infected or the moisture in the air was going to make the soylent clump up in my lungs. So I won’t be doing that again, but glad I did it once. I think.

View fullsize 45233628_1209107382561316_1197669033697083392_n.jpg
View fullsize 45413330_2065931946761626_436645633944715264_n.jpg
View fullsize 45441945_2210288709227228_6945020297258991616_n.jpg
View fullsize 45422939_334668270419525_7333921438358831104_n.jpg
View fullsize 45472286_310757673081699_2032289171967574016_n.jpg
View fullsize 45457789_333823380717056_2035962666085777408_n.jpg
View fullsize 45573677_1397733703692915_2796384379574681600_n.jpg
View fullsize 45623306_1972158943081793_4321476474101039104_n.jpg
View fullsize 45546549_972466209614713_8751531804504096768_n.jpg

Readings Response:

  • Drama Matters: What Do We Mean By Durational Performance?

    • Love the Abramovic quote about durational performance having the largest capacity to transform both audience and performer.

    • I do think there’s a lot of truth to the idea that durational performance reminds us what it is to live — there’s a lot of repetition and you sort of have to come in and out of attention. It’s not something that you can ever fully engage with, but you come in and out of it and by the end the sum of the parts makes something unique and transcendent, I think. I think there’s something special about watching someone spending a lot of time on one thing too; we spend so much of our effort managing our time and being acutely aware of how much time we have and how long things are going to take. So to watch someone simultaneously accept and reject that ingrained behavior by committing to doing something totally outside of survival-brain logic for so long, it really gives you pause. Even if the artist might not have spent as much time on the piece as, say, a sculptor who spent a year on a statue, there’s something about being present for the artist’s waste of time that makes it so much more real.

  • Marina Abramovic: A lecture on “The History of Long-Durational Work”

    • Love love the idea that durational performance is inherently a reaction to mortality and impermanence… Wow.

    • I remember reading in Abramovic’s memoir “Walk through Walls” that one of the factors that created the new medium of performance art in the 20th century was anti-capitalist artists desiring to produce media that couldn’t be commodified and sold, and I always think about that when discussing the ephemerality of performance art. I think that’s one of the most attractive things about the medium to me, that it’s a unique, once-in-a-lifetime experience for the artist and those present — even if it’s recorded, it’s not the same. There aren’t a whole lot of other types of art where that’s such a huge part of it, I don’t think, and makes each performance so important.

    • Fascinated by the idea that there’s a lot of baggage in the concept of an artist as a solitary hermit on a mountain, since I consider one of the focuses of my art to create community.

    • Laughing as I remember that I technically started a durational performance art piece in college called “August (Live)” that’s been on-going for the past 5 years.

  • Extended-Body: Interview with Stelarc

    • the bit about “I think metaphysically, in the past, we've considered the skin as surface, as interface. The skin has been a boundary for the soul, for the self, and simultaneously, a beginning to the world. Once technology stretches and pierces the skin, the skin as a barrier is erased.” reminds me of one of my favorite Alan Watts passages in “The Book”. He mentions how humans have this arbitrary distinction between the external and the internal, and how the skin isn’t a boundary, but rather the membrane that connects us to everything else in the world. Interesting to see the parallel in this context.

    • Oooooh love the idea that we now have to design bodies to match machines, instead of the other way around.

    • Man that stomach sculpture is gnarly.

categories: Designing for Discomfort
Wednesday 11.07.18
Posted by August Luhrs
 

Intro to Fab. Week 9: Cella Cube of Dooooom

Since I had so much work for other classes this week, my main focus when brainstorming what to make five of was “keep it simple, quick, and easy.”

I actually believed I would do that… for about 3 minutes.

Fuck Pintrest.

cellla.jpg
naef spread.jpg

Now, I know what you’re thinking: “You made five of those?!”

No, I’m not stupid. I made three.

Well, started to make three… Since I couldn’t get started until the day before class, I didn’t have time to deal with the inevitable breakdown of my plans. So the joining, evening out, painting, and lacquering will have to come later. But here’s as far as I got, which was honestly farther than I expected with four hours:

  1. The first thing I did when I saw the pintrest pics was to try and wrap my head around how the hell I could reproduce it. I looked at the images and try to deduce the ratios the layers were based off of and saw that the width of each layer was half the width of the center cube, and the center cube was 2/3 the length of the 2nd layer. From that I got the equation L = W + H, which was confirmed when I did my first prototype with index cards — since the cards were so thin the sides ended up being squares.

  2. Then with Play Dough, I did another prototype, and it got me really excited about the project: If just one cube and one layer was so fun, how much better would three cubes and 27 layers be ?!

  3. I wrote down my estimated measurements for each layer and then tried to map out how much wood I would need to buy by drawing out each board and taking a cookie cutter to them. I gave myself at least a 1/2” between blocks since I couldn’t remember how wide the saws in the shop were, and then figured I’d get an extra board to be safe. Proud to say my estimates were almost exactly on, and I didn’t need either extra board. Also planned out each stage of the build to save time the next day, but figured I’d need to adjust a little on the fly too.

  4. In the morning, went out to buy the wood and had looked up and planned to use poplar boards, but upon feeling the poplar, was a little nervous that the material wasn’t that great. So I ended up getting oak boards instead, but damn, they were pricey. Coming back from Home Depot in the pouring rain, the wood got wet and I was stressed that I had just ruined an expensive set of wood. But it turned out to be fine, just smelled weird.

  5. I took the lengths to the panel saw first, and cut some thin slices off using clamps. Forgot I meant to use a stop block since a lot of the measurements were the same, but remembered to by the time I got to the miter, so that was good.

  6. The miter saw was where I spent most of the time, and I wrote the lengths I had to cut on my arm so I wouldn’t have to double check my notes. I’m really excited about the stop block system, because I’m used to pre-measuring and marking all my cuts before hand (trying to estimate the amount of loss from the cut never works though). So I felt really great about how close all the cuts ended up being to each other. Had some scary moments with pieces flying off the saw though, so definitely a learning experience about how to use that machine safely.

  7. Once the rectangles and center cubes were cut, I clamped each layer down and took them to the belt sander to even them out a bit. I had planned to even out the whole cube as a unit once assembled, so this was mainly just to get major imperfections out and get all the pokey bits off. Only had one layer get away from me and one corner got a little too worn down, but nothing too bad.

  8. Then I did a test assemble to make sure the concept had succeeded, and it had! Already looked really cool, was excited to get it smooth and painted.

  9. Then I began the long anticipated journey of drilling holes into each panel, so that I could put dowel pins in the bottom and side of each rectangle. Home Depot didn’t have a bulk bag of dowel pins, so I thought I could just get some 1/4” dowels and cut them to size. I used the bandsaw to cut a bunch of them at once, and I ended up cutting exactly 100 pins (I get really excited when estimations are correct…). Then I went and got the doweling jig and put the holes at 1” and 3” out from the side to account for the edge that needed to sit up against the other rectangle. I put them on the wrong side at first, so that was annoying, but I was using a scrap block as a measuring jig (is that a thing?) so it was super quick and painless to redo. Then I did a test of the drill press; I planned on using a jig to drill all the left holes at once and then move the jig to do all the right holes, but for this one I just made some measurements and did it by sight. Then, using the pins I had cut, I tried assembling a test layer. Since I got 1/4” dowels, I figured I could squeeze them into a 1/4” drilled hole, but that was wrong. So I had to move up to a 5/16” bit, but then the pins were way too small and they were practically useless. That’s when everything fell apart (literally). I realized I either needed to find some dowel pins online that could work (1/4” by 3/4” ideally, but I couldn’t find any of those on amazon…), or figure out another sturdy way of joining these layers… Either way, I wouldn’t have time to get the pins and have everything dried by the time of class tomorrow morning, so I resigned to give up and try again next week.

  10. Frustrating, but still really excited about these cubes. Now just wondering if I could have done all this on the laser cutter….

View fullsize 1105181752.jpg
View fullsize 1105181805.jpg
View fullsize 1105181805a.jpg
View fullsize 1105181805b.jpg
View fullsize 1105181958.jpg
View fullsize 1105181958a.jpg
View fullsize 1106181047.jpg
View fullsize 1106181132.jpg
View fullsize 1106181137.jpg
View fullsize 1106181332_HDR.jpg
View fullsize 1106181502.jpg
View fullsize 1106181350.jpg
View fullsize 1106181453.jpg
View fullsize 1106181453a.jpg
View fullsize 1106181643.jpg
View fullsize 1106181704.jpg
categories: Intro to Fab
Wednesday 11.07.18
Posted by August Luhrs
 

ICMadness: numbers, addictive, gifs! →

categories: ICM
Friday 11.02.18
Posted by August Luhrs
 

Animation Week 8: Stop Motion

43728839_2179301352337217_6261809039051587584_n.jpg
IMG_0680.jpg
45144591_1897938646953594_2241358189842923520_n.jpg
45237254_288348588451724_3091987818709254144_n.jpg
45091020_346834766068608_975031509759033344_n.jpg
45109450_621212678281753_8273844352137035776_n.jpg
IMG_0679.jpg
45290499_189731461904310_2750100905754886144_n.jpg
45327681_2501768116507844_1082536478208163840_n.jpg
45211733_250588315614939_6090409405507960832_n.jpg
45198399_256414744992486_3960529660223160320_n.jpg
45112659_347894542626905_5993832762300170240_n.jpg

This week was crazy! Between all of our hectic schedules, there was luckily one day we could meet and shoot, but man, it was down to the wire. I think we shot the first 15 seconds in 4 hours, and then the last 15 seconds in 45 minutes haha. Obviously, didn’t help that the first two cameras we rented didn’t work with dragon frame, so that was a huge chunk of time. But had a lot of fun doing stop motion again after not having done it in years. The video below doesn’t have sound, but this link does (https://ellielin.com/blog/2018/11/01/stop-motion-whats-happening/).

categories: Animation
Thursday 11.01.18
Posted by August Luhrs
 

Designing for Discomfort Week 8: Truth or Dare

Reading Response:

  • Brenda Romero — Gaming for Understanding

    • Amazing, love the idea of tricking kids into understanding complex topics by having them play games.

    • Really inspiring. I wonder how to get people to play a game like this though — the little girl didn’t know what she was getting into, I imagine it would be much harder to get a school-aged kid excited to play a game about slavery unless you misled them.

    • It also risks trivializing hugely traumatic events. I would argue against this, but I could see a lot of people getting upset over trying to make something like the holocaust “fun”, even though that’s more of a misconception about what a “game” is though. Is it still a game if it’s not fun? A game like “That Dragon, Cancer”, that’s not supposed to be fun, and I’d argue that’s one of the most important video games ever made.

  • Ida Benedetto — Patterns of Transformation

    • I’m obsessed with redesigning funerals, this hits close to home.

    • I really like the idea that there’s a lot in common between people who go to sex parties, wilderness guides, and avant-garde morticians. Makes a lot of sense.

    • Definitely vibe with the idea that there can’t be transformation without risk. There’s a lot of Burning Man here… which coincidentally has a lot of wilderness, sex parties, and funerals. Burning Man also stresses active participation.

    • A little confused on the difference between embraced and conditioned magic circles.

Truth or Dare Redesign: Innie or Outie

Instructions: Two or more players, traditional truth or dare set up, but one at a time players are instead asked “Innie or Outie?” If “Innie”, the asker designates an act of self-care or otherwise positive action for the individual to take themselves, if “outie” the asker designates a positive action for the whole group to take at once.

Comments/Questions from playtest:

  • Should the task be written down before the person selects innie or outie? Because as an asker, I felt a much different mindset once I heard “outie” and realized I would be participating in this myself.

  • Should we explicitly say the command should be positive? Or if adhering to the previous point of writing down the command before, would people typically choose something positive anyway, since they risk themselves having to do it?

  • Suzanne mentioned it didn’t feel as though we were connecting to each other as much as we might in a traditional Truth or Dare game, and I wonder if that’s because there’s no shared suffering. If we’re all just feeling good then there’s nothing to bond over?

categories: Designing for Discomfort
Wednesday 10.31.18
Posted by August Luhrs
 

Intro to Fab. Week 8: SMASHLIGHT

I always say I want open ended prompts until one lands in my lap…. “Make a flashlight”…. damnit.

Here was my brainstorm:

  • FIRE

  • puzzle box that turns on light on correct solve

  • glow stick torture device (rack?)

  • giant block with one tiny tiny LED

  • EXPLOSION

  • glow in the dark fish trebuchet

  • GIANT HAMMER — bashlight!

One of these won out, mainly due to two factors: 1) I didn’t have time to make a puzzle box or safe explosive and 2) it made me laugh every time I thought about it. PRESENTING (with a name change thanks to Lydia Jessup)….

THE SMASH LIGHT!!!!

So here’s how it all went down.

  1. Went on a lovely dig through the shop scrap, and found a treasure trove of wood! Figured I could just make the handle out of the longest piece I could find, and make a box for the mallet head. The light part wasn’t as important, I left thinking about that until the end :P I was actually considering not having the hammer emit light at all, but rather bring a demo “light bulb” that I could smash dramatically in class.

  2. I finally got to haul my tools from home to the shop; I was really excited to use my bestest friend tool, my impact driver. I was hoping to use it exclusively (besides any cuts) and just quickly smash some screws in (again, didn’t have much time). Unfortunately, I couldn’t drive anything with it without the screws getting bent to shit, either because of the thickness of the wood or the quality of the shop screws, but it’s a problem I don’t think I’ve had with my trusty impact driver, so I was sad.

  3. Resorted to normal drill/driver combo, clamps, and my chalk line tool for quick guidelines.

  4. So I actually had a big moment at the beginning of this project where I spent a whole precious 45 minutes trying to figure out how I was going to make the initial cuts to the wood. Back in L.A., in my backyard shop, this would’ve been no problem, I would’ve taken out my circular saw and bam, done. But I left it behind in California. Though one of the things that excited me the most about coming to ITP was access to the shop machines, I found myself paralyzed before them. If only I had my comfortable hand saws, I wouldn’t have to go use the scary big saws (that I’ve used before, mind you!). It was a big moment, and I’m happy to say I sucked it up and got some help using the three saw machines in the back. Definitely have a while to go before I get good with them though.

  5. Had a lot of trouble getting a straight cut on the band saw (?), but I think it was because the top-stop guard (?) thing wasn’t close enough. Only the last cut I made on that machine turned out perfect. Oh well, I never really aim for pretty projects anyway.

  6. Once the cuts were made, everything else was super quick. Just clamp and drive.

  7. Didn’t measure the box so that everything would be flush — again, wasn’t really focused on pretty, just wanted to sprint to the finish line so I could actually bring a completed project to class.

  8. The light I found was just the biggest light I could find in my component box — luckily I happened to have a 12V portable battery pack that I could tape on. I thought about hiding all the wires, but I kind of liked the exposed look. I also considered putting some sort of screen over the hole (which I didn’t make, I just found that piece in the scrap and decided it was a perfect opening) to project an image or something, but didn’t have time.
  9. Super jazzed about how it turned out — I love big stupid stuff. Glad I could keep accessibility and portability as priorities, I think it’s the perfect tool for a grandma.

View fullsize 1029181529.jpg
View fullsize 1029181529a.jpg
View fullsize 1029181726.jpg
View fullsize 1029181733.jpg
View fullsize 1029181640.jpg
View fullsize 1029181700.jpg
View fullsize 1029181604.jpg
View fullsize 1029181610.jpg
View fullsize 1029181611.jpg
View fullsize 1029181617.jpg
View fullsize 1029181620.jpg
View fullsize 1029181714.jpg
View fullsize 1029181724.jpg
View fullsize 1030180941.jpg
View fullsize 1030180949.jpg
View fullsize 1030180916.jpg

Can I be DIY/Queer Thor?

1030181003.jpg
categories: Intro to Fab
Tuesday 10.30.18
Posted by August Luhrs
 
Newer / Older

Powered by Squarespace.